19-10
Cisco Security Appliance Command Line Configuration Guide
OL-8629-01
Chapter 19 Managing the AIP SSM and CSC SSM
Managing the CSC SSM
• Incoming SMTP connections destined to inside mail servers.
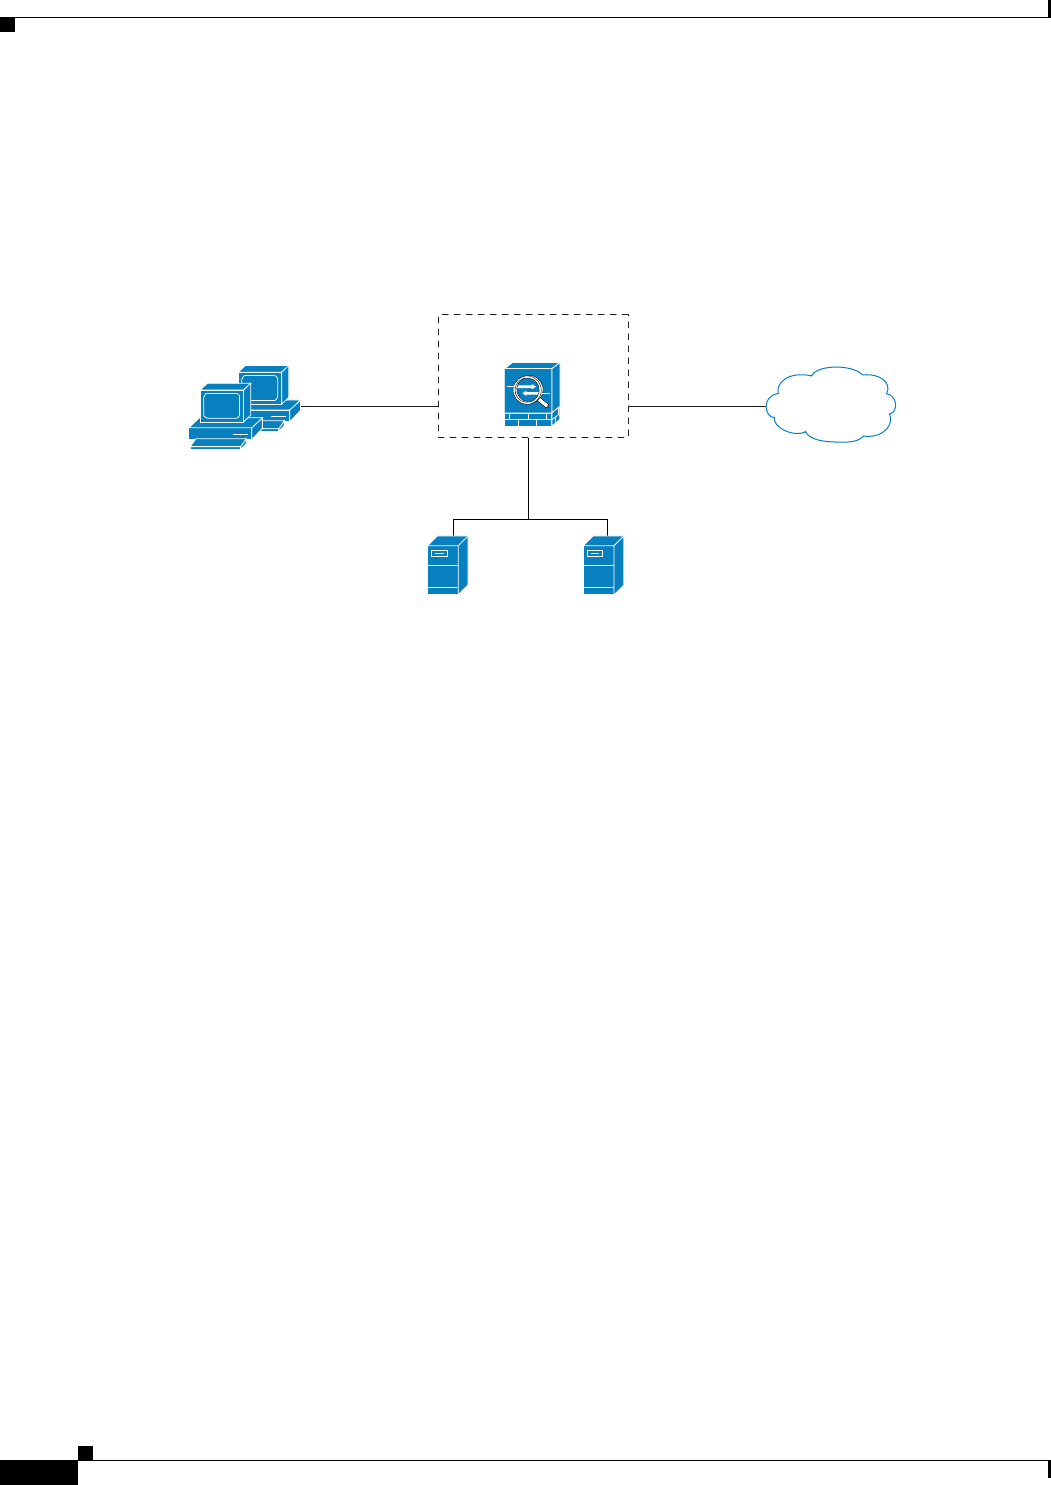
In Figure 19-3, the adaptive security appliance should be configured to divert traffic to CSC SSM
requests from clients on the inside network for HTTP, FTP, and POP3 connections to the outside network
and incoming SMTP connections from outside hosts to the mail server on the DMZ network. HTTP
requests from the inside network to the web server on the DMZ network should not be scanned.
Figure 19-3 Common Network Configuration for CSC SSM Scanning
There are many ways you could configure the adaptive security appliance to identify the traffic that you
want to scan. One approach is to define two service policies, one on the inside interface and the other on
the outside interface, each with an access list that matches traffic to be scanned. The following access
list could be used on the policy applied to the inside interface:
access-list csc_out permit tcp 192.168.10.0 255.255.255.0 any eq 21
access-list csc_out deny tcp 192.168.10.0 255.255.255.0 192.168.20.0 255.255.255.0 eq 80
access-list csc_out permit tcp 192.168.10.0 255.255.255.0 any eq 80
access-list csc_out permit tcp 192.168.10.0 255.255.255.0 any eq 110
As previously mentioned, policies applying the csc command to a specific interface are effective on both
ingress and egress traffic, but by specifying 192.168.10.0 as the source network in the csc_out access list
the policy applied to the inside interface matches only connections initiated by the hosts on the inside
network. Notice also that the second ACE of the access list uses the deny keyword. This ACE does not
mean the adaptive security appliance blocks traffic sent from the 192.168.10.0 network to TCP port 80
on the 192.168.20.0 network. It simply exempts the traffic from being matched by the policy map and
thus prevents the adaptive security appliance from sending it to the CSC SSM.
You can use deny statements in an access list to exempt connections with trusted external hosts from
being scanned. For example, to reduce the load on the CSC SSM, you might want to exempt HTTP traffic
to a well known, trusted site. If the web server at such a site had the IP address 209.165.201.7, you could
add the following ACE to the csc_out access list to exclude HTTP connections between the trusted
external web server and inside hosts from being scanned by CSC SSM:
access-list csc_out deny tcp 192.168.10.0 255.255.255.0 209.165.201.7 255.255.255.255 eq 80
The second policy in this example, applied to the outside interface, could use the following access list:
access-list csc_in permit tcp any 192.168.20.0 255.255.255.0 eq 25
192.168.30.0
192.168.20.0
(dmz)
Web server Mail server
192.168.10.0
Internet
outside inside
Security
appliance
143800


