


SETTING UP REMOTE ACCESS FOR Q-SEE DVR SYSTEMS
MODEL NUMBER: QC40198
Accessing the DVR from a Computer Attached to the Same Router:
If you are only going to access the DVR from a computer that is attached to the same router as the DVR
you only need to setup the information in the NETWORK settings using either the DHCP option or
assigning a static IP following the instructions below. Since you are just going from one location to
another on the same network port forwarding and knowing the public IP address are not necessary. You
would just access the DVR by entering the IP address of the DVR from the NETWORK setup into the
Internet Explorer browser window. After you setup the NETWORK settings using DHCP or Static IP
instructions, refer to the section in this document entitled “Accessing the DVR through Internet
Explorer”.
There are 4 ways you can setup the DVR to be accessed remotely; DHCP, Static IP, PPPOE, and DDNS.
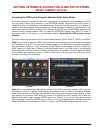
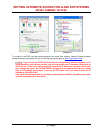
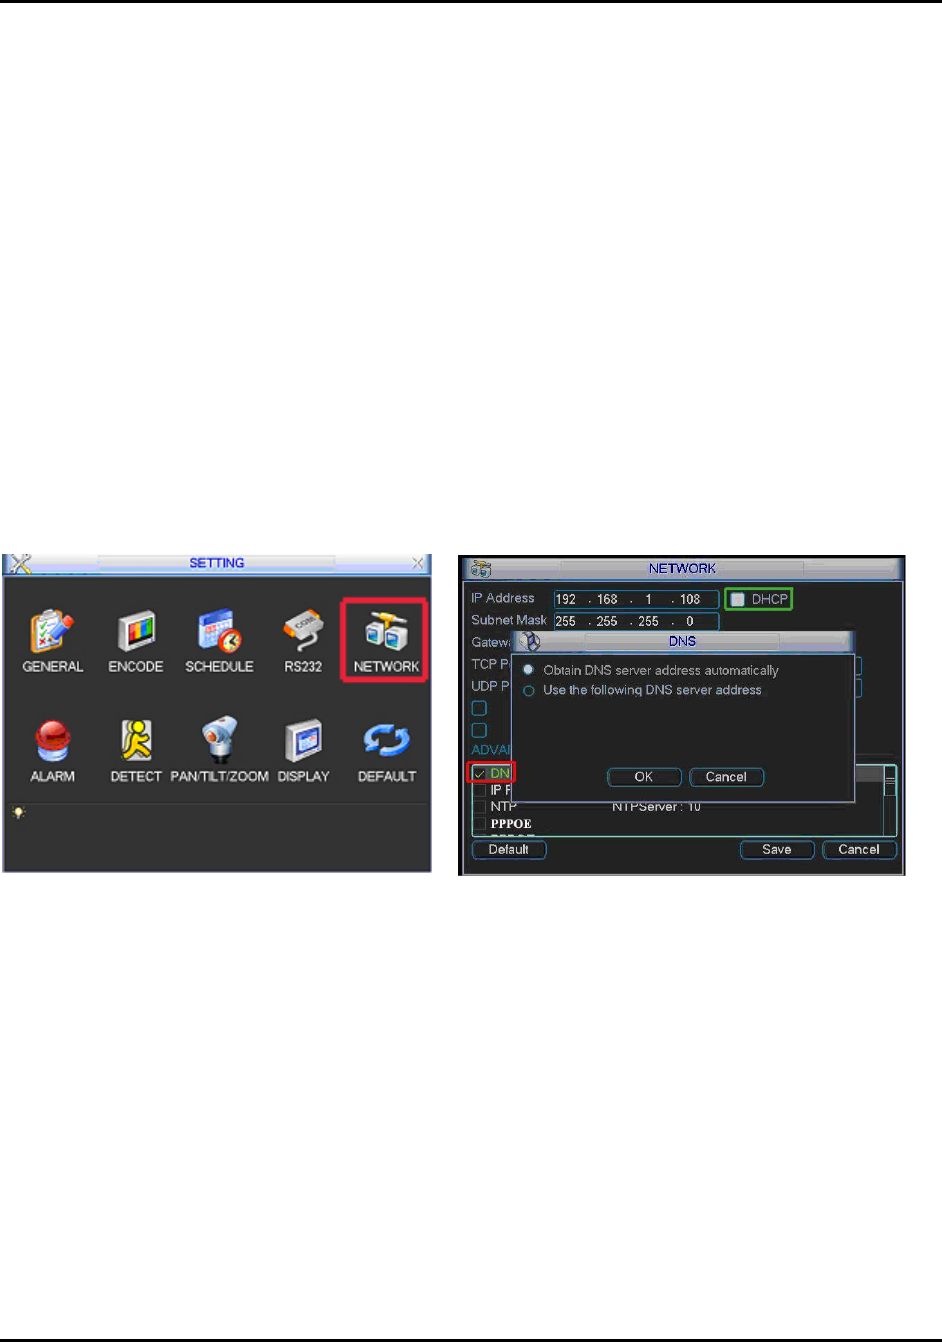
DHCP: If your router is setup for DHCP, and most of them are by default, you can have the router assign
an IP address to the DVR. To do this go to the setting option in the Main Menu and select the Network
icon (Red square in Picture 1), this will display the NETWORK screen shown in Picture 2. Select the
DHCP option box (Green box in Picture 2) and then double click on the DNS option in the Advanced
section (Red box in Picture 2) which will display the DNS option box shown in Picture 2. Select the option
to find address automatically as shown in Picture 2 then click on OK and restart the DVR so the router
can find it and assign it an IP address.
Picture 1 Picture 2
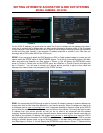
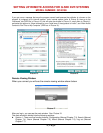
Static IP: You will need to setup the network settings on the DVR to match the settings of the router that
you attach the DVR to. To get the router settings you would go to the run option on a computer attached
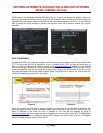
to the same router as the DVR and type cmd and hit OK to bring up a command prompt (Picture 3), then
type ipconfig at the prompt (RED arrow on Picture 3) to access the router settings. Write down the
gateway and subnet mask numbers (GREEN arrows on (Picture 3) so you can copy them into the
network settings on the DVR (GREEN boxes on Picture 4). Go to the Setting option in the Main Menu and
select the Network icon (Red square in Picture 1), to get to the NETWORK screen shown in Picture 4.