3-6
Using the Uploader Utilities
L
Proof Sign-off:
BLE H.Kato E.Omori
F.Fujimori
SEI M.Kauppi
R4C4410
Rev. C
A5 size UPLOADER.FM
2/14/00 Pass 3
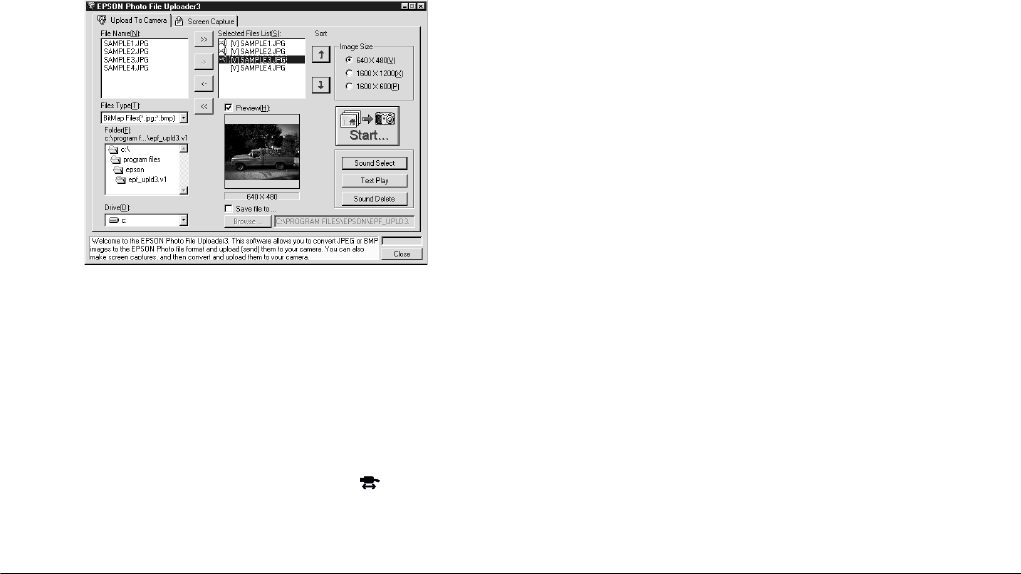
7. Repeat steps 4 to 6 to link the audio recording files
to the image files to upload. The speaker icon
appears at the left of the image file names in the
Selected Files List box.
Note:
❏
When you select the image file with the speaker
icon and click
Test Play
, you can play back the
linked audio recording.
❏
If you want to cut the link between the image file
and audio recording file, select the image file with
the speaker icon and click
Sound Delete
.
8. Turn the camera’s dial switch to .
9. Click
Start
to begin uploading the audio
recording files as well as the image files. EPSON
Photo!3 starts and shows thumbnails of
uploading images and audio recordings.
Pressing the ESC key stops uploading. Press
Yes
to stop or
No
to continue the operation.
Note:
You can listen to the linked audio recording by clicking
the speaker icon at the bottom of each photo.
10. Click
Select All
and then
Upload/Copy
.
11. Make sure to select
Upload into
the Camera
and click
OK
. To cancel your job, click
Cancel
.
12. When the dialog box prompts you to select your
action, click
Upload Photo and Audio
. To
upload the photos only, click
Upload Photo
Only
. Clicking
Abort
cancels uploading.


