


Genie Monochrome Series-GigE Vision Camera Installing the Genie Camera • 19
Installation Overview
• Inspect all cables and connectors prior to their use. Do not use faulty cables or connectors to avoid camera
damage.
• Before connecting power to the camera, test all power supplies. Power supplies must meet the requirements
defined in section "
Genie Signal Electrical Details" on page 91. Apply power to the camera.
• Connect Genie to the computer GigE network adapter or to the Ethernet switch via a CAT5e or CAT6 Ethernet
cable. Note: cable should not be less than 1 meter (3 feet) long or more than 100 meters (328 feet) long.
• Check the diagnostic LED which will be initially red then switch to flashing blue while waiting for IP
configuration. See "
Status LED Codes" on page 22 for Genie LED display descriptions.
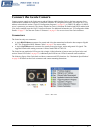
• Look at the small camera icon added to the Windows tray (next to the clock). Ensure the Genie camera has
been found (right click the icon and select Status).
• A new Genie installation typically requires a firmware update. See the procedure "
Updating Genie Firmware"
on page 27.
• Use CamExpert (installed either with Sapera or Sapera runtime) to test the installation of the Genie camera. Set
the Genie to internal test pattern. See "
Sapera CamExpert Guide" on page 85.
• Set up the other components of the imaging system such as light sources, camera mounts, optics, encoders,
trigger sources, etc. Test with CamExpert.
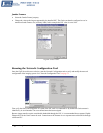
Sapera LT Library Installation
Note: to install Sapera LT and the Genie device driver, logon to the workstation as an administrator or with an
account that has administrator privileges.
When Sapera application development is performed on the same computer that the Genie is connected to, the Sapera
Development Library (version 6.0 or later) must be installed. Else, Sapera LT is not required to control the Genie
camera.
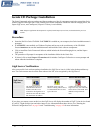
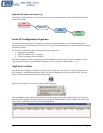
• Insert the DALSA Sapera CD-ROM. If AUTORUN is enabled on your computer, the DALSA installation
menu is presented.
• If AUTORUN is not enabled, use Windows Explorer and browse to the root directory of the CD-ROM.
Execute launch.exe to start the DALSA installation menu and install the required Sapera components.
• The installation program will prompt you to reboot the computer.
• Continue with the
Genie CD Package Installation described next.
Refer to Sapera LT User’s Manual concerning application development with Sapera.