8 9
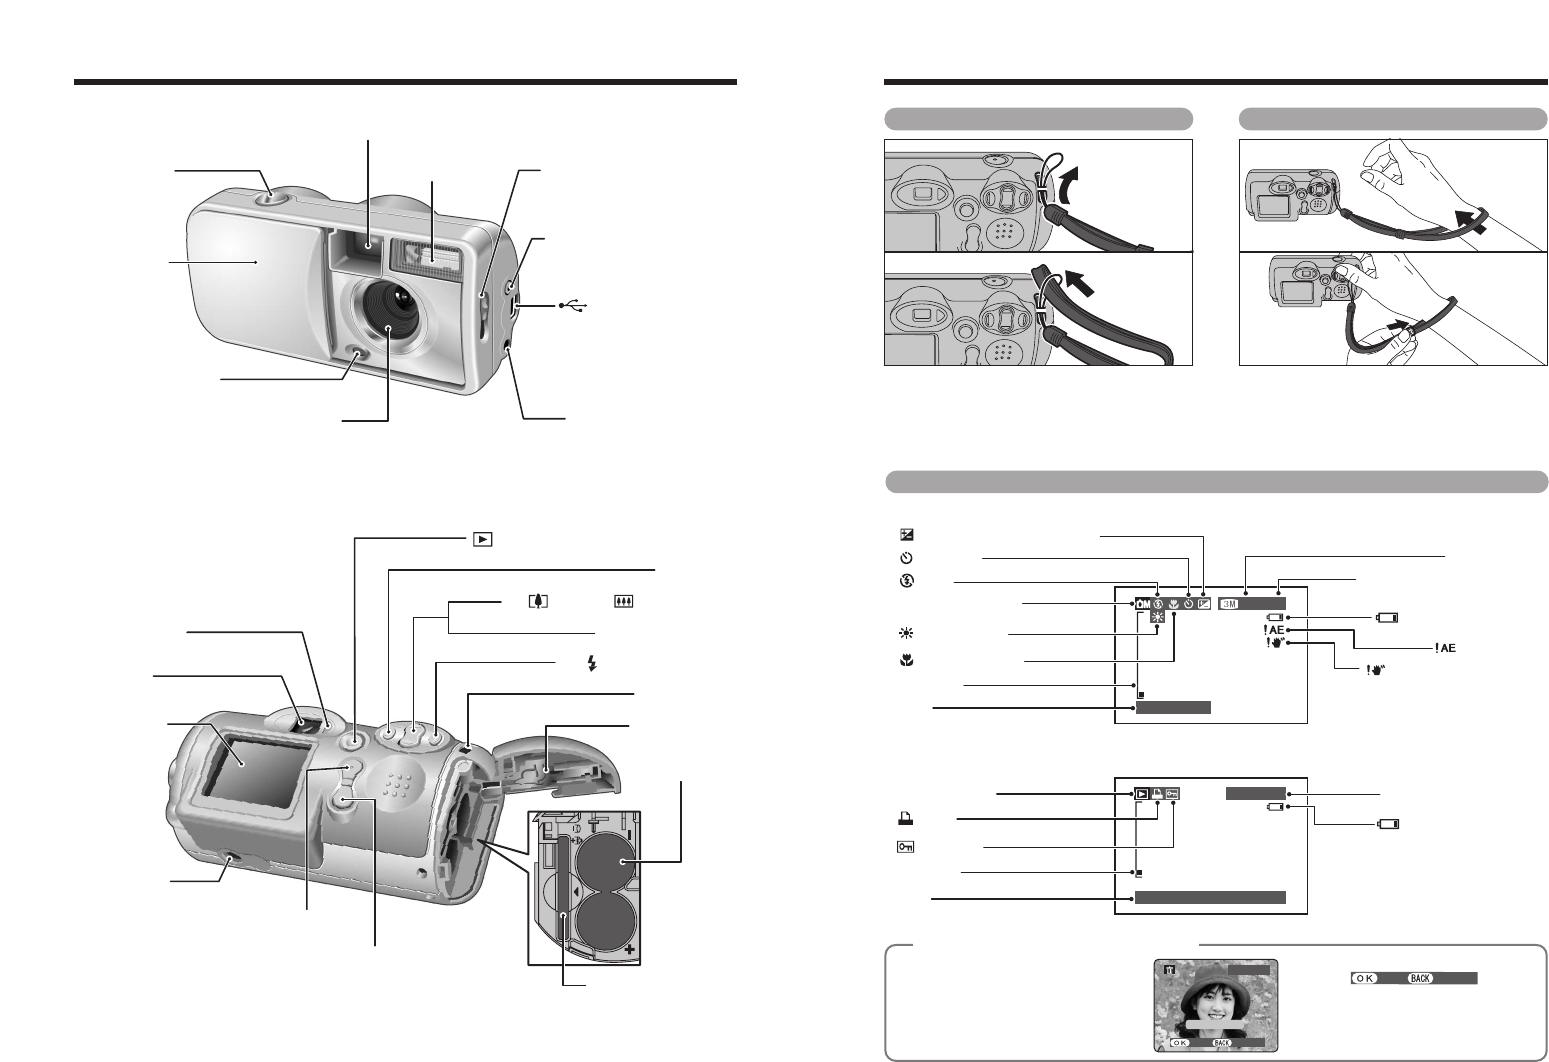
Camera parts and features
Number of available frames
Battery level warning
Quality mode
AE warning
Camera shake warning
Zoom bar
Date
Macro (close-up)
White balance
EV (Exposure compensation)
Flash
Photography mode
Self-Timer
Battery level warning
Zoom bar
Protection
DPOF
Playback mode
Date
Playback frame number
VIDEO OUT (Video output)
socket
(P.58)
Self-timer lamp (P.27)
Shutter button
DC IN 3V (power input)
socket
(P.58)
Macro selector switch (P.23)
Viewfinder window
Power switch
/ Lens cover
Flash
USB socket (mini-B)
(P.59)
xD-Picture Card slot
Battery
compartment
Tripod mount
Viewfinder
Battery cover
Viewfinder lamp
LCD monitor
DISP (Display) / BACK button
Strap mount
MENU/OK button
a
/ (Tele) b / (Wide) (P.18)
Lens
c / Flash button (P.24)
d button
Zoom switch
(P.18)
ON (Playback) button
✽ Refer to the pages in parentheses for information on
using the camera parts or features.
Attaching the strap
Attach the strap as shown in 1 and 2.
Example of LCD Monitor text display
■ Still photography mode
■ Playback mode
◆
Displaying the On-screen Help
◆
Instructions for the next step in the
procedure are displayed at the bottom
of the LCD monitor. Press the button
indicated.
Press the “MENU/OK” button to erase
the displayed frame. To cancel erasing,
press the “DISP/BACK” button.
01
02
1Loop the strap over your wrist.
2To avoid dropping the camera, secure the
strap around your wrist by sliding the
fastener to adjust the length.
01
02
Using the strap


