


39
Advanced Features
3
38
D
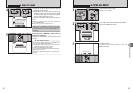
EV
(
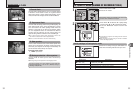
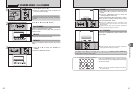
EXPOSURE COMPENSATION
)
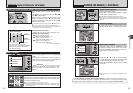
Select EV in the “s” Shooting mode.
Use this function when it is important to get the
correct brightness (exposure), such as shots with
extremely high contrast between the subject and
the background.
h Compensation range
–2.1 EV to +1.5 EV (13 steps in 0.3 EV increments)
See P.95 for more information on EV.
●
!
Any of the following disables exposure compensation:
i Using the flash in Auto or Red-eye reduction mode
i Shooting dark scenes in Forced flash mode
PHOTOGRAPHY MENU
PHOTOGRAPHY MENU
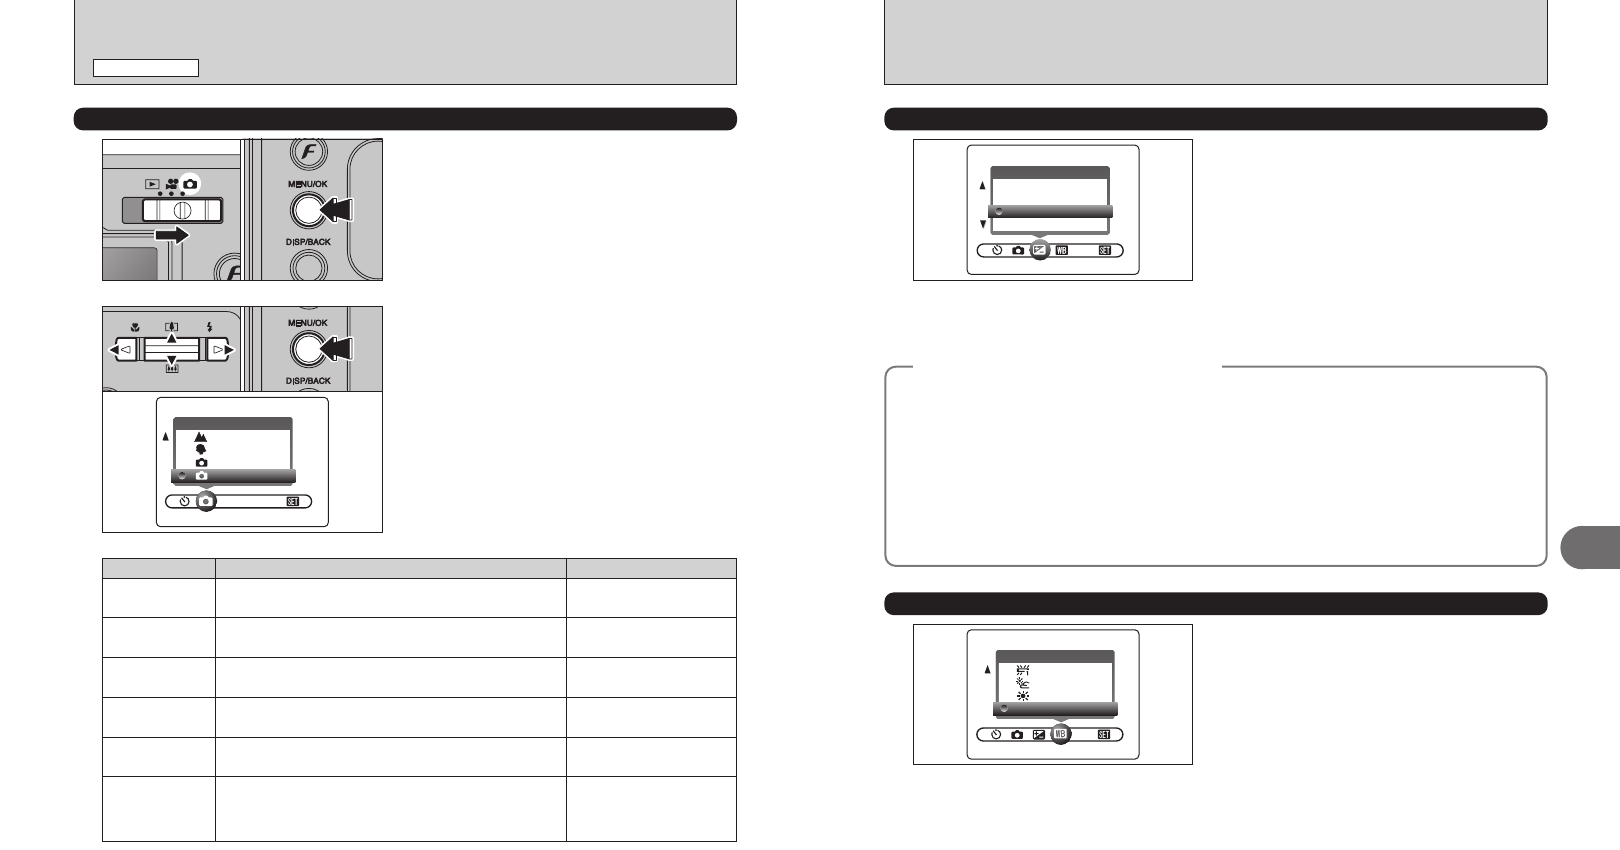
A
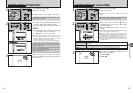
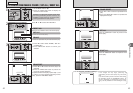
WHITE BALANCE
(
SELECTING THE LIGHT SOURCE
)
Select white balance in the “s” Shooting mode.
Change the white balance setting to take a picture
with the white balance fixed for the surroundings
and lighting.
In AUTO mode, the correct white balance may not
be achieved for subjects such as close-ups of
people’s faces and pictures taken under a special
light source. Select the correct white balance for
the light source. See P.95 for more information on
the white balance.
●
!
The color tones may vary depending on the shooting
conditions (light source, etc.).
AUTO: Automatic adjustment
(shooting to show the ambience of
the light source)
6: Shooting outdoors in good weather
7: Shooting in shade
9: Shooting under “Daylight” fluorescent
lamps
0:Shooting under “Warm White” fluorescent
lamps
-: Shooting under “Cool White” fluorescent
lamps
8: Shooting in incandescent light
✽ When the flash fires, the white balance setting for the flash is used. Consequently, to achieve a particular effect, the
flash mode should be set to Suppressed flash (➡P.32).
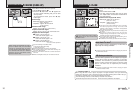
◆
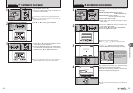
To obtain the optimum brightness
◆
Adjust the exposure compensation according to the level of brightness or darkness in the image.
■ Guide to compensation
i Backlit portraits: +0.6 EV to +1.5 EV
i Very bright scenes (such as snowfields) and highly reflective subjects: +0.9 EV
i Shots made up predominantly of sky: +0.9 EV
i Spotlight subjects, particularly against dark backgrounds: –0.6 EV
i Scenes with low reflectivity, such as shots of pine trees or dark foliage: –0.6 EV
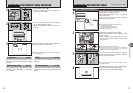
hWhen the subject appears too bright
Try a negative (–) compensation setting.
This will make the overall image darker.
hWhen the subject appears too dark
Try a positive (+) compensation setting.
This will make the overall image brighter.
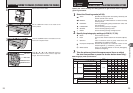
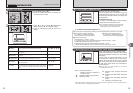
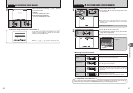
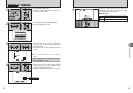
✽ Displaying the menus (➡P.36)
1Set the Mode switch to “q”.
2Press the “MENU/OK” button to display the
menu on the LCD monitor.
2
1Press “d” or “c” to select “q” SHOOTING
MODE and “a” or “b” to change the setting.
2Press the “MENU/OK” button to confirm the
setting.
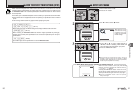
01 02
q
SHOOTING MODE
1
01 02
Shooting mode Explanation Available flash modes
m
PORTRAIT
Uses for photography getting beautiful skin tones and soft
overall tone.
AUTO / b / d / v / c /
n
q
MANUAL
Sets the “EV” (exposure compensation) (➡P.39) and “White
balance” (➡P.39) to manual to easily control yourself.
AUTO / b / d / v
q
AUTO
Uses in a wide range of conditions. This is the easiest mode for
taking pictures.
AUTO / b / d / v / c /
n
,
LANDSCAPE
Uses for shooting scenery in daylight and provides crisp, clear
shots of scenery such as buildings and mountains.
Flash not available
.
SPORTS
Uses for shooting sporting events. This mode gives priority to
faster shutter speeds.
AUTO / d / v
/
NIGHT
Uses for shooting evening and night scenes. This mode allows
you to take shots where priority is given to slow shutter speeds
of up to 2 seconds. To prevent camera shake, always use a
tripod.
c / n / v
✽ “m”, “,”, “.” and “/” can not be selected in Macro mode.