71
Software Installation
5
70
10
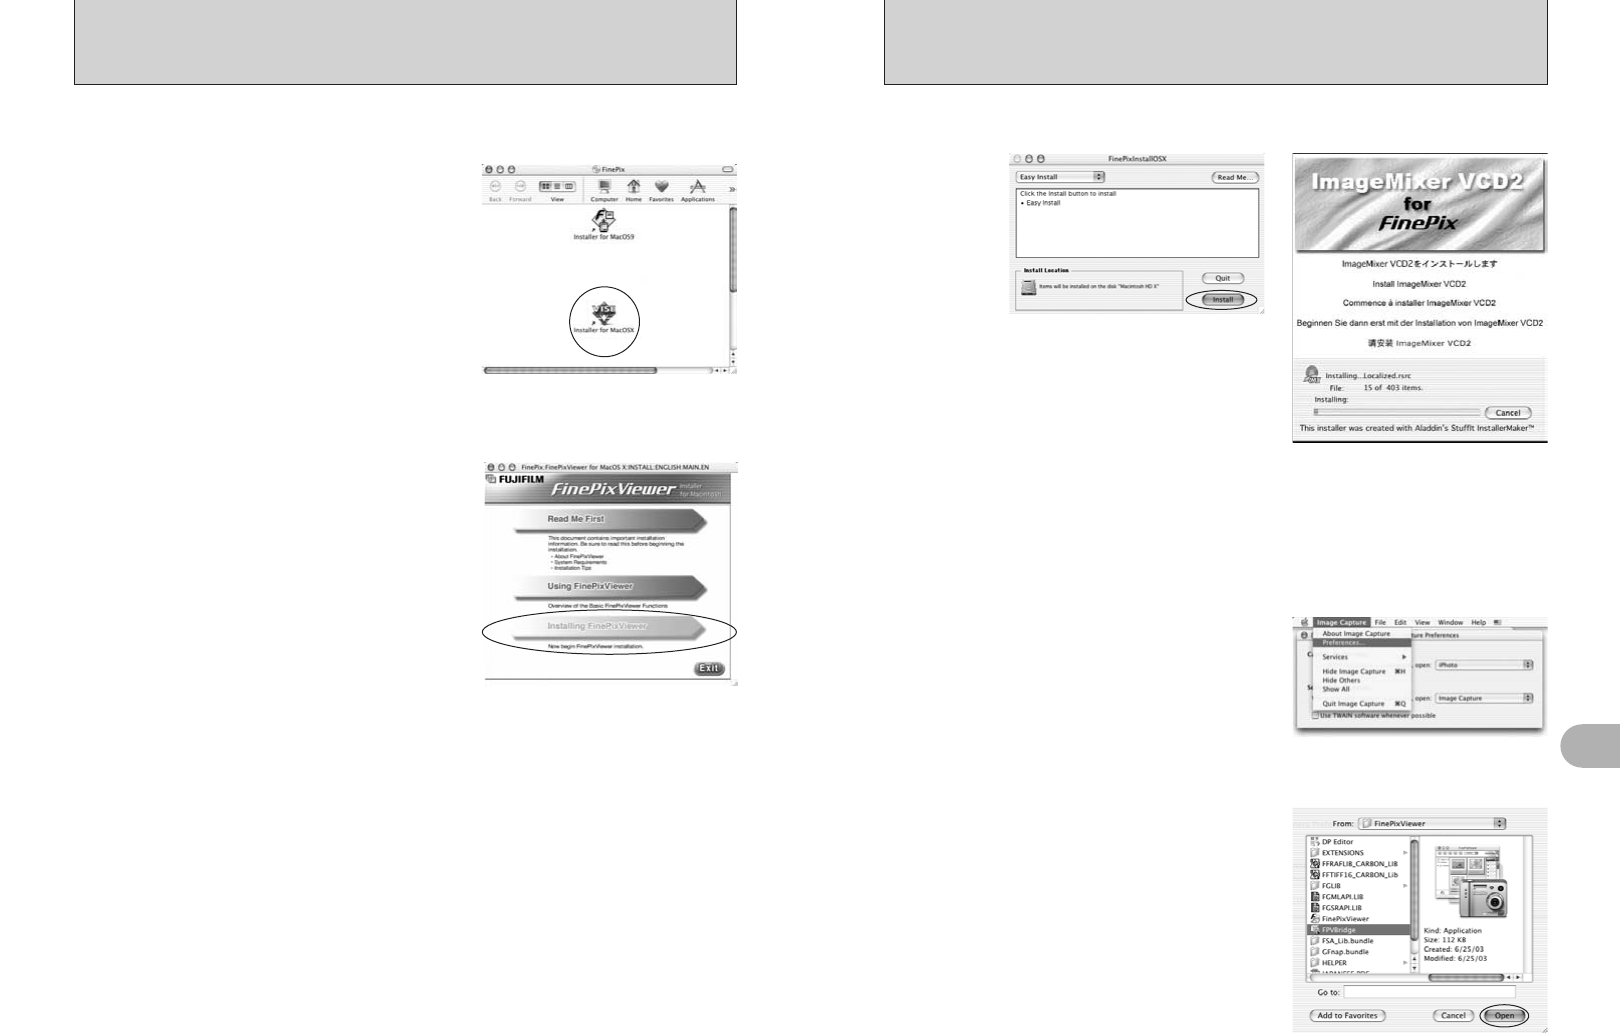
The “FinePixViewer installation completed” message dialog appears. Then click exit button and
close it.
11
Launch “Image Capture” from the “Applications” folder.
12
Change the Image Capture settings.
Select “Preferences...” from the “Image Capture”
menu.
14
Select “FPVBridge” from “FinePixViewer” folder in
the “Applications” folder and click the [Open] button.
15
Select “Quit Image Capture” menu in the “Image Capture” menu.
8
The “FinePixInstallOSX” window appears.
Click the [Install] button to install FinePixViewer and RAW FILE CONVERTER LE.
9
The ImageMixer VCD2 installer automatically starts up and a window showing the installation
progress appears (Installation may take several minutes).
13
Select “Other...” from “When a camera is connected, open”.
5.3 INSTALLATION ON A Mac OS X
1
Turn your Macintosh on and start up Mac OS X. Do not launch any other applications.
2
When the bundled CD-ROM is loaded into the CD-
ROM drive, the “FinePix” icon appears. Double-click
the “FinePix” icon to open the “FinePix” volume
window.
3
Double-click on “Installer for MacOS X”.
5
The “Authenticate” dialog appears.
Enter the name and password for the administrator account and then click the [OK] button.
✽
✽ The administrator account is the user account used for Mac OS X installation and you can confirm the user account
in the Accounts dialog in the System Preferences.
4
The Installer setup dialog appears. Click the
[Installing FinePixViewer] button.
●
!
For more information on what is installed, click the [Read Me
First] button and [Using FinePixViewer] button.
The “License” dialog appears. Read the agreement carefully and then, if you agree to the terms
of the Agreement, click the [Accept] button.
7
The “Read me” dialog appears. Click the [Continue] button.
6


