


16 17
1
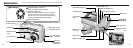
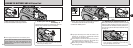
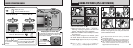
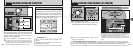
To change the date display format
◆
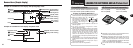
Power Save Function
◆
If the camera is not used for 2 minutes, this
function automatically switches it off.
When this function is enabled, the LCD monitor
switches off to conserve battery power if the
camera is not used in any way for 30 seconds
(See P.70 for details).
◆
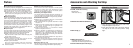
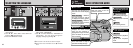
Checking the remaining battery charge
◆
Switch the camera on and check that no battery
level warning (
Z or X) is displayed on the
LCD monitor. If no icon indicating the remaining
battery charge is displayed, the battery has
ample charge.
i
Z Lit red:
Battery charge low. Replace or recharge the
battery as it will run out shortly.
i
X Blinking red:
The battery is exhausted. The display will shortly
go blank and the camera will stop working.
Replace or recharge the battery.
●
!
The above estimates are for the Still photography
modes. In Playback mode, the transition from “
Z”
to “
X” may take less time.
01 02
1Press “d” or “c” to select the date format.
2Press “a” or “b” to set the format. Refer to
the table below for details of the settings.
Displays the date in the “month/day/ year” format.
MM/DD/YYYY
Displays the date in the “day.month. year” format.
DD.MM.YYYY
YYYY.MM.DD
Explanation
Setting
Displays the date in the “year.month. day” format.
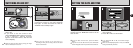
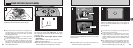
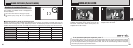
Once you have set the date and time, press the
“MENU/OK” button. Pressing the “MENU/OK”
button switches the camera to still photography
or Playback mode.
●
!
You cannot set the seconds, but you can set the time
more accurately by pressing the “MENU/OK” button
when the time on your reference clock is at zero
seconds.
●
!
If the camera is left for 30 minutes or longer with the
batteries removed and the AC power adapter
disconnected, the date and time settings may revert to
the factory default settings. If this occurs, reset the date
and time.
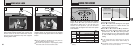
3
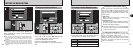
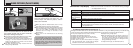
Changing the date and time
To change the date and time:
1Press the “MENU/OK” button.
2Use “d” or “c” to select “g” OPTION and
then use “a” or “b” to select “SET–UP”.
3Press the “MENU/OK” button.
4Select “DATE/TIME” and press “c”.
See P.15 for information on setting the date and
time.
0103 0204
SETTING THE DATE AND TIME