8 9
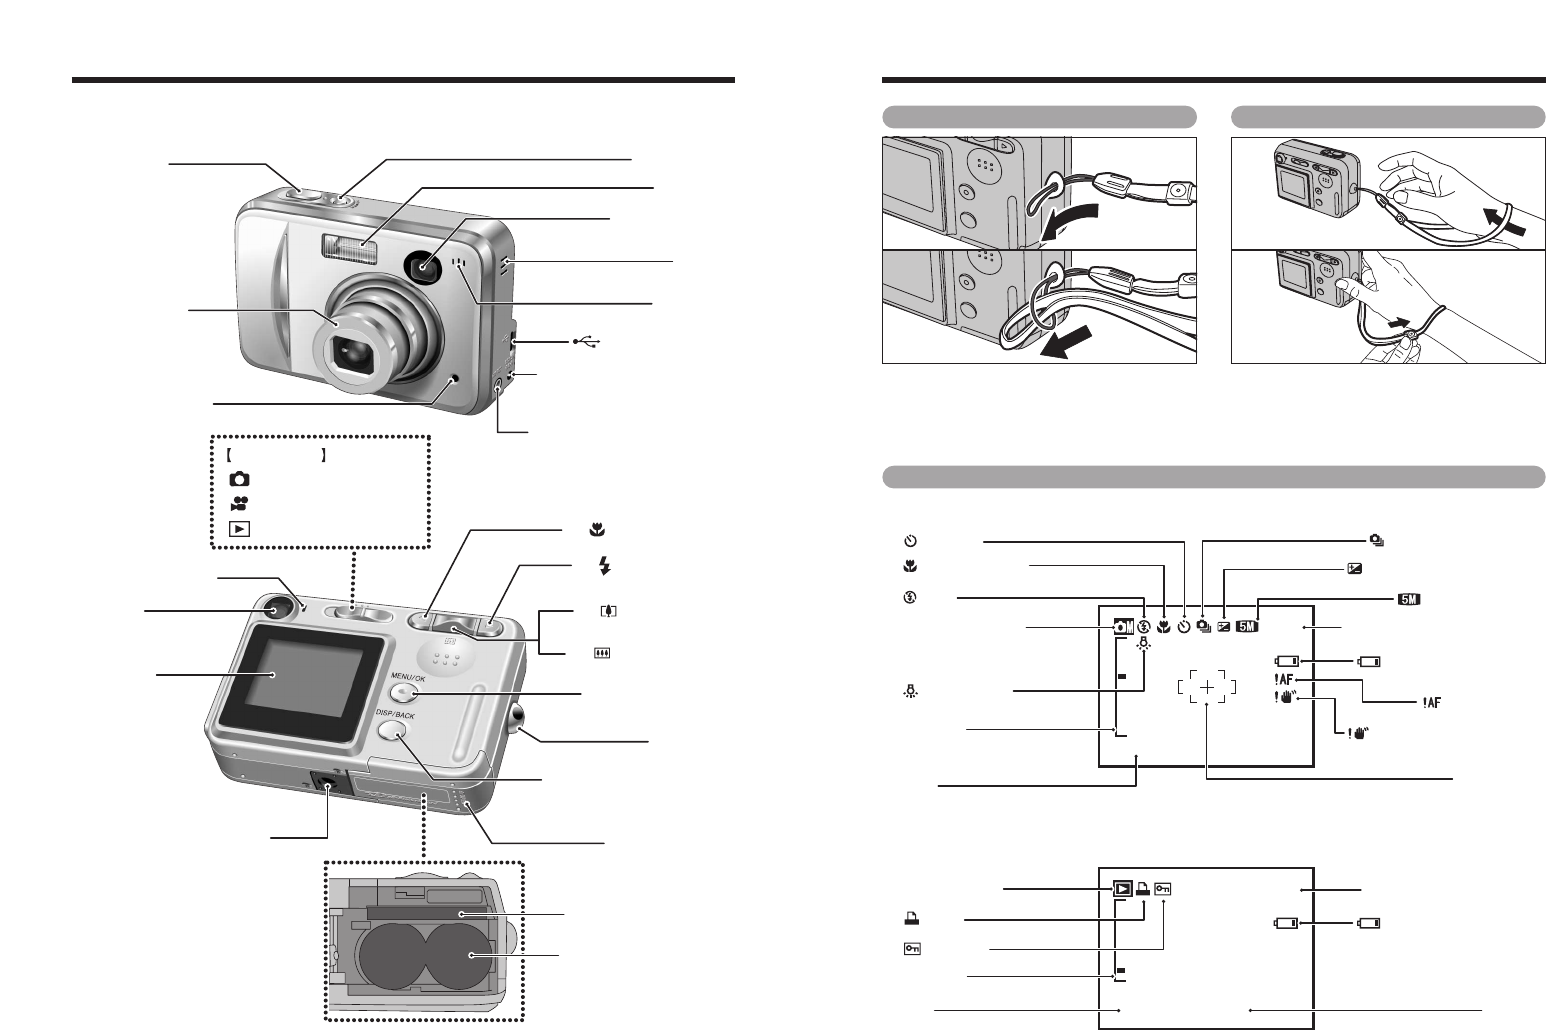
Camera parts and features
Example of LCD monitor text display
■ Photography mode
N 1 2
1 0 0
-
0 0 0 9
1/1 / 1 / 2 000 0 5
1 / 1/20 0 5 12:0 0 AM
Battery level warning
AF warning
Camera shake warning
Number of available frames
Quality mode
Exposure compensation
Self-timer
Continuous shooting
Date
AF frame
Zoom bar
Photography mode
Macro (close-up)
White balance
Flash
N
N12
101 0 0
-
00090 0 0 9
1 / 1/20 0 5
1/1 / 1 / 2 000 0 5 5 1 2 : 000 0 AM
Battery level warning
Time
Protection
DPOF
Playback mode
Date
Playback frame number
Zoom bar
N
■ Playback mode
Flash (P.28)
Speaker
Microphone
Viewfinder window
Shutter button
Self-timer lamp
(P.32)
Lens (lens cover)
Photography mode
(P.17)
Movie mode (P.47)
Playback mode (P.23)
Mode switch
DC IN 3V (power input) socket
(P.66)
DISP (Display) / BACK button
(P.15)
Battery cover (P.10)
MENU/OK button (P.16)
Strap mount
Viewfinder lamp
(P.19)
Viewfinder
Tripod mount
LCD monitor
xD-Picture Card slot
(P.10)
Battery compartment (P.10)
d / Macro button (P.27)
c / Flash button (P.28)
USB socket (mini-B)
A/V OUT (Audio / Visual output)
socket
POWER button
b / Wide zoom switch
(P.15-16, 55)
a / Tele zoom switch
(P.15-16, 55)
Attaching the strap
Attach the strap as shown in 1 and 2.
When attaching the strap, move the length
adjustment buckle slightly away from the end
of the strap, as shown in figure 1.
Using the strap
1Loop the strap over your wrist.
2To avoid dropping the camera, secure the
strap around your wrist by sliding the
fastener to adjust the length.
01
02
01
02
✽ Refer to the pages in parentheses for information on
using the camera parts or features.


