5
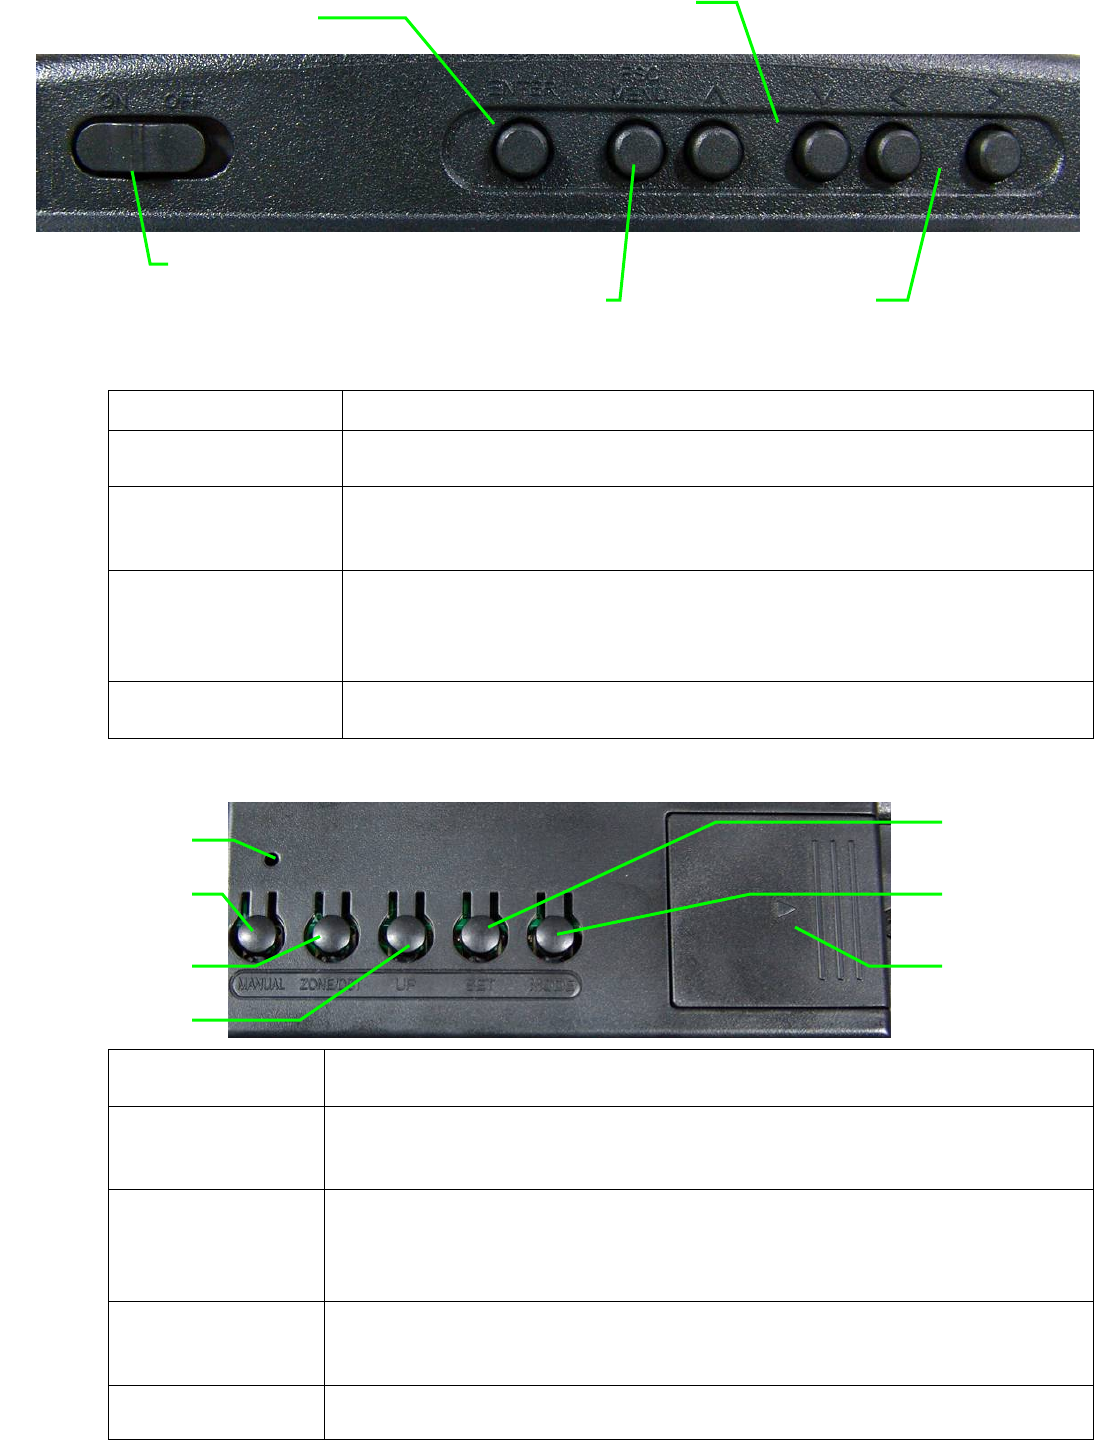
Built-in Photo Frame Control
ON/OFF SWITCH
Switch to turn the Digital Photo Frame ON or OFF.
ENTER
Press to select an option or a photo. Press to save a changed
setting in the setup screen.
ESC/MENU
Press and hold to open the setup screen or the control menu when a
photo is being displayed manually.
Press to function as the “ESC” button on the Remote Control.
UP/DOWN
Press to navigate up and down or to view the previous or next photo
while photo is being displayed manually. These buttons can also be
used to move the photo up or down after a photo has been zoomed
in.
LEFT/RIGHT
Press to navigate left and right or move the photo to the right or left
after a photo has been zoomed in.
Atomic Clock / RCC (Radio Control Clock) Control
MANUAL
Press and hold to start searching for the automatic time signal. Press
again to stop the time signal search.
ZONE/DST
Press to switch between different time zones.
Press and hold to enable/disable Daylight Saving when the clock is
displaying time.
UP
When setting the alarm or manually setting the time, press to increase
the flashing value. When the RCC is displaying time, press to switch
the temperature unit between Fahrenheit and Celsius. When the RCC
is in alarm mode, press to enable/disable alarm.
SET
When displaying time, press and hold to manually set the clock.
When in alarm mode, press and hold to manually set the alarm clock.
When setting either time or alarm, press to go to the next parameter.
MODE
Press to change the RCC display between the time and the alarm.
ON/OFF SWITCH
ENTER
ESC/MENU
UP/DOWN
LEFT
/
RI
G
HT
Clock Buzze
r
MANUAL
ZONE/DST
UP
SET
MODE
Battery
Compartment


