


NOTE
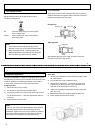
The video level adjustment for lenses that use a video
signal type lens, is adjusted using the binding screws on
the side of the lens as shown in the method below.
1) The lens side sensitivity binding adjustment gauge is
displayed on the light control menu, when the LENS
SW on the camera back is set to [VIDEO].
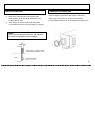
2) Please do the sensitivity binding on the side of the
Lens so that the value of video output level gauge
[Lev] does not drop from the value of reference level
gauge [Ref].
3) When the value of [Lev] is adjusted to a lower value
than the value of [Ref] the repetition phenomenon
(hunting) of the lens iris may occur along automatic
gain control in the camera.
Setting of BLC
In the case where there is a strong light source and sunlight in
the background, the lens iris will close according to the scene
brightness, causing the desired object in the scene to appea
r
dark. This mode is used under such a condition.
4) Press the SET button for longer than 2 seconds to display
the main menu.
5) Use the UP and DOWN buttons to shift the cursor to
“LIGHT CONTROL”, then press the SET button to display
the light control menu.
6) The following menu is displayed. Push the SET button
to select “BLC”, when the cursor is in “MODE”.
7) Shift the cursor to “AREA SELECT” and push the SET
button to display the detection area(BLC) select menu.
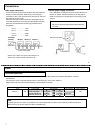
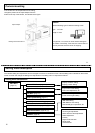
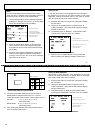
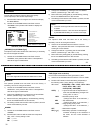
◆ LIGHT CONTROL MENU ◆
>MODE :AVERAGE
Lev
|||||||||||||||||||||||||||||||||||||||||||||||・・
・・・・・・・・・・・・・・・・・・・・・
Ref
||||||||||||||||||||||||||||||||||||||||||||||・・・
・・・・・・・・・・・・・・・・・・・・
LEVEL : 000
…… Select light control mode
…… Video output level gauge
…… Control reference level gauge
…… Video level adjust (-128~000~+127)
…… Return to the main menu
…… End of menu display
LIGHT CONTROL MENU (MODE: AVERAGE)
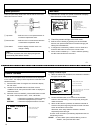
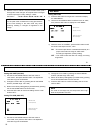
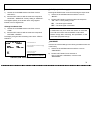
◆ LIGHT CONTROL MENU ◆
>MODE :BLC
AREA SELECT:NO.1
↵
LEVEL : 000
RET
END
…… Select light control mode
…… Go to area select menu and selected area No.
…… Video level adjust (-128~000~+127)
…… Return to the main menu
…… End of menu display
LIGHT CONTROL MENU (MODE: BLC)
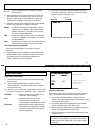
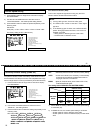
5) There are 9 light detect areas selected by the UP and
DOWN buttons. Select the areas from nos. 1 to 9 that
include the subject of main interest. (Factory setting is NO.1)
UP button : 1→2→3→4→5→6→7→8→9
(ascending order)
DOWN button : 9→8→7→6→5→4→3→2→1
(descending order)
6) After deciding the detection area, push the SET button to
return to the light control menu.
Setting of PEAK/AVERAGE
When there is strong spot light in the background a halo may
appear and cause obstruction to a desired object in the image.
This mode is used under such a condition.
1) Press the SET button for longer than 2 seconds to display
the main menu.
2) Use the UP and DOWN buttons to shift the cursor to
“LIGHT CONTROL”, then press the SET button to display
the light control menu.
3) The following menu is displayed, push the SET button
and change to “PEAK/AVE”, when the cursor is in “MODE”.
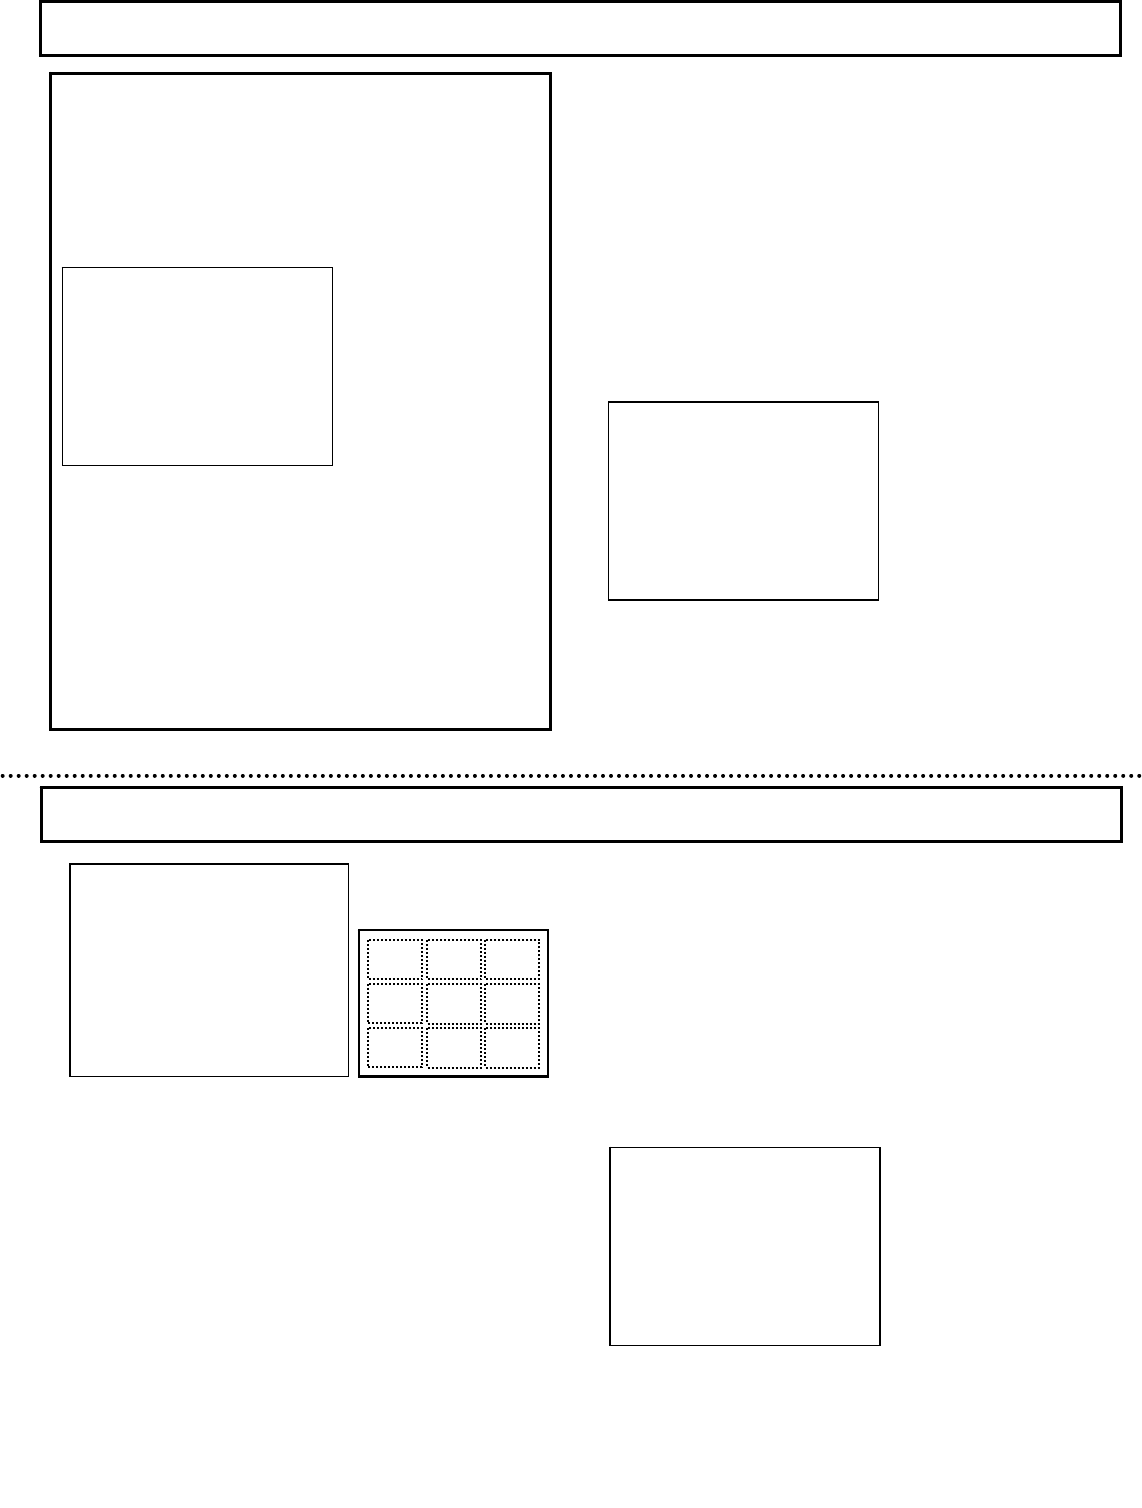
AREA(BLC)
NO.1
┏━━━━━━┓
┃ ┃
┃ ┃
┗━━━━━━┛
DETECTTION AREA (BLC) SELECT MENU
Detect area position
6 5
4
2
1 3
7
8 9
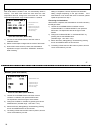
◆ LIGHT CONTROL MENU ◆
MODE :PEAK/AVE
>PK/AV : 15/ 85
LEVEL : 000
RET
END
…… Select light control mode
…… Select peak / average value ratio
…… Video level adjust (-128~000~+127)
…… Return to the main menu
…… End of menu display
LIGHT CONTROL MENU (MODE: PEAK/AVE)
17
18