


6. In the Paper Type drop-down list, select the type of paper that you have loaded.
7. In the Print Quality drop-down list, select the appropriate quality setting for your
project.
NOTE: To find out what dpi the product will print based on the paper type
and print quality settings you selected, click Resolution.
To check your margin settings
1. Preview your print job before sending it to the product.
In most software applications, click the File menu, and then click Print Preview.
2. Check the margins.
The product uses the margins you have set in your software application, as long
as they are greater than the minimum margins the product supports. For more
information about setting margins in your software application, see the
documentation that came with the software.
3. Cancel the print job if the margins are not satisfactory, and then adjust the margins
in your software application.
Cause: The print settings were not set correctly.
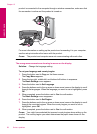
Reset the product
Solution: Turn off the product, and then unplug the power cord. Plug the power
cord back in, and then press the On button to turn on the product.
Cause: The product experienced an error.
Contact HP support for service
Solution: If you have completed all of the steps provided in the previous solutions
and are still having a problem, contact HP support for service.
Go to:
www.hp.com/support.
If prompted, choose your country/region, and then click Contact HP for technical
support.
Cause: You might need assistance to enable the product or software to function
properly.
Print quality troubleshooting
Use this section to solve these print quality problems:
•
Photo printouts are hazy, blurry, or have inaccurate color
Photo printouts are hazy, blurry, or have inaccurate color
Solution: For best photo color quality, do not allow printouts to stack on top of
photos in the paper tray.
Chapter 12
64 Solve a problem
Solve a problem