


EN
10
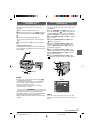
● It takes a few seconds for the cassette holder to open. Do
not apply force.
● There may be a delay after you open the cassette holder
cover until the cassette holder opens. Do not use force.
● If you wait a few seconds and the cassette holder does
not open, close the cassette holder cover and try again. If
the cassette holder still does not open, turn the
camcorder off then on again.
● If the tape does not load properly, open the cassette
holder cover fully and remove the cassette. A few minutes
later, insert it again.
● When the camcorder is suddenly moved from a cold
place to a warm environment, wait a short time before
opening the cassette holder cover.
● Once the cassette holder is closed, it recedes automati-
cally. Wait until it recedes completely before closing the
cassette holder cover.
● Closing the cassette holder cover before the cassette
holder comes out may cause damage to the camcorder.
● Even when the camcorder is switched off, a cassette can
be loaded or unloaded. After the cassette holder is closed
with the camcorder switched off, however, it may not
recede. It is recommended to turn the power on before
loading or unloading.
● When resuming recording, once you open the cassette
holder cover a blank portion will be recorded on the tape
or a previously recorded scene will be erased (recorded
over) regardless of whether the cassette holder came out
or not. See page 14 for information about recording from
the middle of a tape.
GETTING STARTED
Date/Time Settings
The date/time is recorded onto the tape at all times, but
its display can be turned on or off during playback
(੬ pg. 31).
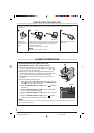
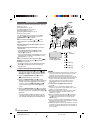
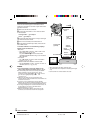
1 Set the Power Switch y to “ ” while pressing
down the Lock Button t located on the switch, and
open the LCD monitor fully or pull out the viewfinder
fully. The POWER/CHARGE lamp r lights and the
camcorder is turned on.
2 Press the MENU/VOLUME wheel % in to access
the Menu Screen.
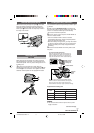
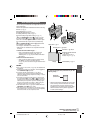
3 Rotate the MENU/VOLUME wheel % to select
“ (CAMERA DISPLAY)” and press it.
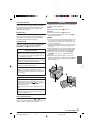
4 Rotate the MENU/VOLUME wheel % to select
“CLOCK ADJ.”. Press it and “month” is highlighted.
Rotate the MENU/VOLUME wheel % to input the
month. Press it. Repeat to input the day, year, hour and
minute. Rotate the MENU/VOLUME wheel % to select
“ RETURN”, and press it twice. The Menu Screen
closes.
NOTE:
Even if you select “CLOCK ADJ.”, if the parameter is not
highlighted the camcorder’s internal clock continues to
operate. Once you move the highlight bar to the first date/
time parameter (month), the clock stops. When you finish
setting the minute and press the MENU/VOLUME wheel
%
in, the date and time begin operation from the date and
time you just set.
Recording Mode Setting
Set the tape recording mode depending on your
preference.
1 Set the Power Switch y to “ ” while pressing
down the Lock Button t located on the switch, and
open the LCD monitor fully or pull out the viewfinder
fully. The POWER/CHARGE lamp r lights and the
camcorder is turned on.
2 Press the MENU/VOLUME wheel % in. The Menu
Screen appears.
3 Rotate the MENU/VOLUME wheel % to select
“ (CAMERA)” and press it.
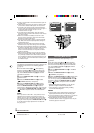
4 Rotate the MENU/VOLUME wheel % to select “REC
MODE” and press it. The Sub Menu appears. Select
“SP” or “LP” by rotating the MENU/VOLUME wheel %
and press it. Rotate the MENU/VOLUME wheel % to
select “ RETURN”, and press it twice. The Menu
Screen closes.
• Audio Dubbing and Insert Editing (੬ pg. 36) are
possible on tapes recorded in the SP mode.
•“LP” (Long Play) is more economical, providing
1.5 times the recording time.
NOTES:
● If the recording mode is switched during recording, the
playback picture will be blurred at the switching point.
● It is recommended that tapes recorded in the LP mode on
this camcorder be played back on this camcorder.
● During playback of a tape recorded on another
camcorder, blocks of noise may appear or there may be
momentary pauses in the sound.
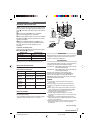
y
r
%
t
RETURN
–
–
–
AREMACD
ISPLAY
RE NEON SC
LCD/TV
UAOT
IMETDATE /
TIME CODE
CLOCK
ADJ .
FFO
25 ’03
CED
30
PM
:5
BRIGHT
AREMACD
ISPLAY
CLOCK
ADJ .
25 ’03
CED
30
PM
:5
1 GR-D90/70/30US EN 01-11 02.11.6, 3:09 PM10