


EN
22
5 Select the number of prints by rotating the MENU/
VOLUME wheel % and press it.
Repeat steps 3 through 5 for the desired number of
prints.
• The number of prints can be set up to 15.
• To correct the number of prints, select the image
again and change the number.
6 Rotate the MENU/VOLUME wheel % to select
“RETURN” and press it. Selection is complete. “SAVE?”
appears.
• If you did not change any settings in step 3 through 5,
the Menu Screen reappears.
7 Rotate the MENU/VOLUME wheel % to select
“EXECUTE”, then press it to save the setting you have
just made.
• To cancel selection, rotate the MENU/VOLUME wheel
% to select “CANCEL” and press it.
To Reset The No. Of Prints . . .
..... select “RESET” in step 4 of “TO PRINT ALL STILL
IMAGES (ONE PRINT FOR EACH)” on pg. 21.
The number of prints is reset to 0 for all still
images.
CAUTION
While performing the above, never disconnect power,
as this may cause the memory to be corrupted. For
safety, all buttons including the Power Switch y are
disabled in step 6.
NOTES:
● “BATTERY LOW” appears if the battery remaining power
is too low.
● If you load a memory card already set as shown above in
a printer compatible with DPOF, it will make prints of the
selected still images automatically.
● To print images recorded on a tape, first dub them to a
memory card (
੬ pg. 21).
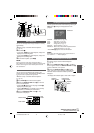
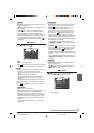
Making A New Folder
New still pictures you are going to take can be
separated from previously shot pictures by resetting the
file name to DVC00001; these new pictures will be
stored in a new folder.
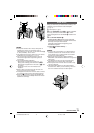
1 Set the VIDEO/DSC Switch 4 to “DSC”, then set
the Power Switch y to “PLAY” while pressing down the
Lock Button t located on the switch.
• A stored file is displayed.
2 Press the MENU/VOLUME wheel % in. The Menu
Screen appears. Rotate the MENU/VOLUME wheel %
to select “NO. RESET”, then press it. The NO. RESET
Screen appears.
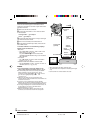
3 Rotate the MENU/VOLUME wheel % to select
“EXECUTE”, then press it. The new folder (such as
“101JVCGR”) will be made and the file name of the
next shot starts from DVC00001.
Initializing A Memory Card
You can initialize a memory card anytime.
After initializing, all files and data stored on the
memory card, including those which have been
protected, are cleared.
1 Perform step 1 of “Making A New Folder”.
2 Press the MENU/VOLUME wheel % in. The Menu
Screen appears. Rotate the MENU/VOLUME wheel %
to select “FORMAT” and press it. The FORMAT Screen
appears.
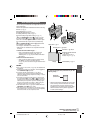
3 Rotate the MENU/VOLUME wheel % to select
“EXECUTE” and press it. The memory card is
initialized. When initialization is finished, “NO IMAGES
STORED” appears.
• To cancel initialization, rotate the MENU/VOLUME
wheel % to select “RETURN” and press it.
CAUTION
Do not perform any other operation (such as turning off
the camcorder) during initialization. Also, be sure to use
the provided AC Adapter, as the memory card may be
corrupted if the battery becomes exhausted during
initialization. If the memory card becomes corrupted
initialize it.
Folder and File names
Each time shooting takes place, a file name is made
using a number which is larger by one than the
largest number of the file names which are in use.
Even if you delete an image file with a number in
the middle of range, the number will not be used for
a new shot; a gap will remain in the numerical
sequence. If the file name reaches DVC09999, a
new folder (such as “101JVCGR”) will be made and
the file name will start again from DVC00001.
ADVANCED FEATURES
(GR-D90 and GR-D70 only)
1 GR-D90/70/30US EN 17-22 02.11.6, 3:11 PM22