EN7
GETTING STARTED
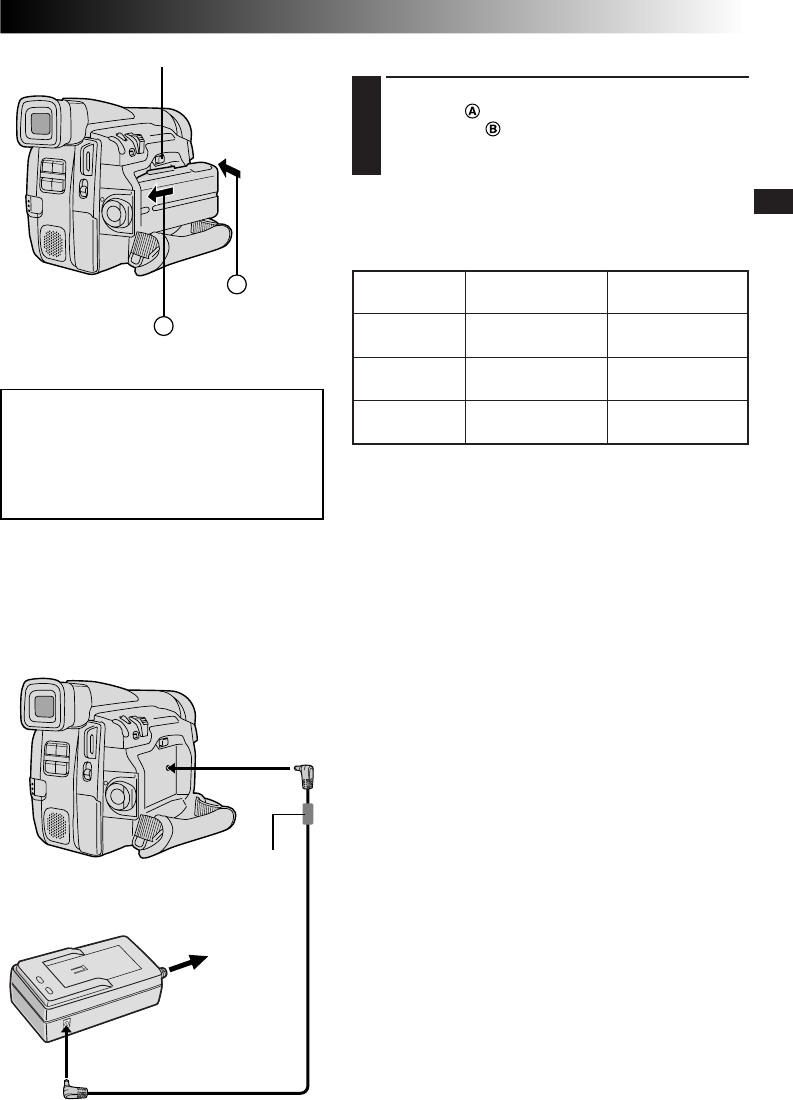
A
B
To DC OUT connector
To AC outlet
AC Power Adapter/Charger
AA-V20EG or AA-V20EK
DC cord
ATTENTION:
Before detaching the power source,
make sure that the camcorder’s power
is turned off. Failure to do so can result
in a camcorder malfunction.
USING THE BATTERY PACK
1
Hook the non-terminal end of the battery pack to the
camcorder and push the battery pack in until it
locks in place .
•If the battery pack is attached in the wrong position,
a malfunction may occur.
To Detach The Battery Pack . . .
.... slide BATTERY RELEASE and pull out the battery pack.
Approximate recording time
BATTERY RELEASE Switch
Hook on.
Push in.
To DC IN
connector
Core filter
USING AC POWER
Use the AC Power Adapter/Charger (connect as shown in
the illustration).
NOTES:
●
The provided AC Power Adapter/Charger features
automatic voltage selection in the AC range from 110 V
to 240 V.
●
For other notes,
੬
pg. 6.
( ) : when the video light is on (GR-DVL40/DVL30 only).
NOTES:
●
Recording time is reduced significantly under the
following conditions:
•
Zoom or Record-Standby mode is engaged repeatedly.
•
The LCD monitor is used repeatedly.
●
Before extended use, it is recommended that you
prepare enough battery packs to cover 3 times the
planned shooting time.
INFORMATION:
VU-V856KIT is a set composed of the BN-V856U battery
pack and AA-V80EG or AA-V80EK AC Power Adapter/
Charger.
Read the VU-V856KIT’s instruction manuals before using.
It is impossible to charge the BN-V856U battery pack
using the provided AC Power Adapter/Charger. Use the
optional AA-V80EG or AA-V80EK AC Power Adapter/
Charger.
Battery pack
BN-V207U
BN-V214U
(optional)
BN-V856U
(optional)
LCD monitor on/
Viewfinder off
50 min.
(25 min.)
1 hr. 55 min.
(60 min.)
7 hrs.
(4 hrs.)
LCD monitor off/
Viewfinder on
60 min.
(30 min.)
2 hrs. 20 min.
(1 hr. 10 min.)
8 hrs. 30 min.
(4 hrs. 30 min.)


