


33
1
2 3
4
5 6
7
8
9
0
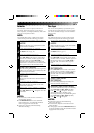
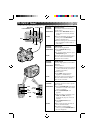
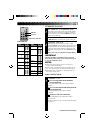
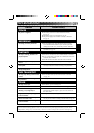
VCR BRAND
NAME
BUTTONS
(A) (B)
GE 1 1
9 2
9 `
9 4
MAGNAVOX 9 5
1 1
7 1
7 6
MITSUBISHI 6 7
6 8
NEC 3 7
3 8
PHILIPS 1 9
9 5
1 1
9 4
9 1
9 6
JVC A
B
C
9 1
9 6
9 3
HITACHI 6 6
6 3
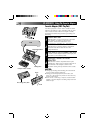
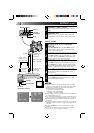
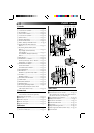
VCR BRAND
NAME
BUTTONS
(A) (B)
PHILIPS 1 2
3 3
SANYO 3 6
3 5
SHARP 1 5
1 `
SONY 6 5
6 `
3 9
3 1
TOSHIBA 6 9
6 1
ZENITH 1 6
RCA 9 2
9 4
6 6
6 3
9 `
PANASONIC 1 3
1 7
1 1
9 4
1 8
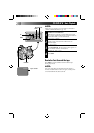
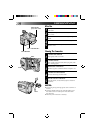
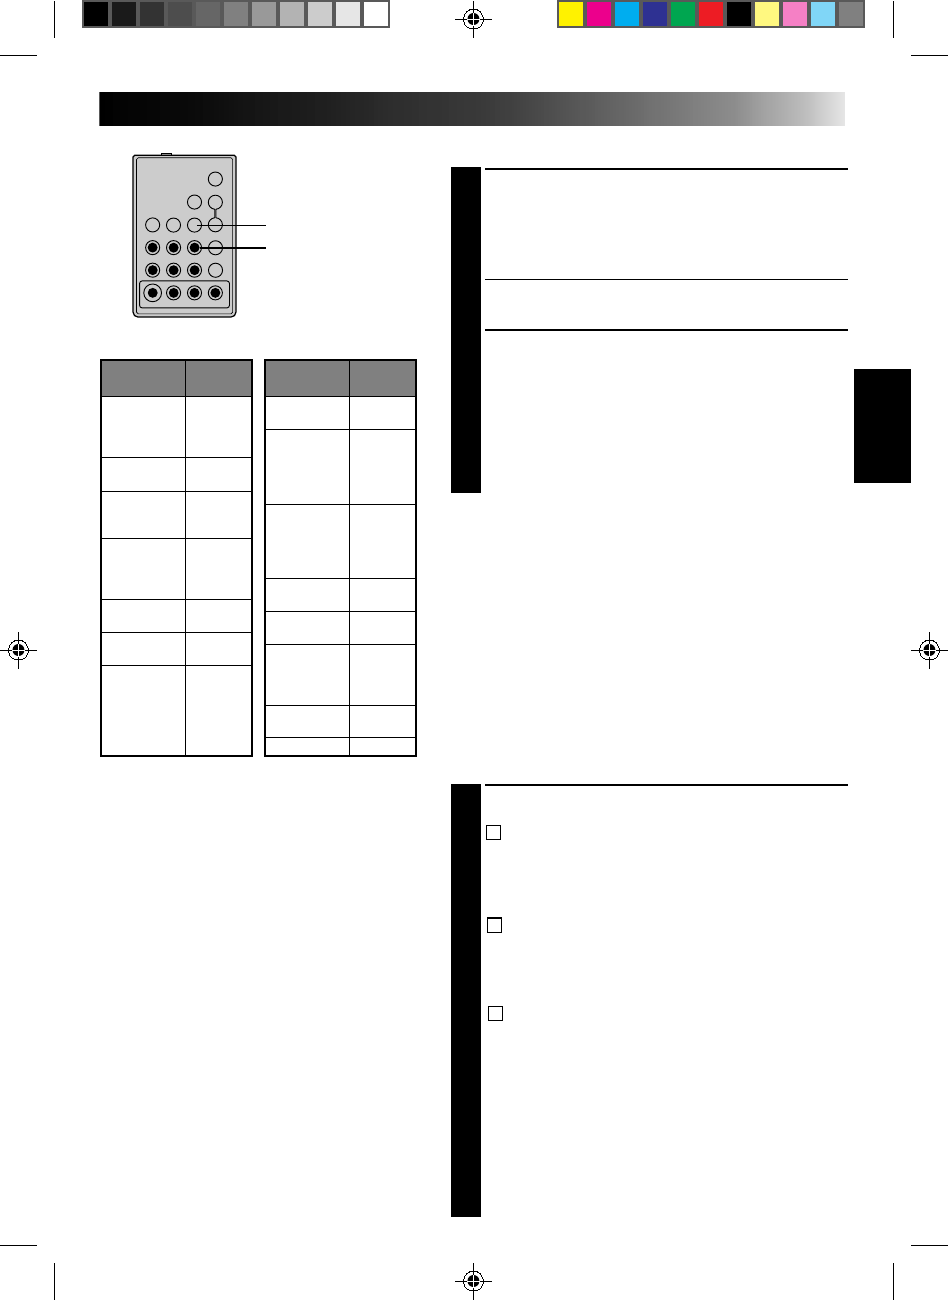
VCR CODE LIST
MBR SET
VCR CTL
RM-V700U (optional)
SET REMOTE/VCR CODE
SET REMOTE TO OPERATE VCR
1
Turn off the power to the VCR and point the remote
toward the VCR’s infrared sensor. Then, referring to
the chart at left, press and hold MBR SET, and press
button (A) and then (B).
•The code is automatically set once you release the
MBR SET button, and the VCR’s power comes on.
OPERATE THE VCR
2
Make sure the VCR’s power is on. Then, while
holding VCR CTL, press the button on the remote for
the desired function. The functions the remote can
control are PLAY, STOP, PAUSE, FF, REW and VCR
REC STBY (you don’t need to press VCR CTL for this
one).
You’re now ready to try Random Assemble Editing.
IMPORTANT
Although the MBR is compatible with JVC VCRs and
those of many other makers, it may not work with yours
or may offer limited functions.
NOTES:
●
If the VCR’s power doesn’t come on in step 1, try
another code from the chart.
●
Some brands of VCR don’t come on automatically. In
this case, turn the power on manually and try step 2.
●
If the RM-V700U is not able to control the VCR, use
the controls on the VCR.
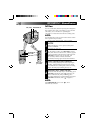
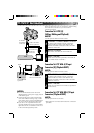
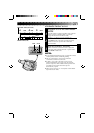
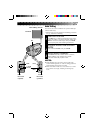
MAKE CONNECTIONS
CONNECT TO . . .
1
A
JVC VCR EQUIPPED WITH REMOTE
PAUSE TERMINAL
Connect the editing cable to the Remote PAUSE
terminal.
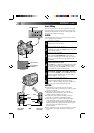
2
B
JVC VCR NOT EQUIPPED WITH REMOTE
PAUSE TERMINAL
Connect the editing cable to the R.A.EDIT
connector.
2
C
NON-JVC VCR WITH NEITHER
Connect the editing cable to the RM-V700U’s
Pause-In jack.
All other connections are as shown in the illustration
on page 34.
CONTINUED ON NEXT PAGE