


29
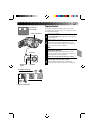
Self-Timer
You can set the delay between pressing Recording Start/
Stop and the actual start of recording. If you secure the
camcorder, you (or whomever is operating the
camcorder) can enter the scene before recording starts.
NOTE:
You need the RM-V20U remote control unit to perform
this procedure.
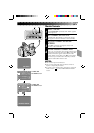
ENGAGE RECORD–STANDBY
MODE
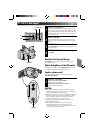
1
Make sure the lens cover is open, set the power
switch to CAMERA.
SET TIME DELAY
2
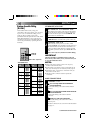
On the remote control, press INTERVAL to set the
delay time. There are four choices, and they appear
in the LCD monitor or the viewfinder in the
following order (each time INTERVAL is pressed):
15S (15 seconds), 30S (30 seconds), 1MIN (1
minute) and 5MIN (5 minutes). Pressing again
releases the Self-timer.
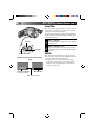
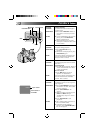
START DELAYED RECORDING
3
Press Recording Start/Stop. The tally lamp begins
blinking, and the blinking speed increases about
5 seconds before recording starts. When recording
begins, the lamp stops blinking but stays lit.
RELEASE SELF-TIMER MODE
4
To release when the tally lamp is not blinking, press
INTERVAL continuously until “ ” disappears. To
release when the tally lamp is blinking, press
Recording Start/Stop to stop the blinking, then press
INTERVAL continuously until “ ” disappears.
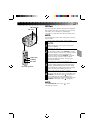
NOTE:
If the PROGRAM AE dial is set to “ ”, 15S is
automatically selected.
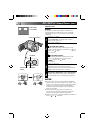
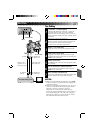
Tally lamp
PROGRAM AE
START/STOP
INTERVAL
REC TIME
RM-V20U (optional)