52
112min
EPREC
1min
TAPE END
Congratulations
PAUSE
1/4s
T40
INDEX
MWB
DEC 25. 96
ࡗ
PM 4:28:34
+
02
W
T
12 3 4 567
8
9
0
!
@
#
$%&^
*
(
)
q
w
e
r
INDEX
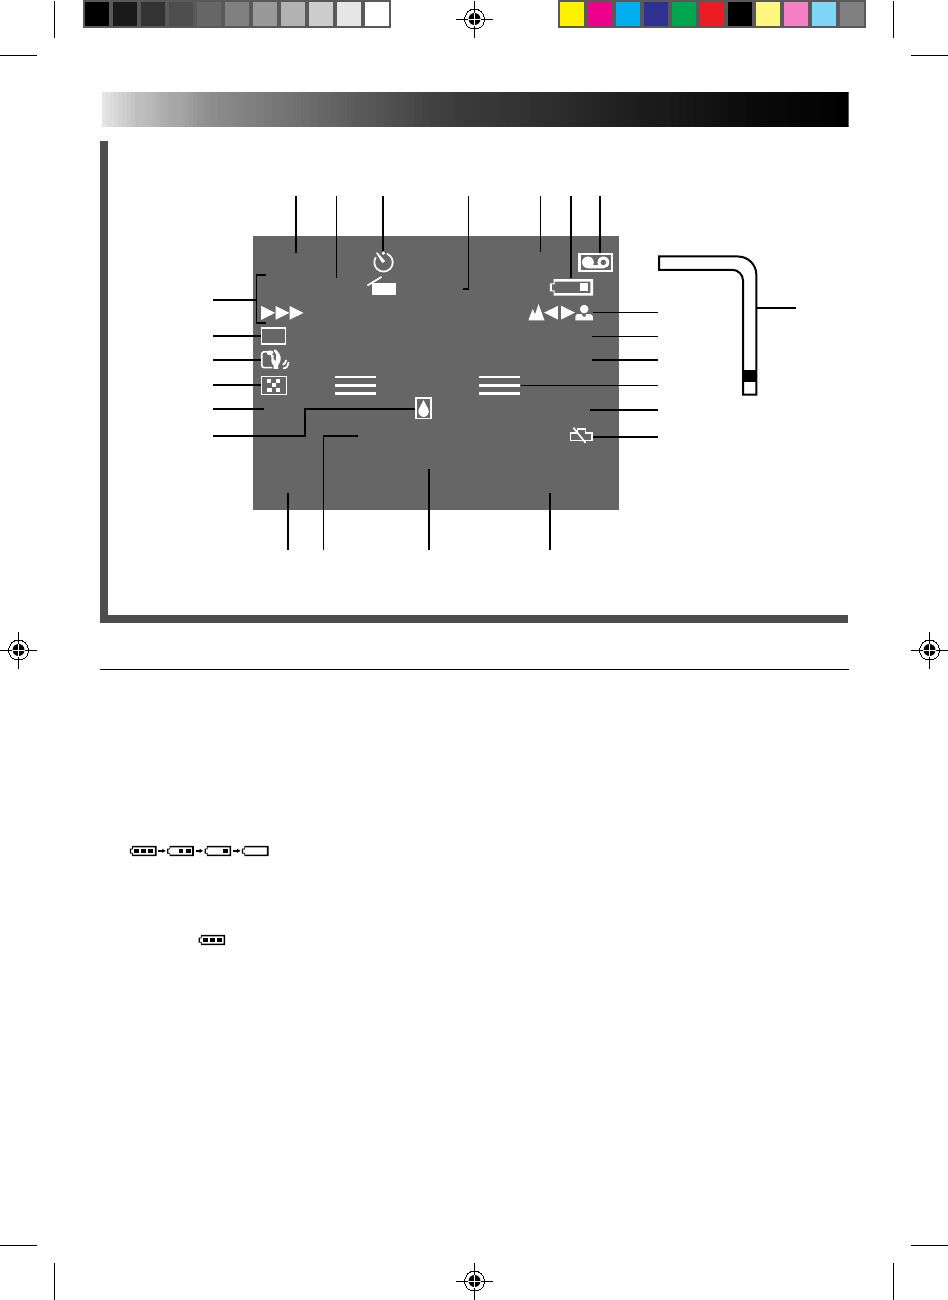
LCD monitor/Viewfinder
# Clock Warning
Once the power is turned on and the indicator
blinks for about 10 seconds, perform the date
and time settings (
੬ pg. 11). After setting is
complete, turn the power off and disconnect the
power source. If you re-connect it and turn the
power on and the indicator is blinking, that
means that the clock (lithium) battery is either
not installed or has discharged. Install, or replace
the old battery with, a new one (
੬ pg. 10).
$ Time Display ...................................... ੬ pg. 21
% Instant Title Display............................ ੬ pg. 32
^ Tape End Display ............................... ੬ pg. 17
Appears when the end of the tape is reached
during playback, recording or fast-forward.
& Date Display ...................................... ੬ pg. 21
* Condensation Warning
When this indication appears, all functions are
disabled. Turn the unit off (without removing the
power source) for a few hours, and when you
turn it on again the indicator should disappear.
( Main Menu Setting Change
Indicator ............................................ ੬ pg. 30
) FADE/WIPE indicator ......................... ੬ pg. 28
q D.I.S. (Digital Image Stabilizer)
Indicator ............................................ ੬ pg. 22
w PROG.AE/EFFECT indicator................ ੬ pg. 26
e Recording Indicator............................ ੬ pg. 16
r Zoom Indicator Bar ............................ ੬ pg. 19
LCD monitor/Viewfinder Indications
1 Remaining Tape Time ......................... ੬ pg. 16
2 Recording Mode (SP/EP) Indicator ...... ੬ pg. 13
3 Interval Timer Indicator ...................... ੬ pg. 34
4 Recording Time Indicator ................... ੬ pg. 35
5 Tape Length Display ........................... ੬ pg. 12
6 Battery Pack Remaining Power
Indicator ............................................ ੬ pg. 8
Changes as follows according to the battery
pack’s remaining power level:
“ ”. When the power is
almost gone, the indicator blinks, then the unit
shuts off. Replace the battery pack with a fully
charged one.
(Note: The symbol containing 3 darkened
squares — — does not necessarily mean
that the battery pack is fully charged.)
7 Cassette Indicator
Blinks when no cassette inserted;
remains steadily lit when cassette inserted.
8 Focus Indicator .................................. ੬ pg. 24
9 Exposure Level Display ...................... ੬ pg. 22
0 White Balance Mode Indicator........... ੬ pg. 23
! Record–Standby Mode Indicator ........ ੬ pg. 16
@ Index Code Marking........................... ੬ pg. 20


