


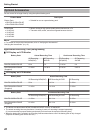
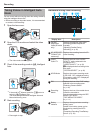
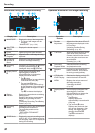


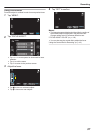
Indications During Still Image Recording
.
[6630]
1/125
Display Icon
Description
1
IMAGE SIZE Displays the icon of the image size.
0
The size of still images can be
changed.
“ IMAGE SIZE ” (A p. 104)
2
SHUTTER
SPEED
Displays the shutter speed.
3
Focus Lights up in green when focused.
4
Recording in
Progress
Appears when a still image is being
captured.
5
Remaining
Number of
Shots
Displays the remaining number of
shots for still image recording.
6
Recording
Mode
Press the i.AUTO button to switch the
recording mode between P
(Intelligent Auto) and H (Manual).
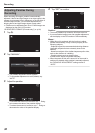
7
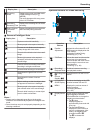
Display Button
n
Some displays disappear after
approximately 3 seconds.
Use the n button to change the
displays as shown below.
0
Tap n button
Displays appear for approximately
3 seconds with every tap.
0
Tap and hold n button
Displays are fixed such that they
do not disappear. After setting, the
display button changes from n to
m.
Tap m to release the displays.
8
Battery
Indicator
Displays the approximate remaining
battery power.
Details of the battery power can be
displayed by pressing the INFO
button.
“Remaining Recording Time/Battery
Power” (A p. 54)
9
Recording
Media
Displays the icon of the media where
still images are recorded to.
The recording media can be
changed.
“ REC MEDIA FOR IMAGE ”
(A p. 111)
0
3D/2D Mode Displays the current recording mode
of 3D or 2D. “3D” is displayed during
3D recording, while “2D” is displayed
during 2D recording.
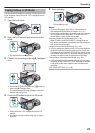
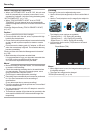
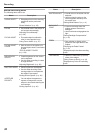
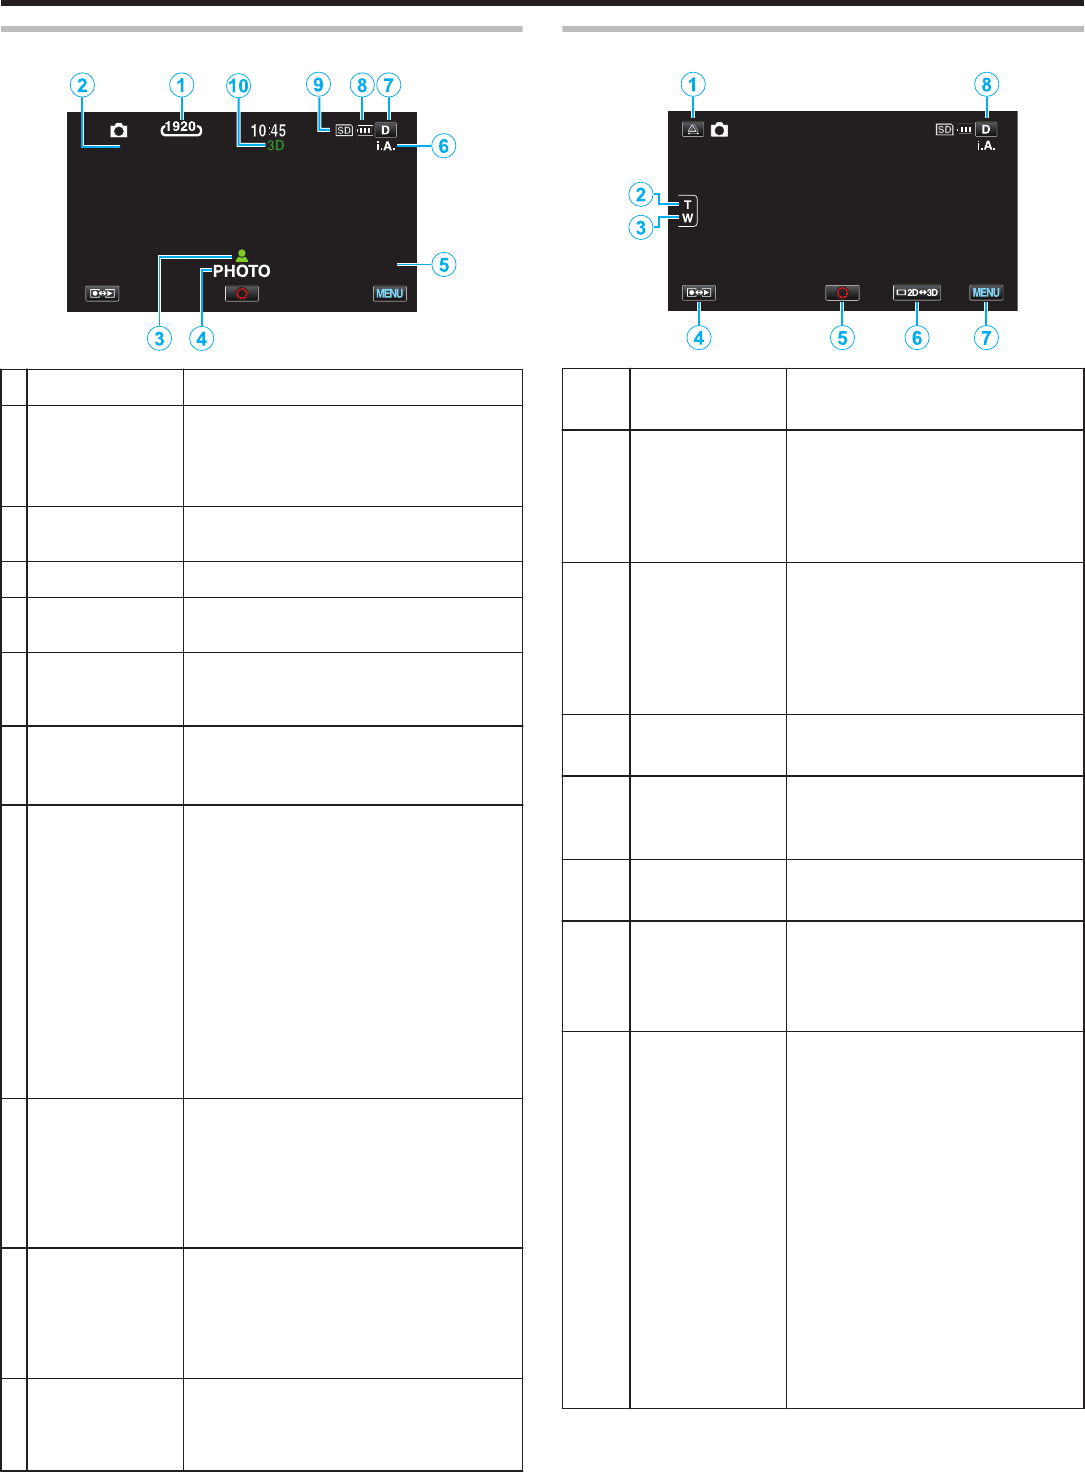
Operation Buttons for Still Image Recording
.
[6630]
Operation
Buttons
Description
1
Parallax
Adjustment
Adjusts the effect when 3D or LR
MIX images are displayed on the
LCD monitor.
“Adjusting Parallax During
Recording” (A p. 32)
2 /
3
T/W Zoom Allows the same functions as the
zoom lever to be performed.
Camera shake that often occurs
when using the zoom lever can
be minimized.
“Zooming” (A p. 28)
4
Recording/
Playback Mode
Switches between recording
and playback modes.
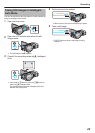
5
Snapshot
Q
Functions as the SNAPSHOT
button. However, focus cannot
be set by pressing halfway.
6
LCD Monitor
3D/2D Display
Switches the display on the LCD
monitor between 3D and 2D.
7
MENU Displays the various menus of
still image recording.
“Operating the Menu”
(A p. 85)
8
Display Button
n
Some displays disappear after
approximately 3 seconds.
Use the n button to change the
displays as shown below.
0
Tap n button
Displays appear for
approximately 3 seconds with
every tap.
0
Tap and hold n button
Displays are fixed such that
they do not disappear. After
setting, the display button
changes from n to m.
Tap m to release the
displays.
Recording
30