


Charging the Battery Pack
Charge the battery pack immediately after purchase and
when the remaining battery power is low.
The battery pack is not charged at the time of purchase.
Charging the Battery with this Unit
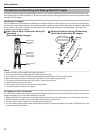
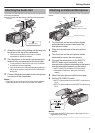
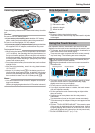
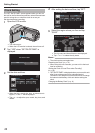
1
Attach the battery pack.
.
0
Align the top of the battery with the mark on this unit, and
slide in until the battery clicks into place.
2
Connect the AC adapter to the DC connector.
.
3
Plug in the power.
.
USER
AC Adapter To
AC Outlet
(110 V to 240 V)
0
The charging lamp blinks when charging is in progress.
It goes out when charging is finished.
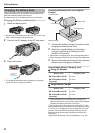
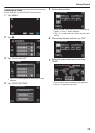
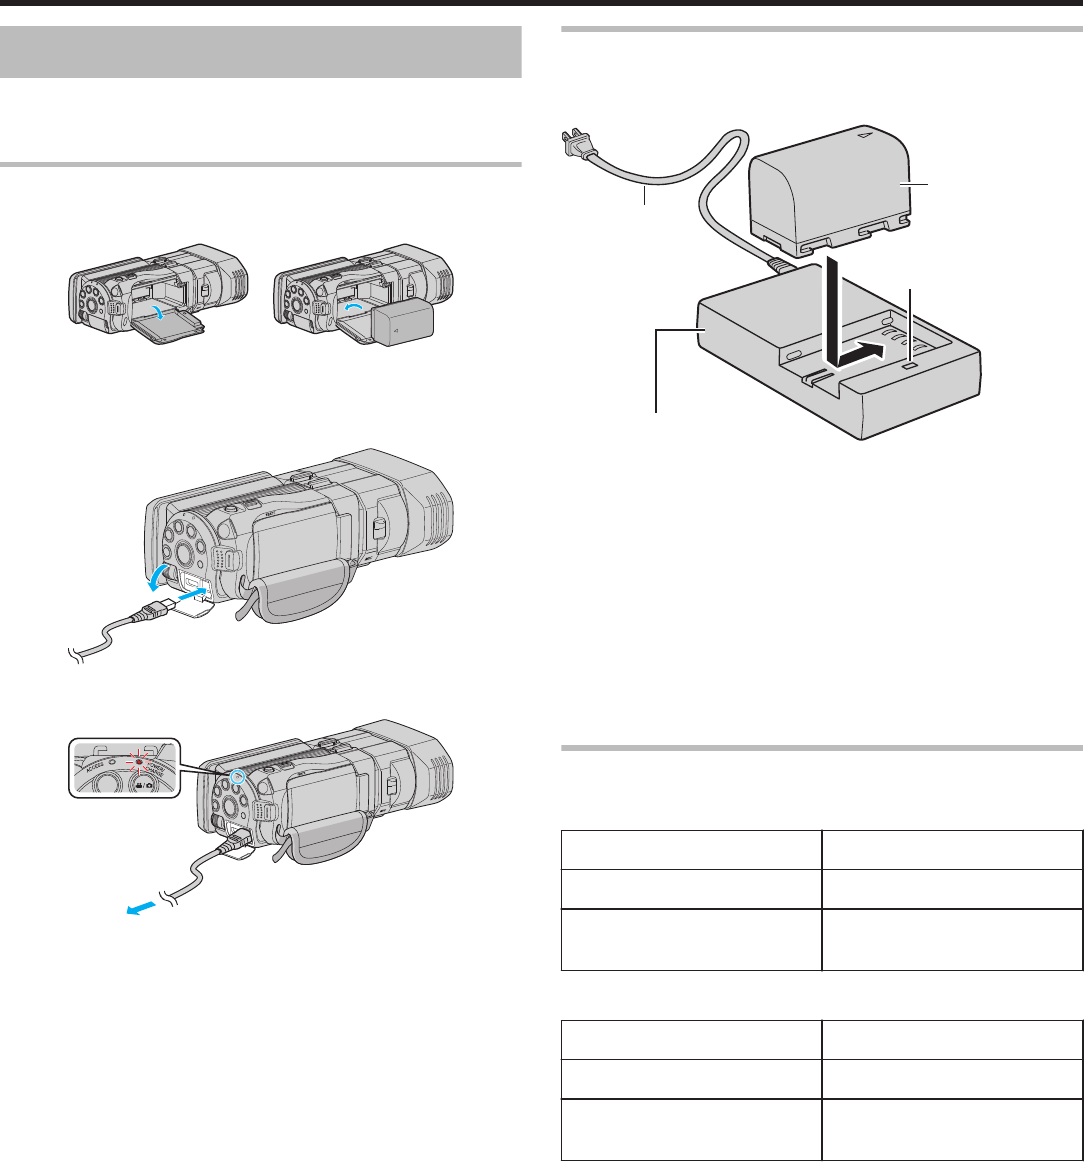
Charging the Battery with the Supplied
Charger
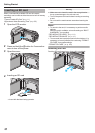
.
Battery Charger
To Power Outlet
Battery Pack
Indicating Lamp
Power Cord
1
Connect the battery charger to a power outlet
using the provided power cord.
2
Attach the supplied battery to the battery
charger by pressing and sliding it in the
direction of the arrow.
0
When battery charging starts, the indicating lamp blinks.
0
When charging is complete, the indicating lamp lights up.
3
Remove the battery by sliding it in the opposite
direction after charging is complete.
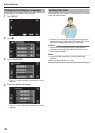
Approximate Battery Charging Time
o
Using AC Adapter
Battery Pack Charging Time
BN-VF815U/BN-VF815E 2 h 40 m
BN-VF823U/BN-VF823E
(Supplied)
3 h 40 m
o
Using Battery Charger
Battery Pack Charging Time
BN-VF815U/BN-VF815E 1 h 50 m
BN-VF823U/BN-VF823E
(Supplied)
2 h 30 m
0
When the battery life is reached, the recording time
becomes shorter even if the battery pack is fully charged.
(Replace the battery pack with a new one.)
* The charging time is when the unit is used at 25°C. If the
battery pack is charged outside the room temperature range
of 10°C to 35°C, charging may take a longer time or it may
not start. The recordable and playable time may also be
shortened under some usage conditions such as at low
temperature.
“Approximate Recording Time (Using Battery)” (A p. 56)
Getting Started
8