41
ENGLISH
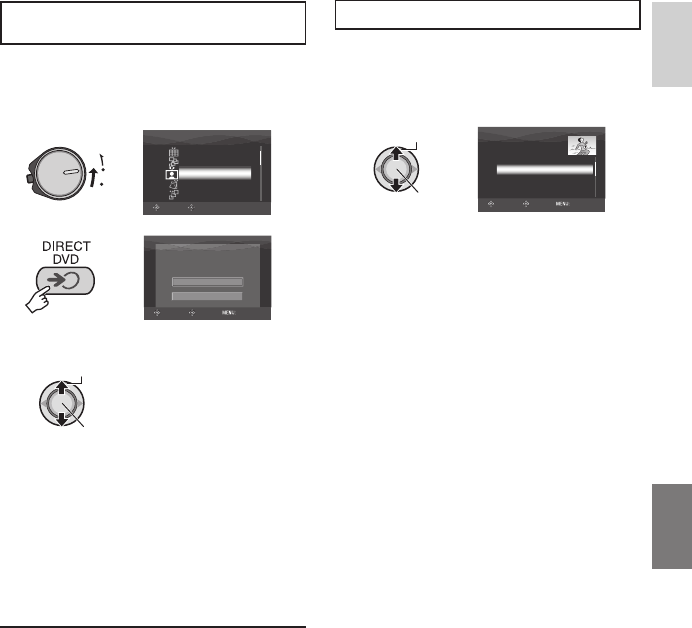
Copying Only the Newly Taken Video
Files
Files that have never been copied to the DVD
discs are automatically selected and copied.
1 Set the power/mode switch to ON.
MODE
OFF
ON
QUIT
CREATE DVD
SELECT FROM SCENES
ALL SCENES
SELECT FROM EVENT
SELECT FROM DATE
SELECT FROM PLAYLIST
SELECT
SET
2
DVD-RW
TIME REQUIRED: 45 MIN.
ALL WILL
BE CREATED
EXECUTE
CANCEL
SELECT
SET QUIT
3 Select [EXECUTE].
Select
Set
•
The DVD disc begins to be created.
When [COMPLETED] appears, press
down the set lever to complete the
operation.
•
When [COMPLETED. CHANGE DISC]
appears, change the disc. The second
DVD disc begins to be created.
•
To cancel the DVD creation, select
[CANCEL].
8 To exit the screen
Press MENU, then move the set lever to
/ to select [EXECUTE] and press
down.
Selecting and Copying Video Files
After performing step 1 (੬ left column)
2 Select an item and display the DVD
Creation List for the fi les to be
copied.
Select
Set
DVD CREATION LIST
ALL
DVD1 01.01.2007 12:04
DVD2 01.02.2007 12:04
01.01.2007 12:15
01.02.2007 12:15
SELECT
SET QUIT
•
[SELECT FROM EVENT]:
Search for an event and display the
corresponding fi les listed by recording
date.
Move the set lever to / / / to
select the event, then press down.
•
[SELECT FROM DATE]:
Display the fi les recorded on selected
dates listed by recording date.
Move the set lever to / to select the
recording date, then press down.
•
[SELECT FROM PLAYLIST]:
Register a created playlist. (੬ pg. 34)
Playlists are displayed in a list in the
selection order.
1) Move the set lever to / to select
the desired list, then press down. To
select other lists, repeat this process.
2) Move the set lever to twice.
•
[CREATE DUPLICATE]:
Create a DVD disc identical to the one
created last time. The last creation date
is displayed. (Up to 20 fi les)
Move the set lever to / to select the
date, then press down.
•
[SELECT FROM SCENES]:
Register a fi le individually. Files are
displayed in a list in the selection order.
1) Move the set lever to / to select
the desired fi le, then press down. To
select other fi les, repeat this process.
2) Move the set lever to twice.
•
[ALL SCENES]:
Display all fi les individually.
Make sure to read “Disc number”
(੬ pg. 42) before proceeding to the next
procedure.
Continued on next page


