18 EN
GETTING STARTED
MasterPage: Body_Left
The recording start date/time is recorded on the
video/still image file and it can be checked by
pressing INFO/ during playback.
(੬ pg. 24, 29)
In addition, you can find the desired file by the
date index screen. (੬ pg. 30)
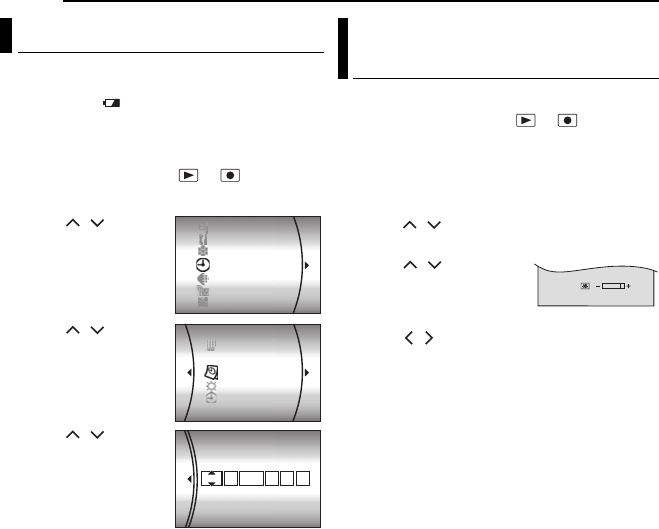
1 Set the power switch to or .
2 Press MENU. The menu screen appears.
3 Press / to
select [DISPLAY], then
press 49.
4 Press / to
select [CLOCK
ADJUST], then press
49. The month is
highlighted.
5 Press / to input
the month, then press
49. Repeat to input the
day, year, hour and
minute.
6 Press MENU to
return to the normal screen.
Built-in Clock’s Rechargeable Lithium
Battery
If the camera is not used for approx. 3 months,
the clock’s lithium battery will become
discharged and the date/time stored in memory
will be lost. When this occurs, first connect the
camera to an AC outlet using the AC adapter for
over 24 hours to charge the clock’s rechargeable
lithium battery. Then perform the date/time
setting before using the camera.
Note that the camera can be used without
setting the date/time.
The brightness of the display can be adjusted.
1 Set the power switch to or while
pressing down the lock button located on the
switch.
2 Open the LCD monitor fully. (੬ pg. 9)
3 Press MENU. The menu screen appears.
4 Press / to select [DISPLAY], then press
49.
5 Press / to select
[BRIGHT], and press 49.
The brightness control
indicator appears.
6 Press / until the appropriate brightness
is reached.
7 Press 49 to clear the brightness control
indicator from the display.
Date/Time Settings
CAMERA SETTING
BASIC SETTING
REC MEDIA SETTING
DISPLAY
QUALITY
WIDE MODE
WIND CUT
LANGUAGE
CLOCK ADJUST
BRIGHT
DATE/TIME
SCENE COUNTER
CLOCK ADJUST
JAN 31
AM
11 07:
DATE TIME
2005
Brightness Adjustment of the
Display
M5E6US.book Page 18 Tuesday, September 27, 2005 5:42 PM


