


EN 39
Master Page: Right-Heading0
GR-DVP7-5EG_37-79.fm Page 39
RECORDING MENUS
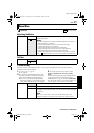
3) Press SET/SELECT. Selection is complete.
● Repeat the procedure if you wish to set other
function menus.
4) Press SET/SELECT. The Menu Screen returns.
● Repeat the procedure if you wish to set other
function menus.
5) Press SET/SELECT again. The Menu Screen
closes.
NOTES:
● The “m CAMERA” settings are effective when the
Power Switch is set to both “A” and “M”.
However, the menu settings can be changed only
when the Power Switch is set to “M”.
● The “q MANUAL” settings are effective only
when the Power Switch is set to “M”.
● The “s SYSTEM” and “n DISPLAY” functions
which are set when the Power Switch is set to “M”
are also applied when the Power Switch is set to
“P”. The “CLOCK ADJ.” menu only appears
when the Power Switch is set to “M”.
● The “n DISPLAY” settings are effective even
when the Power Switch is set to “A”. However,
the menu settings can be changed only when the
Power Switch is set to “M”.
● The date indication can also be turned on/off by
pressing the DISPLAY Button on the remote
control (provided). (੬ pg. 25, 62, 74)
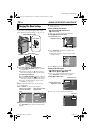
These effects let you make pro-style scene
transitions. Use them to spice up the transition from
one scene to the next.
IMPORTANT:
Some Wipe/Fader Effects cannot be used with
certain modes of Program AE with special effects.
(੬ pg. 41) If an unusable Wipe/Fader Effect is
selected, its indicator blinks in blue or goes out.
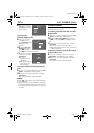
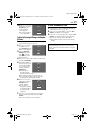
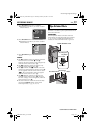
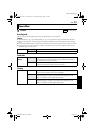
MODESNAP
ODEREC M SP
I
12
BTMODESOUND
ZOOM
UPGAI N
–
–
–
–
–
40
x
LFUL
AGC
NRETUR
OFFFADER/ IPE
AM AEPROGR
ACAMER
LMANUA
MSYSTE
DSC
END
AYDISPL
C
AN E
W
W
.BAL
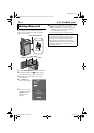
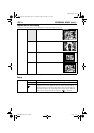
Wipe Or Fader Effects
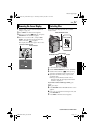
Power Switch
Lock Button
VIDEO/MEMORY
Switch
Recording Start/
Stop Button
MENU Button
SET/SELECT Button
+, – Button
CONTINUED ON NEXT PAGE
GR-DVP7-5EG_02-08.book Page 39 Thursday, February 28, 2002 11:39 AM