


EN53
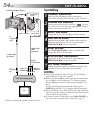
PLAYBACK
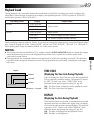
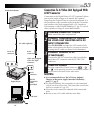
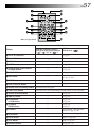
Video unit equipped
with a DV input
connector
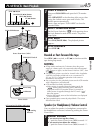
Connection To A Video Unit Equipped With
A DV Connector
Connection to the Digital Printer GV-DT3 (optional) allows
you to print out the images or to transfer the captured
image from the Digital Printer to a personal computer. It is
also possible to copy recorded scenes from the camcorder
onto another video unit equipped with a DV connector.
This function is called Digital Dubbing (੬ pg. 55), which
offers virtually no image or sound deterioration.
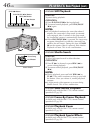
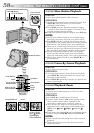
1
CONFIRM POWER-OFF STATUS
Make sure all the units are turned off.
2
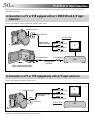
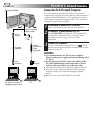
CONNECT CAMCORDER TO PRINTER
OR VIDEO UNIT EQUIPPED WITH DV
INPUT CONNECTOR
Press PUSH-OPEN and open the LCD monitor fully.
Make connections to the device you want to connect
to using the DV cable, as shown in the illustration.
3
CONNECT PRINTER TO PC
(IF NECESSARY)
Connect the JLIP-PC connection cable (provided) to
the printer's PC connector and the PC’s RS-232C
connector.
4
TURN ON POWER
Turn the camcorder's Power Switch to “ ”, “ ”
or “ ” while pressing down the Lock Button located
on the switch and turn on the other units.
NOTES:
●
It is recommended to use the AC Power Adapter/
Charger as the power supply instead of the battery
pack. (
੬
pg. 9)
●
For Digital Dubbing, this camcorder can be connected
only to one device at a time. This camcorder can also be
used as a recorder (
੬
pg. 55).
●
Also refer to the instruction manuals of the connected
units.
●
Be sure to use a DV cable with the noise filter.
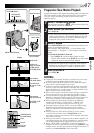
To DV IN/OUT
To DV
connector
Digital Printer
To DV IN
connector
PC
DV cable (optional)
PUSH-OPEN Button
To PC
connector
JLIP-PC
connection
cable
(provided)
To RS-232C