


E-20
CONNECTION/INSTALLATION
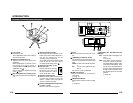
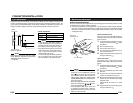
Lens adjustment
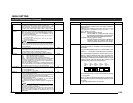
ALC
LEVEL
Av Pk
L H
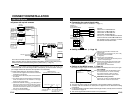
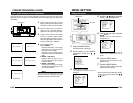
Connect the camera according to the connection method, turn it on, display an image on the
monitor, and check the image. The camera has been factory-adjusted to the best position, but
it may need to be adjusted according to the object conditions or combination of lenses. If the
image is unnatural, adjust it as follows: (Also read the instruction manual of the lens.)
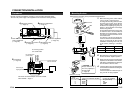
• LEVEL adjustment
Monitor screen
LEVEL turning direction
Too bright Counterclockwise (Toward L)
Too dark Clockwise (Toward H)
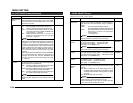
MEMO
• If the sensitivity adjustment LEVEL is
turned excessively to L, the sensitivity in-
creases because of the AGC function of
the camera, and the image looks grainy.
• If the video iris lens is set to too low a level,
malfunction such as the hunting phenom-
enon, in which the iris opens or closes
unintentionally, may occur.
In such a case, first set LEVEL potentiom-
eter on the lens to the H (iris open) posi-
tion then adjust it to the optimum level.
LEVEL
adjustment
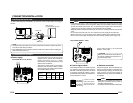
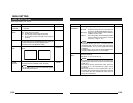
ALC adjustment
(Does not operate.)
MEMO
Note that the lens cannot make ALC adjust-
ments. Make ALC adjustments using the item
AVERAGE: PEAK on the menu.
(੬ Page 26)
E-21
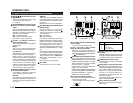
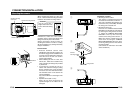
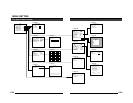
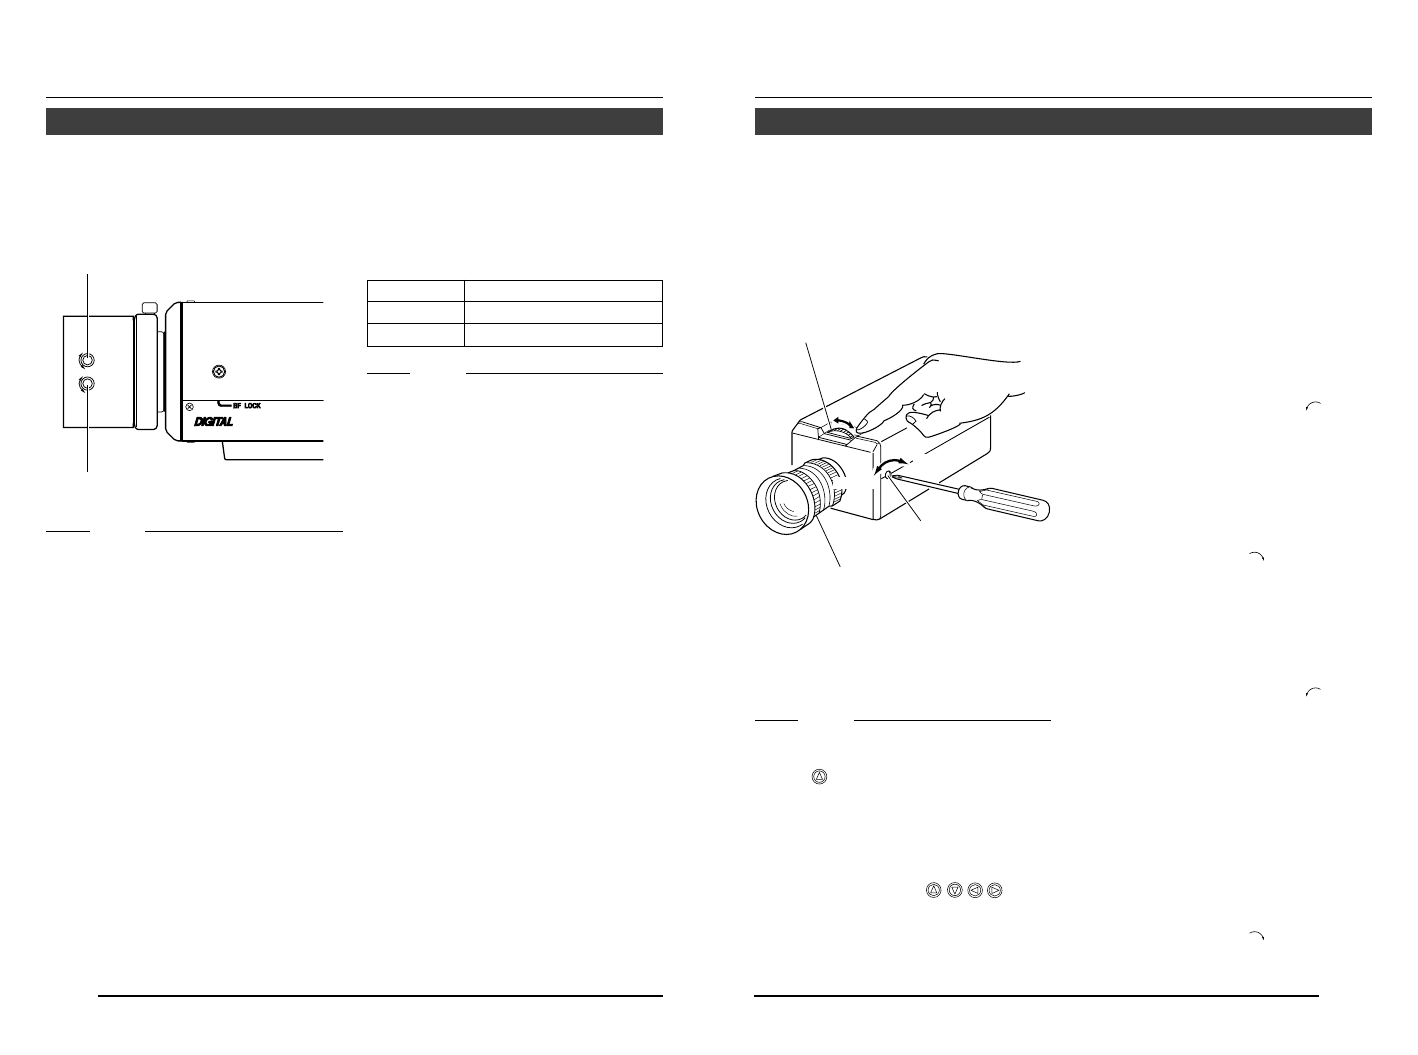
Back focus adjustment
• With a fixed-focus lens
If the focus can not be adjusted correctly by
rotating the lens focus ring, adjust the back
focus as follows.
1.
Loosen the back focus locking screw by
turning it counterclocckwise (
) with a
screwdriver.
2.
Shoot a pattern closely.
3.
Turn the lens focus ring to ϱ.
4.
Turn the back focus adjustment ring to
focus at the best point.
5.
Tighten the back focus locking screw by
turning it clockwise (
).
• With a zoom lens
If the image is out of focus when zooming
(telephoto wide-angle), adjust the camera as
follows:
1.
Loosen the back focus locking screw by
turning it counterclocckwise (
) with a
screwdriver.
2.
Shoot a comparatively dark scene with
thin lines.
3.
Set the lens to the maximum telephoto
position, and adjust the lens focus.
4.
Set the lens to the maximum wide-angle
position, and turn the back focus ring to
adjust the focus.
(Repeat steps
3.
and
4.
two or three
times.)
5.
Tighten the back focus locking screw by
turning it clockwise (
).
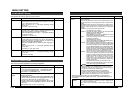
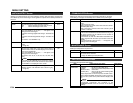
Ⅲ Back focus adjustment
Be sure to make back-focus adjustments when changing the lens mounting method or using
a different lens. If required, adjust it as follows:
● To make accurate back focus adjustments, use the electronic shutter and the ND filter,
and carry out the following adjustments in a state where the lens iris is released. (The ND
filter acts to reduce the amount of incident light entering the lens evenly over the entire
wavelength band.)
MEMO
• LENS FOCUS ADJUSTMENT MODE
At the time of focus adjustment, press the
button
at the side of the unit for at least
one second to open the lens iris and to fa-
cilitate focusing. At this time, “LENS FOCUS
ADJUSTMENT MODE” will be displayed on
the monitor screen.
When the adjustment has been completed,
press one of the buttons
to can-
cel focus adjustment mode.
•Focus setting can differ on the colour and
on the black and white screen. Make ad-
justments so that the focus will come to the
optimum on both screens.
Back focus locking
screw (M2.6)
Back focus
adjustment ring
Lens focus ring
BF
LOC
K
Tighten
Loosen