


25
Appendix 1: Installing the HDD
NOTE: The HDD has the same purpose in a DXR109 as a videocassette does in a VCR. However, installing the HDD is a bit
more complicated. Please follow the next steps carefully in order to ensure proper installation.
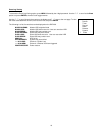
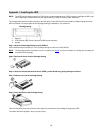
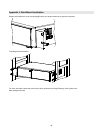
The compartment (with the handle) located on the front panel of the DXR109 is the removable Cartridge Casing where the
HDD is inserted. The various parts of the Cartridge Casing are labeled for your reference.
1. Keyhole
2. LED indicator lights (Power indicator & HDD Access indicator)
3. Handle
Step 1: Remove the Cartridge Casing from the DXR109
Lift the Handle and pull towards you. The Cartridge Casing will slide out of the DXR109.
NOTE: The Cartridge must be unlocked to remove it, (please see step 8 for more information on locking and unlocking the
removable HDD cartridge).
Step 2: Remove the Cover from the Cartridge Casing
Step 3: Unclip the release latch with the word “OPEN,” printed beside it by gently pushing on the latch.
Step 4: Slide the cover off the Cartridge Casing.
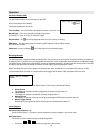
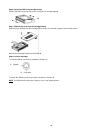
Step 5: Insert the HDD into the Cartridge Casing
Take the Hard Disk Drive and connect the two cables from the back of the Cartridge Casing to the HDD.
The cables should be pushed in firmly, but not forcibly.
Cartridge Casing