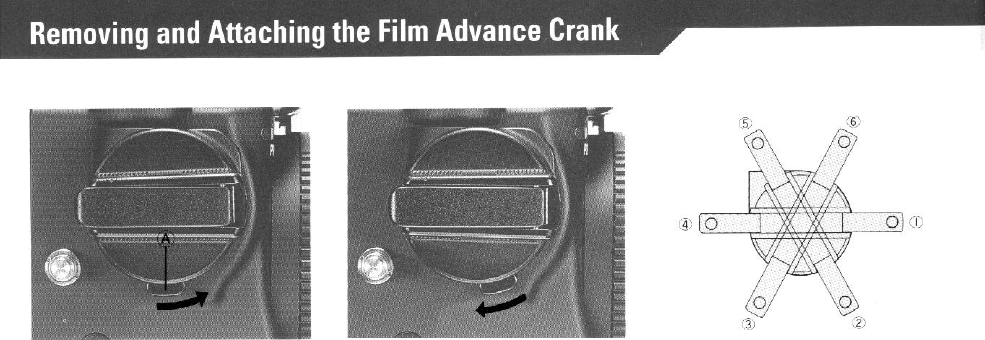
Removing the Crank
Push
the
lock Lever (A) on its bottom
in a forward direction as far as
it
will
go (see illustration).
Attaching the Crank
With the flat part, having a White You may choose six different crank
Index Line, on top, line the Crank up
starting positions to suit
your
prefer-
against its mounting plate on the side
ence.
The orientation of the crank
of the body and push Film Advance
proper against its base, before it is
Crank Lock Lever backward.
attached to the camera, will be
maintained when the entire assem-
bly is locked into place.
13


