


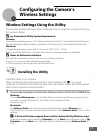
Configuring the Camera’s Wireless Settings
17
m Configuring a Network Profile
Enable connection of the camera to the Internet via a wireless LAN access point. Use the
Utility to apply the same network settings used by the wireless LAN network to the camera.
Up to ten network profiles to connect can be registered.
If using complimentary Wayport subscription, a network profile has already been
configured with the camera. Be sure to proceed to “n Entering my Picturetown User
Information” (A 20) (in the United States only).
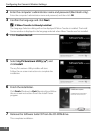
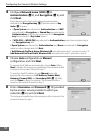
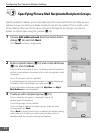
1 Choose Add Network Profiles from the Select
Action dialog (A 16) and click Next.
Click Cancel to cancel configuration.
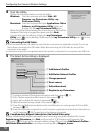
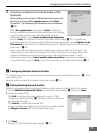
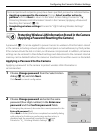
2 Choose the type of network profile and click Next.
If configuring a home wireless LAN profile, choose
Add Network
Profile at Home Wireless LAN
. If configuring a public wireless LAN
profile, choose
Add Network Profile at Public Wireless LAN
.
See “Public Wireless LAN” (A iv) for more information on countries
in which public wireless LANs can be accessed by, and the wireless
service providers that support connection of, this camera.
• Windows:
If Add Network Profile at Home Wireless LAN is selected,
proceed to step 3.
If Add Network Profile at Public Wireless LAN is selected,
proceed to step 4.
• Macintosh:
Proceed to step 4.
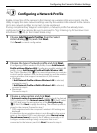
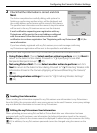
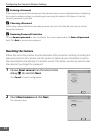
3 Choose a setup option and click Next.
If Automatic setup (recommended) is selected and the desired
SSID is displayed in the Network name (SSID) (A 9) field*, select
the SSID and enter the encryption key in the Encryption key
(A 9) field. Click Next to apply the setting. The network profile is
stored in the camera. Proceed to step 7.
* SSIDs registered with the computer’s wireless LAN settings are
displayed.
If connection by any wireless device is not allowed by the access
point, or the desired SSID is not detected, select Manual setup
(for advanced users) to specify the IP address manually, or to
configure wireless settings using a computer that is not
connected to the Internet, and click Next. Proceed to step 4.