BASIC
OPERATION
_______
_
Steps 1
to
3 are divided into three
sections, according to shooting con-
ditions: A for normal visible light, B
for
UV
rays
and
C for infrared rays.
A -
For
automatic
flash
photography
in
normal
visible
light
8-
For
flash
photography
in
UV
rays
C-
For
infrared
flash
photography
22
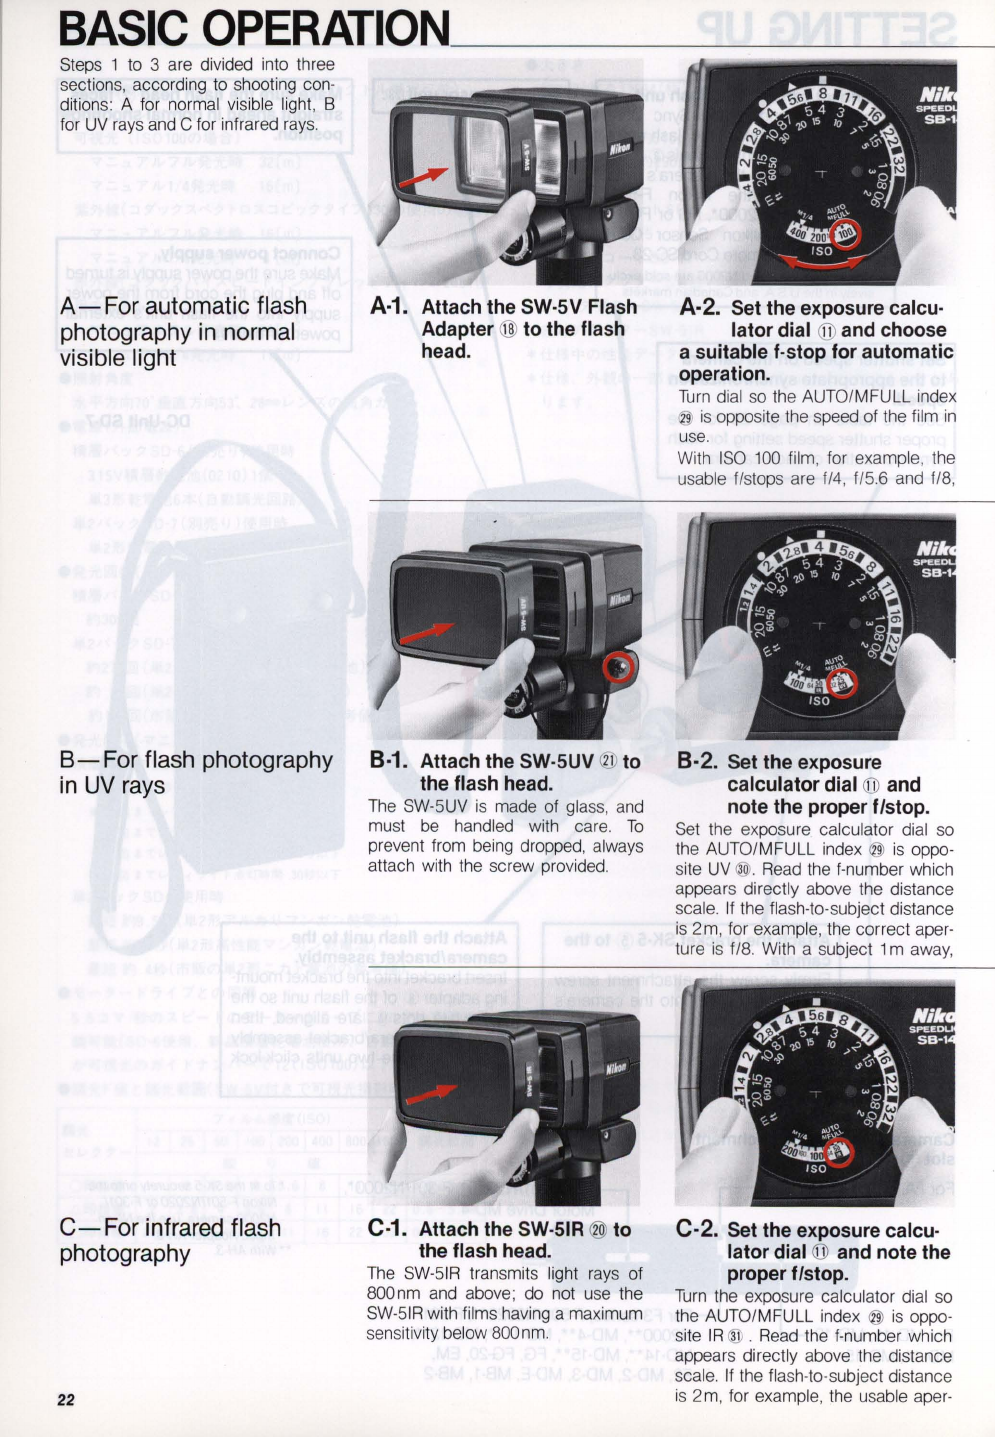
A·1.
Attach the SW·5V Flash
Adapter
@ to the flash
head.
B·1.
Attach the SW·5UV 1 to
the flash head.
The
SW-5UV
is
made of glass,
and
must
be
handled with care.
To
prevent from being dropped, always
attach with the screw provided.
C·1.
Attach the SW·5IR 0 to
the flash head.
The
SW-5
IR transmits light rays of
SOOnm
and
above; do not
use
the
SW-5IR
with films having a maximum
sensitivity below
SOOnm
.
A·2. Set the exposure calcu·
lator dial
(jJ)
and choose
a suitable f·stop for automatic
operation.
Turn
dial
so
the AUTO/MFULL index
@
is
opposite the speed of the film
in
use.
With
ISO
100
film, for example, the
usable flstops are
fl4, f/5.6 and
f/S,
B·2. Set the exposure
calculator dial
(jJ)
and
note the proper f/stop.
Set the exposure calculator dial
so
the AUTO/MFULL index @
is
oppo-
si
te
UV
®.
Read
the f-number which
appears directly above the distance
scale. If the flash-to-subject distance
is
2 m, for example, the correct aper-
ture
is
f/S.
With a subject 1 m away,
C·2. Set the exposure calcu·
lator dial
(jJ)
and note the
proper f/stop.
Turn
the exposure calculator dial
so
the AUTO/MFULL index 9
is
oppo-
site IR
3 .
Read
the f-number which
appears directly above the distance
scale.
If
the flash-to-subject distance
is
2m, for example, the usable aper-


