


34 (E)
Shooting techniques for different targets (cont.)
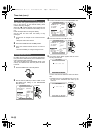
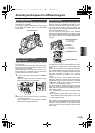
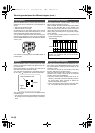
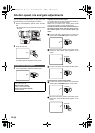
When the ZEBRA button is pressed, parts that may be
whitened out due to overexposure can be displayed in
stripes.
• Parts that are extremely bright
• Parts that reflect a lot of light
By adjusting the iris and shutter speed in the manual
mode to remove the areas with zebra patterns, you can
obtain images with minimal whitened-out areas.
You can set the brightness level at which the zebra pat-
terns are to be displayed by using the menus (P62-64)
and the ZEBRA DETECT item on the DISPLAY SETUP
screen. (
P71)
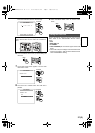
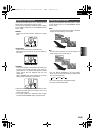
The markers are displayed when the ZEBRA button is
pressed again.
When the ZEBRA button is pressed again while zebra
patterns are displayed, markers will appear at the cen-
ter of the screen.
When these markers are displayed, the video level is
indicated at the bottom left of the screen.
The video level is displayed as a percentage from 0 to
99, and “99% ” appears when the level exceeds 99.
The regular screen is restored when the ZEBRA button
is pressed again.
• The video level and video level detection area will not
be displayed when the digital zooming is performed.
(
P31)
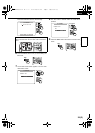
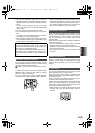
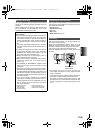
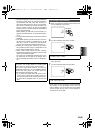
This camera-recorder normally shoots scenes using
field recording (60 fields per second).
When “FRAME” has been selected as the REC MODE
setting for the SETTING item on the SCENE FILE
screen using the menus (P62-64), scenes can be shot
using frame recording (30 frames per second). (P66)
When playing back still pictures, high-quality images
can be obtained.
• If normal (moving image) playback is performed, the
images will appear jerky.
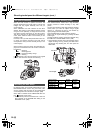
When “ON” has been selected as the ONESHOT REC
item setting on the RECORDING SETUP screen using
the menus (P62-64), frame-by-frame shooting can be
performed. (P70)
The number of seconds for the shooting is set using
the REC TIME item on the same screen.
When the START/STOP button is pressed, shooting is
initiated for the number of seconds set, and then the
shooting pause mode is established.
• When the frame-by-frame shooting mode is set, an
asterisk (∗) at the left of the VCR’s operating mode on
the screen blinks. When recording is started, the
asterisk stops blinking and lights.
• Even if the frame-by-frame shooting mode has been
set, it is cancelled when the power is turned OFF.
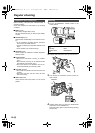
Zebra pattern
Markers
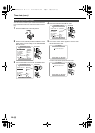
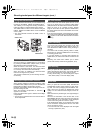
CH1
CH2
AUDIO LEVEL
REC
MODE CHKSNS
OISZEBRA
RESETCOUNTER
ZOOM SPEED
OFF/M
H
L
AUDIO IN
FRONT
REAR
CH1 CH2
MIC
MIC
LINE
RESET
V=V
Video level detection area
Markers
Video level
Field and frame shooting
When you are going to shoot scenes using frame
recording, we recommend that you set the shutter
speed to 1/50. (
P38)
Frame-by-frame shooting
AoAeBoBeCoCeDoDeEoEeFo FeGoGeHoHe Io Ie Jo Je
ABCDEFGHI J
Field recording
Frame recording
AG-DVC60E_En.fm 34 ページ 2004年9月2日 木曜日 午後1時43分