


35
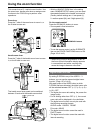
Basic Operations
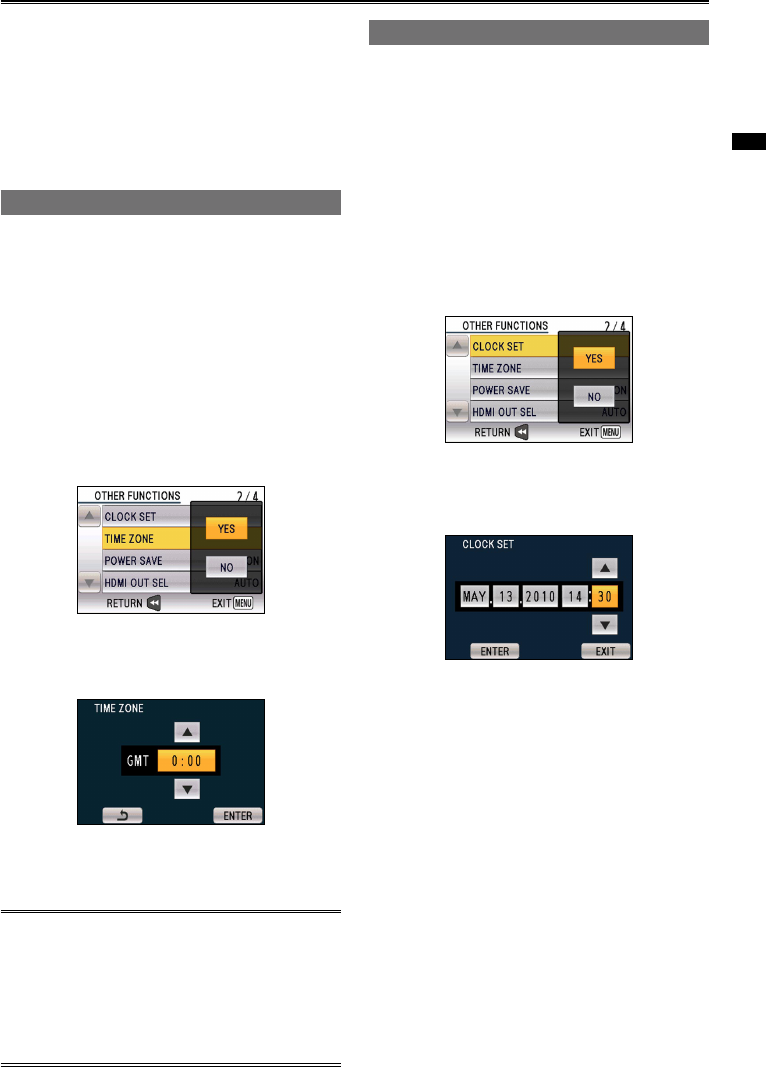
The CLOCK SET value is recorded in the contents
(clip), and affects the sequence of playback of the
thumbnails. The “SET DATE AND TIME” message
appears when you turn on the camera for the first
time. Before carrying out recording, be sure to
check and set CLOCK SET and TIME ZONE. This
shows you how to adjust the calendar to 14:30 on
May 13, 2010.
Setting the time zone
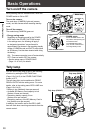
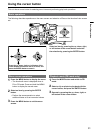
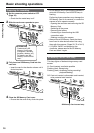
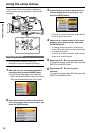
1
Set the POWER switch to ON. (Page 30)
2
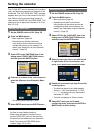
Press the MENU button.
Menu operation (Page 40)
Operations may also be performed
using buttons on the remote control that
correspond to those on the camera. For
details, see “Description of parts (Remote
control)”. (Page 23)
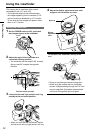
3
Select YES for the TIME ZONE item in the
setting menu OTHER FUNCTIONS screen,
and then press the ENTER button.
4
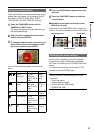
Press the up or down of the cursor button to
select the difference from Greenwich Mean
Time.
The factory default setting is +0:00.
5
Select ENTER and press the ENTER button.
The clock can vary in accuracy, so check that
the time is correct before shooting.
When using the camera overseas, do not
set the CLOCK SET option to the local time,
but enter the time difference from Greenwich
Mean Time using the TIME ZONE option
instead. (Page 111 of Vol.2)
•
•
•
•
•
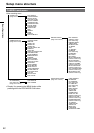
Setting the calendar
Setting the clock
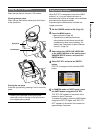
1
Set the POWER switch to ON. (Page 30)
2
Press the MENU button.
Menu operation (Page 40)
Operations may also be performed
using buttons on the remote control that
correspond to those on the camera. For
details, see “Description of parts (Remote
control)”. (Page 23)
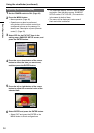
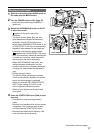
3
Select YES for the CLOCK SET item in the
setting menu OTHER FUNCTIONS screen,
and then press the ENTER button.
4
Select the item you want to set with the left
or right button of the cursor button, and
press up or down to set numerical values.
5
Repeat the procedure from step 4 to set the
remaining items.
The date can be set to any date between
January 1, 2010 and December 31, 2036.
“--.--.----” is displayed for any date beyond
December 31, 2036.
The time is displayed in 24-hour format.
6
Select EXIT when you are finished
configuring items, and press the ENTER or
MENU button to finish setting.
•
•
•
•
•