


–31–
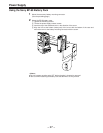
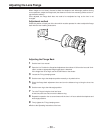
Adjusting the White Shading
The AJ-D400 is adjusted for the Fujinon S14q7.5 BRM4 and CANON YH14q7.3 KRS lenses
when shipped from the factory. If a lens other than these two lenses is to be used, adjusting the
white shading before shooting is recommended.
The AJ-D400 is able to adjust the white shading for vertical coloring.
(Vertical coloring refers to the condition where the top of the screen is green and the bottom is
magenta or where these colors are reversed when a white paper is shot for the entire screen.)
White shading adjustment procedure
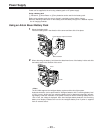
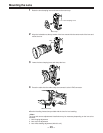
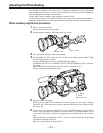
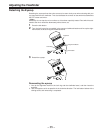
1 Mount a lens to the camera.
Be sure to also connect the lens cable.
2 Set the electronic shutter to OFF and the gain to L (0 dB).
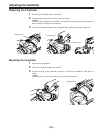
3 If the lens has an extender, remove the extender.
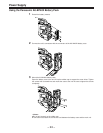
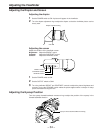
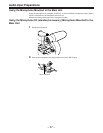
4 Set the MENU SET/OFF switch from OFF to SET while holding down the SHIFT/ITEM
and UP buttons to open the menu.
Press the PAGE button until the VF OPERATION page appears.
Set ZEBRA1 DETECT to 70, ZEBRA2 DETECT to 85 and ZEBRA2 to SPOT. (Initial set-
ting mode)
Return the MENU SET/OFF switch from SET to OFF to close the menu.
Set the viewfinder’s ZEBRA switch to ON.
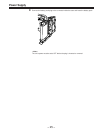
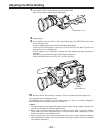
5 Shoot an evenly white paper.
Flickering occurs easily when fluorescent or mercury lamps, etc. are used for lighting.
Therefore, use a light source which does no produce flickering such as sunlight or halo-
gen lamps, etc.
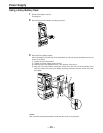
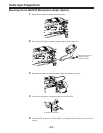
6 Set the lens iris to manual and adjust the iris so that the ZEBRA pattern covers the entire
screen. If the light strikes the subject in an uneven manner, the ZEBRA pattern will not
cover a part of the screen. Therefore, adjust the position of the light source, etc. as neces-
sary.
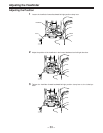
Check that the lens iris is between F4 to F11. If the lens iris is not within this range, adjust
the position of the light source, etc.
(Be sure to set the electronic shutter to OFF.)
GAIN: L (0 dB)
SHUTTER: OFF
SHIFT/ITEMoUP
MENU
PAGE