


-6-
INSTALLATION
Important Notices:
• The following installation should be made by
qualified service personnel or system installers
and should confirm to all local codes.
• Be sure to use a ceiling board having enough
strength to support this camera.
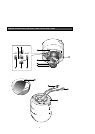
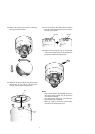
1. Mounting the camera fixing bracket
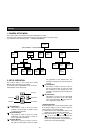
1-1. Make a hole (diameter 75mm) in the ceiling
board in the desired location.
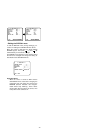
1-2. Fix the camera fixing bracket onto the ceiling
board by using four camera fixing bracket
mounting screws (not provided).
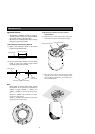
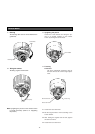
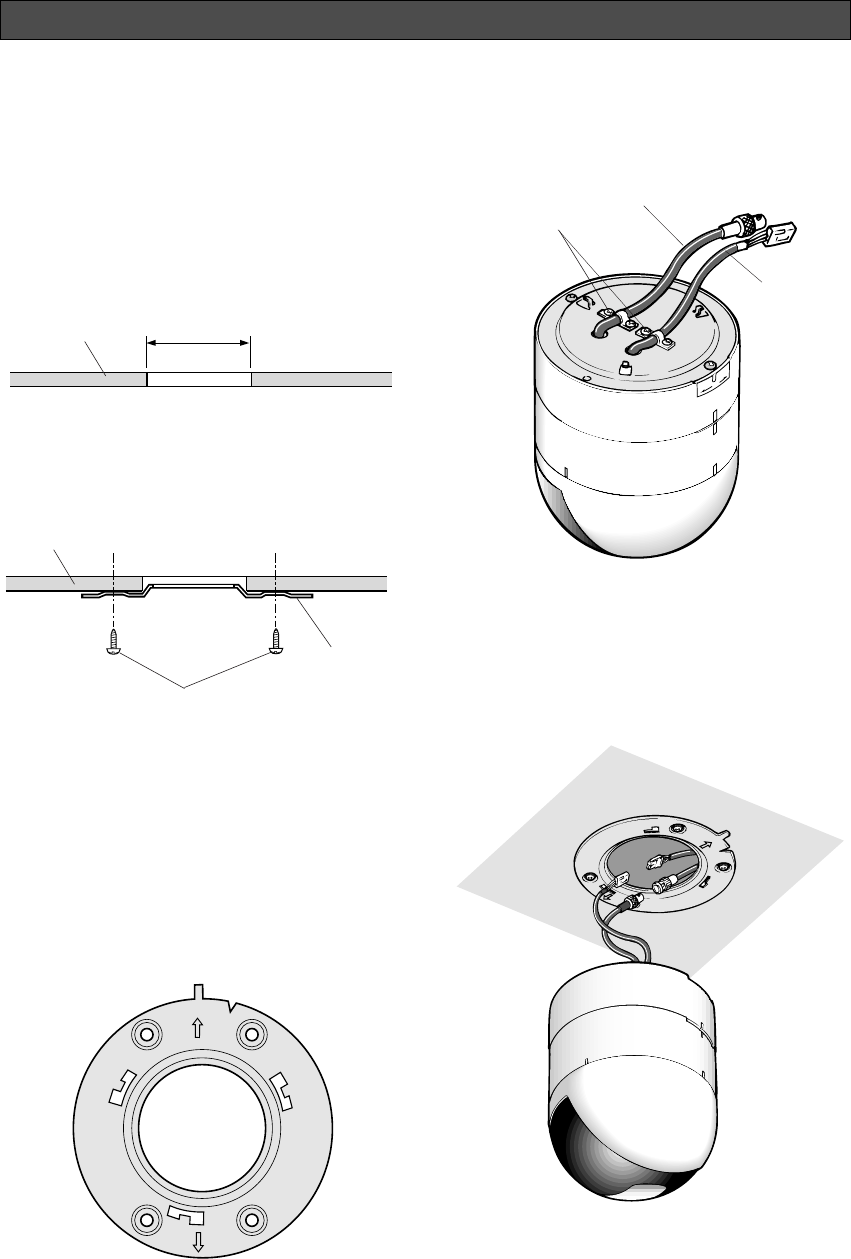
Note:
Before fixing the bracket with screws, confirm
the direction of the camera by checking the
position of signs “FRONT g UPPER” and
“REAR g LOWER” on the camera fixing brack-
et.
“FRONT g UPPER” sign indicates the direc-
tion of the camera head.
“REAR g LOWER” sign indicates the direction
opposite to the camera head.
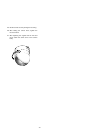
2. Mounting the camera onto the camera
fixing bracket
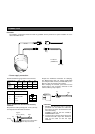
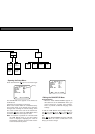
2-1. Make sure the video output cable and power
cable are fixed by the coaxial cable clamps.
2. Pass the video output cable and power cable
through the hole in the camera fixing bracket,
and connect as described in the previous sec-
tion “CONNECTION.”
REAR LOWER
FRONT UPPER
O
P
E
N
LO
C
K
ø75 mm (ø2-15/16”)
Mounting hole
Ceiling board
Coaxial cable clamps
Power cable
Video output cable
Mounting screws (not provided)
Ceiling board
Camera
fixing angle