


120 VQT3G90 VQT3G90 121
Viewing on TV screen (Continued)
Keep the recorded still pictures and
motion pictures
The methods for copying still and motion pictures recorded with this camera to other
devices vary according to the file format (JPEG, MPO, AVCHD, Motion JPEG). Follow the
correct method for your device.
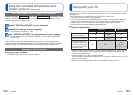
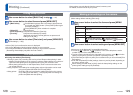
Copy by inserting the SD card into the recorder
Available file types:
Still picture
JPEG/
Motion picture
AVCHD
It is possible to copy onto Blu-ray disc, DVD disc, or hard disk by inserting an SD card
with still pictures and motion pictures recorded by this unit into a Panasonic Blu-ray Disc
Recorder or DVD Recorder.
Check the latest information about the equipment that can copy directly by inserting the SD card
recorded by this unit, and equipment that is compatible with high definition (AVCHD) on the following
website.
http://panasonic.jp/support/global/cs/dsc/ (This Site is English only.)
• See the instruction manual for the recorder for the details of copying and
playing back.
• Note that the equipment described may not be available in certain
countries and regions.
32
3232
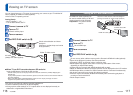
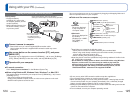
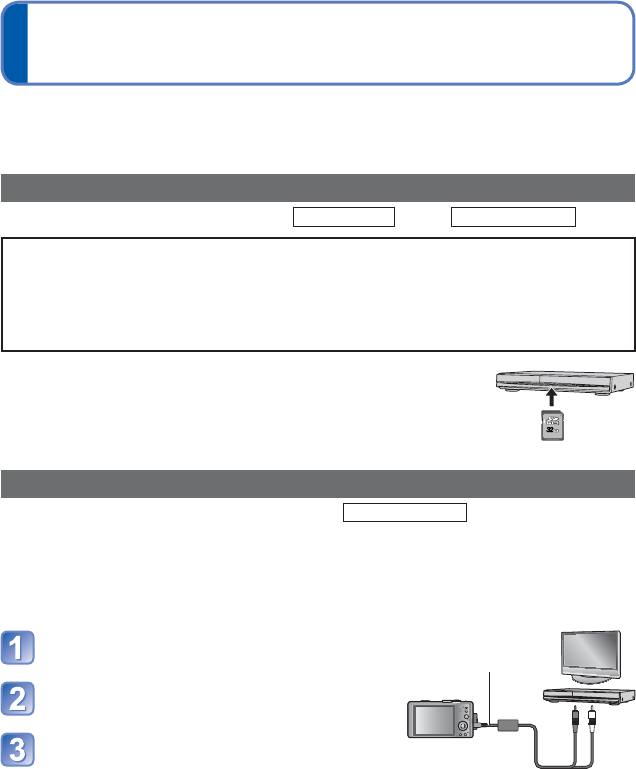
Dubbing playback pictures via AV cables
Available file types:
Motion picture
AVCHD, Motion JPEG
Videos that are played on this camera can be dubbed to media such as a DVD disc, hard
disk or video tape using a device such as a DVD recorder or video recorder. This method
is useful as it allows dubbing to be performed even with devices that are not compatible
with high definition (AVCHD) images. Picture quality will be reduced from high definition
to standard definition.
Connect camera to recorder
To recorder’s input socket
AV cable
(always use cable
supplied)
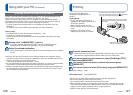
Start playback on camera
Start recording on recorder
• To stop recording (dubbing), stop the recording
on your recorder first before stopping the
playback on the camera.
●
Do not use any other AV cables except the supplied one.
●
When using a TV with a 4:3 aspect ratio, always change the camera’s [TV Aspect]
setting (→47) to [4:3] before dubbing. Motion pictures copied in the [16:9] setting will
appear vertically stretched when viewed on a 4:3 TV screen.
●
For details on dubbing and playback methods, refer to your recorder’s operating
instructions.
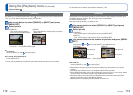
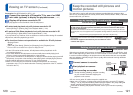
Preparation: Set [3D Playback] to [3D] (→47).
Connect the camera to a 3D-capable TV by use of an HDMI
mini cable (optional) to display the playback screen
(→117)
Display still pictures recorded in 3D
[3D] appears on the thumbnail of the 3D still pictures.
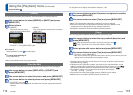
■
To select and play back only still pictures recorded in 3D
Select [3D Play] in [Filtering Play] of the Playback Mode (→104)
■
To perform Slide Show playback of only still pictures recorded in 3D
Select [3D Play] in [Slide Show] of the Playback Mode (→102)
If you experience any ill effects, such as tiredness or sickness while viewing 3D-recorded
still pictures, switch the playback type to 2D.
■
The functions that are not operational or available for 3D still pictures:
• Playback Zoom
∗
• Delete
∗
• [Title Edit], [Text Stamp], [Resize] and [Cropping] in the [Playback] menu
∗
These functions are available when a picture is displayed in 2D.
●
On the LCD monitor of this camera, 3D still pictures will be played back in 2D
(conventional pictures).
●
If you switch between 3D still pictures and normal still pictures while playing back
pictures, a black screen will be displayed for a few seconds.
●
If you select a thumbnail of 3D still pictures or display a thumbnail after playing back 3D
still pictures, it may take a few seconds to start playing back or displaying the pictures.
●
Viewing 3D still pictures too close to a TV may cause eyestrain.
●
When a TV has not been converted for viewing 3D still pictures, do necessary
preparation on the TV. (For details about the necessary preparation of the TV, read the
manual for the TV.)