


126 VQT3G90 VQT3G90 127
Using with your PC (Continued) Printing
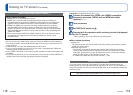
You can connect directly to a
PictBridge-compatible printer for
printing.
Getting Ready:
• Charge the battery sufficiently. Or,
connect the AC adaptor (optional) and
DC coupler (optional).
• When copying pictures from the
built-in memory, remove any memory
cards.
• Adjust the print quality or other
settings on your printer, as needed.
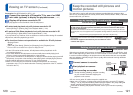
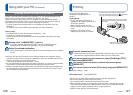
Connect camera to printer
• Please make sure you use the supplied USB connection cable. Use of cables
other than the supplied USB connection cable may cause malfunction.
Use cursor button on the camera to select [PictBridge (PTP)],
and press [MENU/SET]
Use cursor button to select a picture to print and press
[MENU/SET]
Use cursor button to select [Print start] and press [MENU/SET]
(Print settings (→129))
■
To cancel print Press [MENU/SET]
●
Do not use any other USB connection cables except the supplied one.
●
Disconnect USB connection cable after printing.
●
Turn off power before inserting or removing memory cards.
●
When the battery begins to run out during communication, a warning beep sounds.
Cancel printing and disconnect USB connection cable. Use a sufficiently charged
battery or an AC adaptor (optional) and DC coupler (optional).
●
AVCHD motion pictures cannot be printed.
Check socket direction and insert straight in.
(Damage to socket shape can lead to faulty
operation.)
• Do not disconnect the USB connection cable
when the cable disconnection icon
is displayed
(may not be displayed with some printers).
USB connection cable
(always use cable supplied)
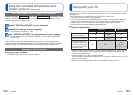
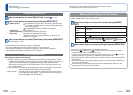
Uploading pictures to image-sharing websites
Using the uploading tool ([LUMIX Image Uploader]), you can upload still pictures and
motion pictures to image-sharing websites (Facebook or YouTube).
There is no need to copy pictures to your computer or install specialized software.
Uploading pictures from the camera is easy with a computer connected to a network,
even when you are away from your regular computing environment.
• This tool supports only computers that run on Windows XP, Windows Vista, and
Windows 7.
(To view the manual for [LUMIX Image Uploader], use Internet Explorer.)
Getting ready:
• Use [Upload Set] to select the pictures for uploading (→105)
• Connect your computer to the Internet
• Create an account for the applicable image-sharing website and prepare your login
information
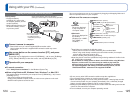
Double-click “LUMIXUP.EXE” to start it
• If you have installed “PHOTOfunSTUDIO” from the CD-ROM (supplied),
“Uploading tool ([LUMIX Image Uploader])” may start automatically.
Select the upload destination
• Do the further steps in accordance with the instructions displayed on the computer
screen.
●
Because YouTube and Facebook services and specifications are subject to change,
operation of online services cannot be guaranteed in the future. Available services and
screens are subject to change without notice.
(This service is available as of December 1, 2010)
●
Do not upload pictures protected by copyright except when you are the copyright holder
or permission has been obtained from the corresponding copyright holder.
●
Pictures recorded using the GPS function are uploaded to image-sharing websites with
the recorded place-name information intact. Be sure to confirm that it is okay to share
the information before uploading.