


231
Wi-Fi
[Send Images Stored in the Camera]
• When sending images on a mobile network, high packet communication fees may be incurred
depending on the details of your contract.
• Details of the playback menu [Favorite] or [Print Set] settings will not be sent.
• Some images taken with a different camera may not be able to be sent.
• Images that have been modified or edited with a computer may not be able to be sent.
1 Press [Wi-Fi].
2 Press 3/4 to select [New Connection], and then
press [MENU/SET].
•
When connecting with the setting you used before, you can
select the connection destination from [Select a destination
from History] (P214) or [Select a destination from Favorite]
(P215).
3
Press
3
/
4
to select [Send Images Stored in the Camera], and then press [MENU/SET].
4 Press 3/4 to select [Smartphone], and then press [MENU/SET].
5 Select the connection method. (below)
6 Press 3/4 to select a device you want to connect, and then press [MENU/SET].
•
When the connection is complete, the screen is displayed. To change the send setting,
press [DISP.]. (P224)
7
Press
3
/
4
to select [Single Select] or [Multi Select] and then press [MENU/SET].
• To change the setting or disconnect, press [Wi-Fi]. (P221)
8 Select and send the images. (P232)
∫ When you want to connect to the smartphone/tablet via a wireless access point
(On your smartphone/tablet)
1 On the setting menu of your smartphone/tablet, turn on the Wi-Fi function.
2 Select the wireless access point you want to connect to, and set.
3 Start “LUMIX LINK” on your smartphone/tablet.
¢
(P211)
(On the camera)
4 Press 3/4 to select [Via Network], and then press [MENU/SET].
5 Select the method for connecting to a wireless access point, and set.
•
Refer to P217 for details.
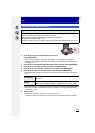
When sending images to smartphone/tablet
Preparations:
•
Install the “LUMIX LINK” in advance. (P211)
Selecting the method for connecting to the smartphone/tablet
ョㄏヒ
ヸㄊノョㄊ