C4655M (2/11) 59
Factory Default
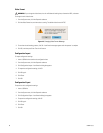
To return the unit to its factory default settings:
1. From the System menu, click the Properties submenu.
2. Click Factory Default. A confirmation dialog box appears.
3. To continue the factory default reset process, click OK.
4. Click Close.
5. Click OK.
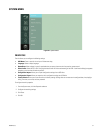
NETWORK
By default, the unit is configured to use Dynamic Host Configuration Protocol (DHCP). If a DHCP server does not reside on your network, the unit
allows you to use a static IP address. If the DHCP setting on the TCP/IP menu is set to OFF, you can configure the following settings:
• DHCP: Select this option when a DHCP server is installed on the network to allow IP address assignment. This assigns the IP address
automatically.
• IP Address: Enter the static IP address (if used by your network).
• Subnet Mask: Enter the IP address of the subnet mask.
• Gateway: Enter the IP address for the Internet gateway server. On smaller systems, this will be the IP address of the DX4700/DX4800. On
larger systems, there might be a gateway server.
• Primary DNS Server: Enter the IP address of the primary Domain Name System (DNS) server that the DX4700/DX4800 will use to convert
names to IP addresses. If you are using the DDNS server, you do not need to enter a DNS server.
• Secondary DNS Server: Enter the IP address of the backup DNS server that the DX4700/DX4800 will use. This server is used if the
primary DNS server fails.
• TCP/IP Port: Enter the port number. The default port number is 9001.
• Web Server Port: Enter the port number that the Web client will use to communicate with the DX4700/DX4800 over the Internet. The
default port number is 80.
NOTE: If you use the Web client to access the unit and you change the port number, you must include the new port number with the IP
address or the Web address. For example, the revised IP address would be http://192.168.0.40:8080, where 8080 is the revised port
number.
• Audio Port: Enter the port number. You can enter a port in the range of 1025 to 65535.
• Bandwidth Throttle: Select the network bandwidth throttle to limit the amount of network resources allocated to client connections.
The default bandwidth throttle is 100 Mbps.
The unit must be turned on, connected to a network, and you must be logged on at the administrator level to configure network settings. You
must restart the HVR for the network configuration changes to take effect; therefore, do not change network settings unless unit recording can
be interrupted.
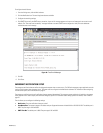
To configure the network settings:
1. From the System menu, click the Network submenu.
2. Select the DHCP setting.
• ON: Use a DHCP server. Skip to step 4.
• OFF: Use static IP address settings. Continue with step 3.
3. Configure the remaining settings.
4. Click Close.
5. Click OK.


