Pelco Manual C1423M-D (10/03) 11
5.0 DEFROSTER KIT INSTALLATION
This section provides instructions for installing the WD57-1, WD57-2, and WD57-3
defroster kits.
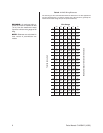
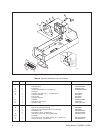
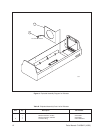
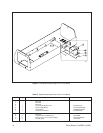
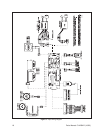
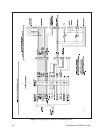
For the following instructions, refer to Figure 3. Table D lists the parts shown in
Figure 3.
1. Turn off power to the enclosure.
2. Unlatch and raise the enclosure lid. The gas spring will hold the lid in Place
when it is fully opened.
3. Remove the camera and sled.
4. If a heater is installed, remove the two screws and washers that hold the
heater bracket to the bottom of the enclosure. Lift the heater bracket up and
move it towards the back of the enclosure to get it out of the way while you
install the defroster.
5. Loosen the two nuts that hold the bottom window bracket. Leave the nuts
attached about 1-1/2 turns.
6. Position the window defroster inside the bottom window bracket with the metal
plate against the inside face of the window. Make sure the defroster wires are
in the lower left corner of the window.
7. Retighten the nuts that hold the bottom window bracket.
8. Remove the top window bracket and position the defroster against the win-
dow. CAUTION: Hold the enclosure lid when you remove the bracket because
the gas spring that holds the lid open is attached to the window bracket. The
lid could fall if you do not hold it open.
9. Replace the top window bracket.
10. Replace the heater bracket if it was removed.
11. Route the defroster wires between the track rail and the body of the enclo-
sure.
12. O/I-PCB Installed - If the circuit board for thermostatic control of the fan al-
ready is installed, complete the installation as follows:
a. Remove the plastic power supply barrier cover from the circuit board.
b. Connect the plug from the fan into the DEF socket on the circuit board.
c. Replace the plastic power supply barrier cover.
d. Reinstall the camera and sled.
e. Close the enclosure lid.
f. All defrosters use 30 watts of power. Make sure the wiring that supplies
power to your enclosure can handle this additional wattage.
g. Turn on power.
13. O/l PCB Not Installed - If the circuit board for thermostatic control of the
defroster is not installed, follow the steps in Section 6.0, CIRCUIT BOARD KIT
INSTALLATION, to complete the installation.
NOTE:
Window defrosters manufac-
tured after July 1998 have a metal
plate affixed to the defroster.


