4. Installation
Installing the camera software
The software supplied only works on PCs with the operating systems Microsoft
®
Windows
®
98SE, ME, 2000 and XP.
Notes!
– Unplug all your USB devices (except USB keyboard and USB mouse) before you start.
– Do not plug in your USB camera yet. Run the Installation CD-ROM first.
– Have your Windows
®
CD-ROM at hand.
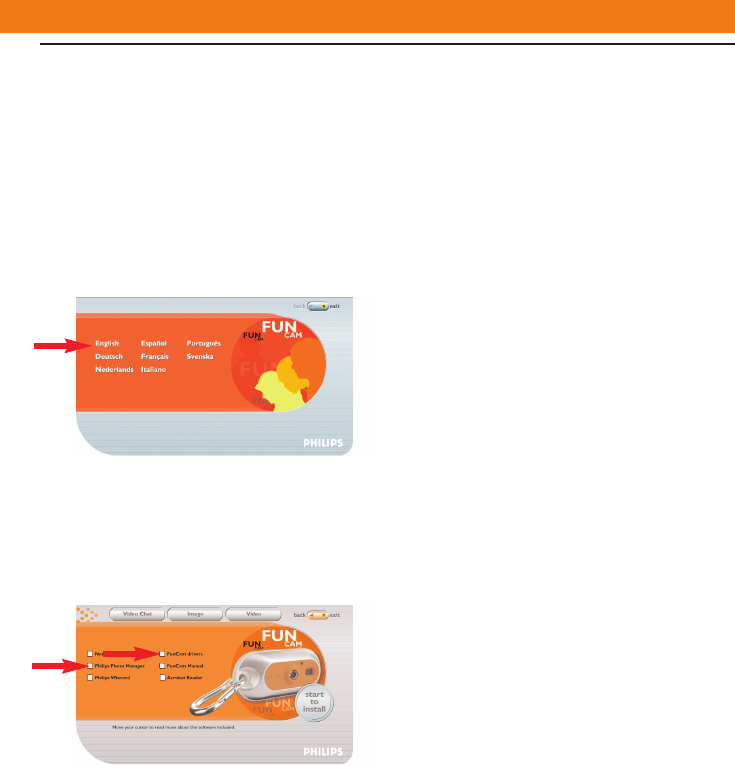
1 Insert the installation CD-ROM supplied into the PC’s CD-ROM-/DVD drive.
> The ‘Language Selection’ screen will appear automatically.
2 Select your language.
Note! If the the ‘Language Selection’ screen does not appear automatically, open Windows Explorer
and double-click the ‘Autorun.exe’ icon in the CD-ROM directory.
> The software installation screen will now appear.
3 Select at least ‘FunCam drivers’ and ‘Philips Photo Manager’.
There are three clusters of application software to install:
- software for video chat (Video Conference):
- software for image applications (Image);
- software for video applications (Video).
> If you move your cursor onto a button or application name, you will see a brief
introduction at the bottom of the menu.
• You can add the additional software by selecting the box in front of the software name:
Windows
®
NetMeeting, Philips Photo Manager,Philips VRecord,Acrobat Reader.
ENGLISH 13
DMVC300K_Fun_01 Eng.1.qxd 25-03-2004 12:44 Pagina 13


