


ENGLISH ESPAÑOL
29
Basic Recording Filmación básica
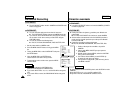
Adjusting the LCD
✤ Your camcorder is equipped with a 2.5 inch color Liquid Crystal
Display(LCD) screen, which enables you to view
what you are recording or playing back directly.
✤ Depending on the conditions in which you are using the camcorder
(indoors or outdoors for example), you can adjust ;
■
Brightness
■
Color
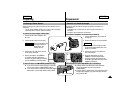
1. Set the POWER switch to CAMERA or PLAYER position.
2. Open the LCD screen, the LCD switches on.
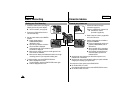
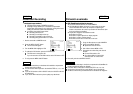
3. Press the MENU ON/OFF button.
4. Turn the MENU DIAL so that LCD ADJUST is highlighted.
5. Press ENTER to enter the sub-menu.
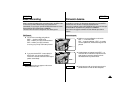
6. Turn the MENU DIAL so that it highlights
the menu item you want to adjust
(BRIGHT, COLOR).
7. Press ENTER again.
■
You can adjust the LCD using the
MENU DIAL.
8. Press ENTER.
■
For further adjustment, repeat steps 6, 7, 8.
9. Press the MENU ON/OFF button to finish the setting.
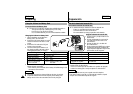
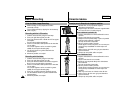
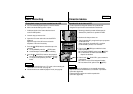
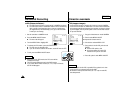
Adjusting the Focus
Use the focus adjustment knob of the VIEWFINDER to focus
the picture. (refer to figure )
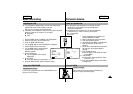
Using the VIEWFINDER
ON/OFF
ENTER
DISPLAY
MENU
(MENU) SP STBY
LCD ADJUST
CUSTOM SET
DIS............................OFF
PIP............................OFF
D.ZOOM...................OFF
PROGRAM AE.........AUTO
: MENU
●
LCD ADJUST
●
SP STBY
BRIGHT I–00 18 36–I
COLOR
RETURN
: MENU
Ajuste de la pantalla LCD
✤ La videocámara está equipada con una Pantalla de cristal
líquido (LCD), que le permite ver lo que está filmando o
reproducirlo directamente.
✤ Dependiendo de las condiciones en las que esté utilizando
la videocámara (ej., interior o exterior), puede ajustar:
■
La luminosidad
■
El color
1. Ponga el interruptor de encendido en la
posición CAMERA o PLAYER.
2. Abra la pantalla LCD, ésta se encenderá.
3. Pulse la tecla MENU ON/OFF.
4. Gire el disco selector MENU a LCD ADJUST.
5. Pulse ENTER para que aparezca el
submenú.
6. Gire el disco selector MENU hasta la opción
del menú que desea ajustar (BRIGHT,
COLOR).
7. Pulse ENTER de nuevo.
■
Puede ajustar la LCD utilizando el disco
selector MENU.
8. Pulse ENTER.
■
Para realizar ajustes posteriores, repita
los pasos 6, 7 y 8.
9. Pulse la tecla MENU ON/OFF para finalizar
la configuración.
Utilice la tecla de ajuste del enfoque del VISOR para
enfocar la imagen. (Consulte la figura)
Uso del VISOR
Ajustar el enfoque