2-8
E
2-7
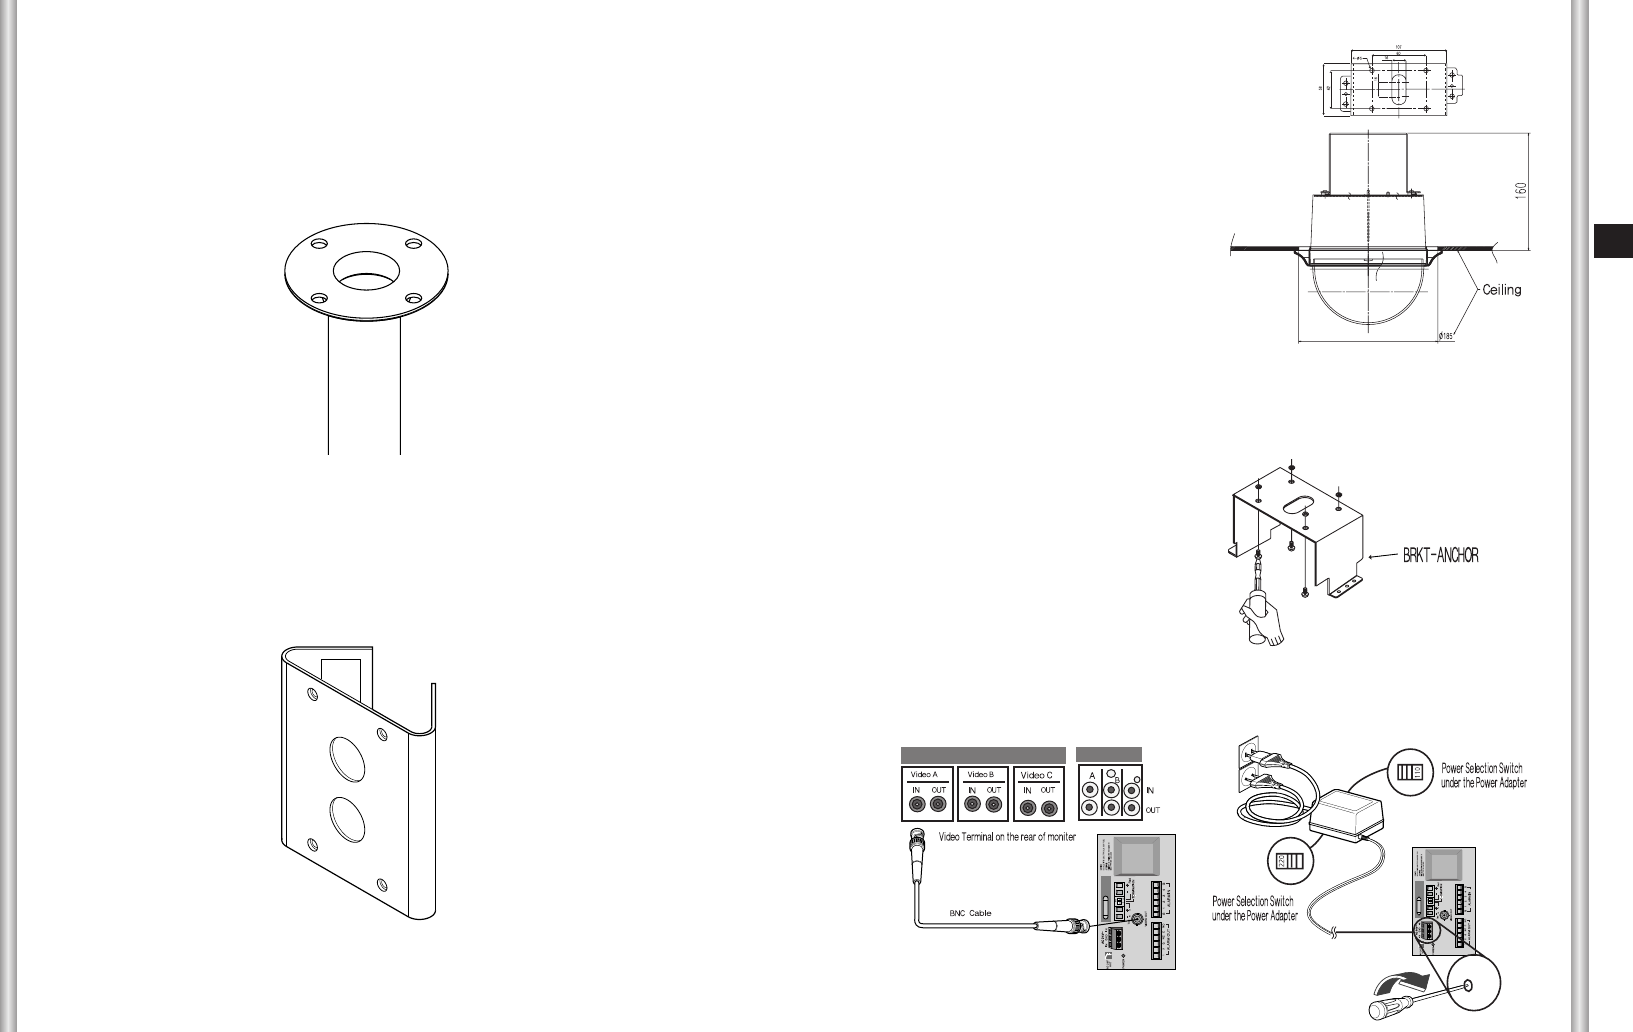
1. [Figure 1] Install the structure on the
ceiling.
(Refer to Installation reference
for the Length of the structure)
* Built in by the builder of the structure
3. [Figure 2] Assemble the
BRKT-ANCHOR on the ceiling
and screw the 4 bolts in.
[Figure 2]
2. Make a hole in the ceiling where the camera will be installed.
(The hole should be about
ø
185)
4. [Figure 3,4] Connect the various cables to the CAMERA ADAPTER.
(See page 2-4)
[Figure 4]
[Figure 3]
Installing the Camera
[Figure 1]
5) CEILING MOUNT ADAPTOR (SADT-100CM)
This adaptor is used for installing the indoor housing or the outdoor
housing for the SmartDome Camera to a concrete ceiling.
6) POLE MOUNT ADAPTOR (SADT-100PM)
This adaptor is used for installing the WALL MOUNT ADAPTOR
(SADT-100WM) to a pole that is over 8 cm (2.76 in.) in diameter.
00570A-SCC-C6403-ENG 8/17/06 1:51 PM Page 2-7


