


7
Connections
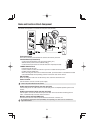
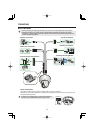
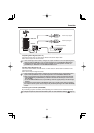
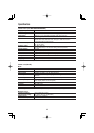
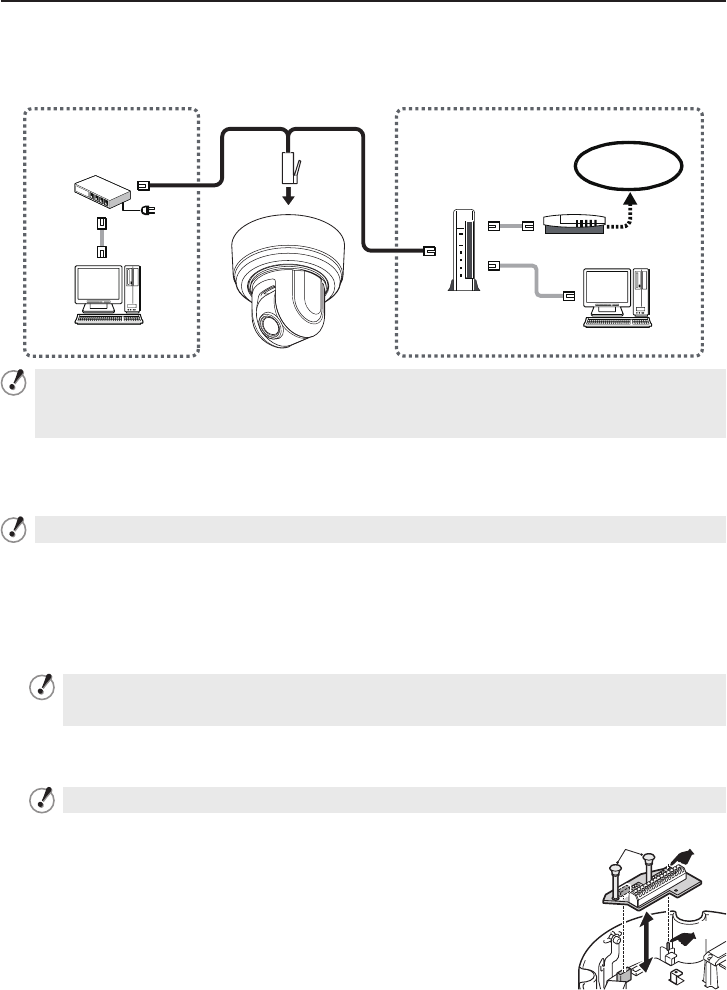
Network Connection
This camera is designed so that you can use all of its functions via network operation.
By connecting the network (LAN) socket of the camera to your PC using a LAN cable, you can
configure and operate it from the Web browser installed on your PC.
Switching hub
Internet connection
LAN connection
PC
PC
Internet
Modem
Router
or
Use a LAN cable no longer than 100 m (109.4 yards) with the shield type CAT5 or higher.
Use a straight-type cable if connecting to LAN, and use a cross-type cable if directly connecting the
camera to a PC.
The supported Web browser is Internet Explorer Ver.6.0 SP2 or higher, or Internet Explorer Ver.7.0.
•
•
•
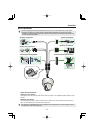
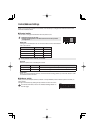
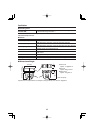
Installing Recording Media
When recording live video on the camera, install an SD memory card or external hard disk on the
camera.
Always turn the power off when installing a recording medium.
Connecting an External Hard Disk
Put the hard disk in a dedicated hard disk case (VA-HDC4000; sold separately) and then
connect the case to the camera.
Inserting an SD Memory Card
Insert the SD card into the slot until it is locked with a clicking sound.
Push the SD card a bit further into the slot to eject it.
When you insert a new recording medium, format it on the SD/HDD screen.
When you remove the recording medium, first set [SD MEMORY CARD]/[HDD] on the SD/HDD
screen to “NO USE”.
•
•
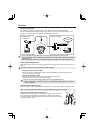
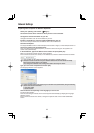
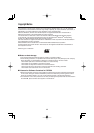
Control Terminal Connections
Connect the alarm input/output cable and controller to the control terminal of the interface board.
Use a thicker cable than 24AWG for connection. (Maximum length 600 m/656 yards)
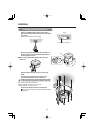
Installing and removing the interface board
To place the board back, align the hole (A) at the right corner of the board
to the protruding portion (B) and securely fix the board by depressing it.
To connect alarm or other cables to the interface board, take out the board
by pulling the portion (C).
(C)
(A)
(B)