


Advanced Features
49
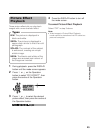
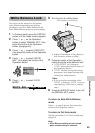
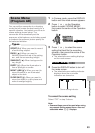
White paper or white cloth
White Balance Lock
The colour of the subject on the screen
looks different depending on lighting
conditions. Lock the White Balance if the
Auto White Balance does not work properly.
1 In Camera mode, press the DISPLAY
button until the mode screen appears.
2 Press l or m on the Operation
button to select “MANUAL SET”, then
press the centre of the Operation
button (see page 48).
3 Press l or m to select “EXECUTE”,
then press the centre of the Operation
button.
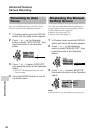
4 Press l or m to select “WHITE
BAL.”, then press the centre of the
Operation button.
5 Press l or m to select “LOCK
MODE”.
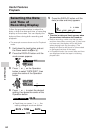
6 Aim the lens at a white object.
• Adjust the distance of the object so
that the entire screen is white.
7 Press the centre of the Operation
button to set the white balance lock.
• “LOCK MODE” will change to
“LOCK” after pressing the centre of
the Operation button.
• “LOCK” flashes during the locking
procedure, and stops flashing after
locking the white balance.
Note:
• If you move the camcorder while
“LOCK” is flashing, “LOCK” may not
stop flashing. If this occurs, repeat
step 7.
8 Press the DISPLAY button to turn off
the MANUAL SET screen.
To return to Auto White Balance
mode
Press k in step 5 above, then press the
centre of the Operation button.
To return to Full Auto mode
Set the camcorder to Full Auto mode (see
page 52).
Note:
• White Balance setting cannot be used
when a scene setting is selected.
W
HITE BAL.
IRIS
AUTO
GAIN
FULL AUTO
RETURN
LOCK MODE
W
HITE BAL.