


98
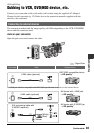
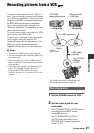
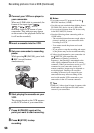
3 Connect your VCR as a player to
your camcorder.
When an i.LINK cable is connected, the
format of the input signal (
or ) will be
indicated on the LCD screen of your
camcorder (This indicator may appear
on the screen of the playback device but
it will not be recorded).
4 Insert a cassette into the VCR.
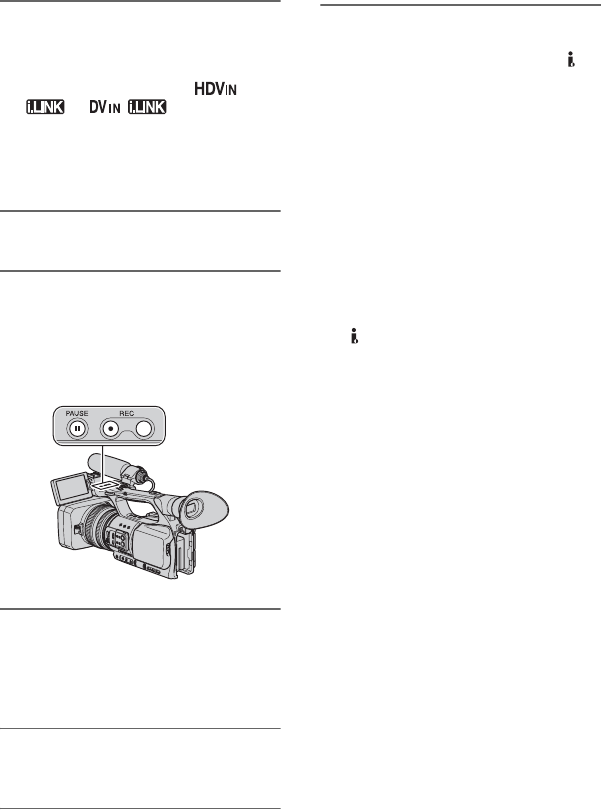
5 Set your camcorder to recording
pause.
While pressing X (PAUSE), press both
z REC (record) buttons
simultaneously.
6 Start playing the cassette on your
VCR.
The picture played on the VCR appears
on the LCD screen of your camcorder.
7 Press X (PAUSE) again at the
point you want to start recording.
8 Press x (STOP) to stop
recording.
b Notes
• You cannot record TV programs from the
HDV/DV interface (i.LINK).
• User bits are not recorded when dubbing from a
DVCAM (DV) device via an i.LINK cable.
• You can record pictures from DV devices only
in the DVCAM (DV) format.
• Note the following when connecting with an
i.LINK cable:
– The recorded picture becomes rough when a
picture is paused on your camcorder while
recording to a VCR.
– You cannot record the picture and sound
separately.
– If you pause or stop the recording and restart
it, the picture may not be recorded smoothly.
• If video signals inputted to your camcorder via
the HDV/DV jack experience the
phenomenon of jittering (variation in
frequency), that jittering is transmitted to the
video signals outputted from the A/V remote
connector. When you monitor a movie on a TV
connected to your camcorder via the A/V
remote connector, images may be distorted or
not be displayed. Jittering will not affect
recording of the movie on a tape with your
camcorder but may affect recording of the
movie with another VCR connected to your
camcorder via the A/V remote connector.
z Tips
• When a 4:3 video signal is input, it appears with
black bands on the right and left sides on the
screen of your camcorder.
Recording pictures from a VCR (Continued)