


19
Switch 6: Remote/local
When switch 1 (CCU command mode) is set to on
(TX7 mode), selects whether to control the camera/
camcorder from a device connected to the REMOTE
connector on the rear panel of this unit or from the
front panel.
OFF: Operations on the device connected to the
REMOTE connector receive priority.
ON: Operations on the front panel of this unit receive
priority.
Note
This switch is disabled when an RM-M7G is
connected.
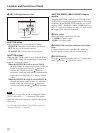
qj Intercom setting switches
Set the intercom mode using switches 1 to 3. Switch 4
is not used.
Power this unit off before setting switches.
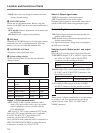
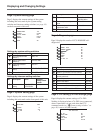
Setting to 4W mode
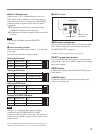
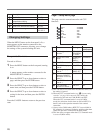
Setting to 2W mode
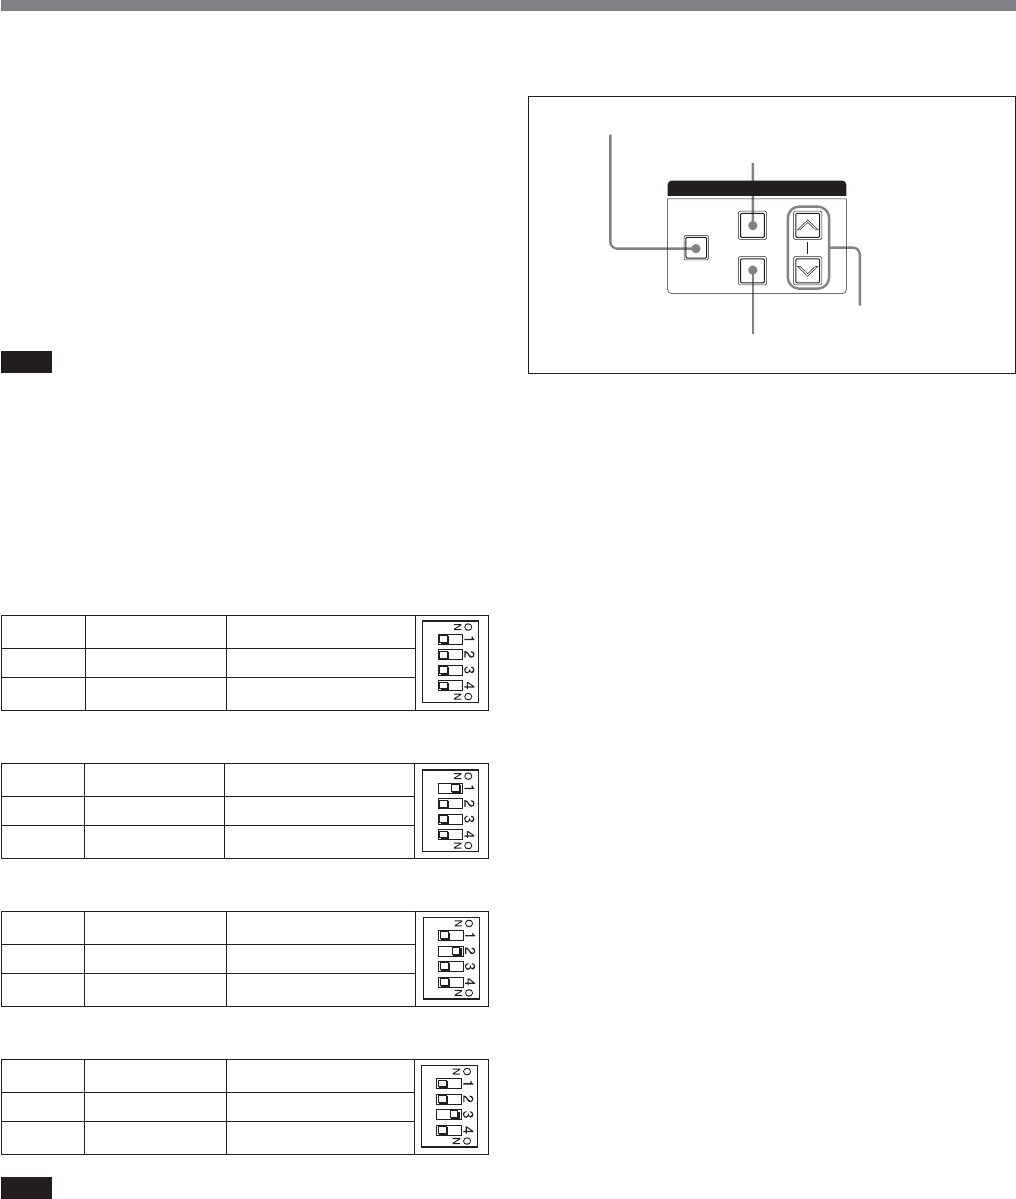
Setting to RTS mode
Setting to CLEARCOM mode
Note
Always set to 4W mode when there is nothing
connected to the INTERCOM/TALLY/AUX
connector on the rear panel of this unit. The intercom
system may not operate correctly if this switch is set to
another mode.
For more information about intercom system connections,
contact your Sony dealer or a Sony service representative.
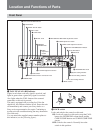
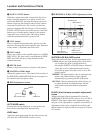
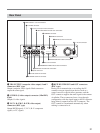
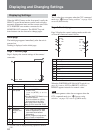
qk MENU section
MENU button and indicator
When you press the MENU button, the indicator lights
and a menu is displayed on the monitor connected to
the MONITOR OUT connector.
On how to change system settings, see page 26.
SELECT up and down buttons
Use to switch between menu pages or settings display
pages, to move the arrow within a menu, and to change
menu item settings.
ENTER button
Confirms the settings made with the SELECT up and
down buttons.
CANCEL button
Cancels the currently selected state and returns the
item to its original state.
Switch 1 INCOM mode 1 OFF
Switch 2 INCOM mode 2 OFF
Switch 3 INCOM mode 3 OFF
Switch 1 INCOM mode 1 ON
Switch 2 INCOM mode 2 – (ON/OFF both OK)
Switch 3 INCOM mode 3 – (ON/OFF both OK)
Switch 1 INCOM mode 1 OFF
Switch 2 INCOM mode 2 ON
Switch 3 INCOM mode 3 – (ON/OFF both OK)
Switch 1 INCOM mode 1 OFF
Switch 2 INCOM mode 2 OFF
Switch 3 INCOM mode 3 ON
MENU
MENU
ENTER
CANCEL
SELECT
MENU button
ENTER button
CANCEL button
SELECT up and
down buttons