


Other functions
G:\BackUP(E)\PC(3084946111)\0729PC_GB\3084946111\3084946111_PC\01US05ADV.fm
master:Right
Other functions
35
DCR-PC330/IP1
3-084-946-11(1)
Camera Operations Guide supplied with
your camcorder.
3 Insert a recorded cassette into your
camcorder.
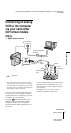
4 Connect your camcorder to a
computer via an i.LINK cable
(optional).
b Note
• When you connect your camcorder to a
computer, make sure you insert the connector in
the correct direction. If you insert the connector
forcibly, it may be damaged, and causes a
malfunction of your camcorder.
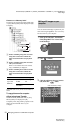
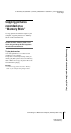
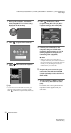
5 Touch [P-MENU] and [MENU], then
touch to select [BURN DVD].
“Click to DVD” starts up and the on-screen
instructions appear on your computer.
For details, refer to the separate Camera
Operations Guide supplied with your
camcorder.
6 Place a writable DVD in the disc drive
of the computer.
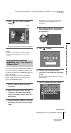
7 Touch [EXEC] on the LCD screen of
your camcorder.
The status of the operation on your
computer is displayed on the LCD screen of
your camcorder.
CAPTURING: The picture recorded on
the tape is being copied to the computer.
CONVERTING: The picture is being
converted to the digital format.
WRITING: The picture is being written
onto the DVD.
z Tip
• If you use a DVD-RW/+RW which has other
data stored on it, the message [This is a
recorded disc. Delete and overwrite?] appears
on the LCD screen of your camcorder. When
you touch [EXEC], the existing data is erased
and new data will be written.
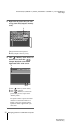
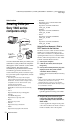
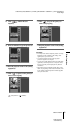
8 Touch [NO] after creating a DVD.
The disc tray comes out automatically.
To create another DVD with the same
content, touch [YES]. The disc tray comes
out and place a new writable DVD in the
disc drive.
To cancel the operation
On your camcorder, touch [CANCEL] after step
5, or select [CANCEL], then touch [YES] in
step 7.
Note that you cannot cancel the operation after
[Finalizing DVD] is displayed on the LCD
screen.
b Notes
• Do not disconnect the i.LINK cable or set the
POWER switch to another mode on your camcorder
until the picture is completely copied to the
computer.
• The DVD will be created even if you disconnect the
i.LINK cable (optional) or turn off the power of your
camcorder while [WRITING] or [CONVERTING]
is displayed.
• When any of the following occurs, copying of the
picture is canceled. A DVD containing the data up to
the point the operation was canceled will be created.
Refer to the help files of “Click to DVD Automatic
Mode” for details.
– When there is a blank portion of 10 seconds or
longer on the tape.
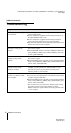
0:00:00:00
CREATE DVD
?
BURN DVD
START
EXEC CANCEL
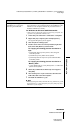
0:00:00:00
Create another
copy?
Disctray opens.
BURN DVD
COMPLETED
YES NO
,continued