


60
Recording
Chapter 4 Recording and Playback
• When the internal time code generator is set to F-RUN
mode, the precision of the synchronization may be
reduced if you turn the POWER switch off and on or
keep the camcorder turned off for a long time.
• When the GENLOCK item is set to OFF on the
GENLOCK page of the MAINTENANCE menu, the
time code cannot be synchronized with the reference
video signal. In this case, set the GENLOCK item to ON.
About user bit settings during time code
synchronization
When the time code is synchronized, only the time data is
synchronized with the external time code value. Therefore,
the user bits can have their own settings for each
camcorder.
To release the time code synchronization
First disconnect the external time code, then set the F-
RUN/SET/R-RUN switch to R-RUN.
To change the power supply from the battery
pack to an external power supply during time
code synchronization
To maintain a continuous power supply, connect the
external power supply to the DC IN connector before
removing the battery pack. You may lose time code
synchronization if you remove the battery pack first.
Camera synchronization during time code
synchronization
During time code synchronization, the camera is
genlocked to the reference video signal input from the
GENLOCK IN connector.
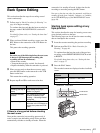
Setting for special shooting cases
Depending on the shooting conditions, set the camcorder
appropriately referring below.
To correct skin detail
You can specify a color other than a skin tone to adjust the
color.
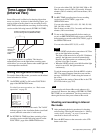
1
Set SKIN AREA IND to ON on the SKIN DETAIL
page of the PAINT menu.
For details on menu operations, see “Basic menu
operations” on page 93.
2
Set SKIN DETECT on the SKIN DETAIL page of the
PAINT menu.
This causes the area detect cursor to be shown in the
viewfinder.
3
Place the area detect cursor on the target, then execute
SKIN DETECT.
This designates the correction area, which is indicated
by a zebra pattern.
4
Change the value of SKIN DTL WIDTH (0 to 359) on
the SKIN DETAIL page so that the zebra pattern may
be displayed in the target area.
Set the correction level beforehand on the SKIN
DETAIL LVL item on the SKIN DETAIL page.
5
When the setting is finished, set SKIN AREA IND to
OFF on the SKIN DETAIL page.
Shooting
conditions
Setting and effect
The subject is
completely still
(Example: When
shooting
documents,
drawings, etc.).
Setting: Set the EVS (Enhanced Vertical
definition System) function to ON on the
SW STATUS page of the PAINT menu.
Enabling the EVS function tends to
increase the occurrence of aliasing
problems (moiré patterns). Therefore,
normally leave the function disabled.
Effect: This enhances the vertical
resolution.
When adjusting
for skin detail or
tone (Example:
When shooting
to hide skin
details)
Setting: See “To correct skin detail” on
page 60.
Effect: This adjusts the skin detail or
tone to a designated active area.
The 3200K
preset white
balance makes
the picture
reddish.
Setting: Change the setting of the preset
white balance on the PRESET WHT
page of the MAINTENANCE menu.
Effect: This prevents the picture from
reddening.
Shooting
conditions
Setting and effect