


64
Adjusting the Audio Level
Chapter 4 Adjustments and Settings for Recording
4
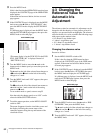
Turn the MENU knob to move the b mark to “IRIS
WINDOW,” then press the MENU knob.
The
b mark changes to a z mark, and the z mark
changes to a ? mark.
5
Turn the MENU knob until the desired auto iris
window appears, then press the MENU knob.
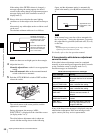
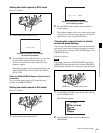
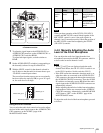
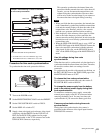
Auto iris window
The z mark on returns to a b mark and the ? mark
returns to a z mark.
If you select “VARIABLE,” the following items
become effective and you can set the window of the
desired size. Set each item to the desired size.
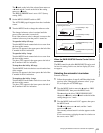
6
Set the MENU ON/OFF switch to OFF or close the
cover of the menu operating section.
The menu disappears from the viewfinder screen and
the display indicating the current status of the
camcorder appears along the top and bottom of the
screen.
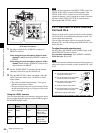
To counter problems with very bright
highlights
If the subject is too bright, the iris may close too much,
leaving the overall image dark, or the highlights may be
blown out. In such cases, setting the highlight clip function
on reduces the luminance range, avoiding problems from
the automatic iris correction.
In the AUTO IRIS page of the USER menu, set the CLIP
HIGH LIGHT item to “ON.”
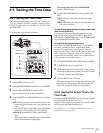
4-4 Adjusting the Audio
Level
Setting the AUDIO SELECT CH-1/CH-2 switches to
AUTO automatically adjusts the input levels of the audio
signal to be recorded in audio channels 1 and 2. You can
also adjust the audio level manually.
For the audio level of the signal to be recorded in
audio channels 3 and 4
The input levels of audio channels CH-3 and CH-4 are
automatically adjusted or fixed.
When the CH-1/2 / CH-3/4 switch is set to CH-3/4, the
audio channel level meters display the level of the audio
signals recorded in audio channels CH-3 and CH-4. You
can select the audio input signals to be recorded for audio
channel CH-3 and 4 by using the AUDIO IN CH-3/CH-4
switches.
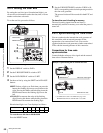
4-4-1 Manually Adjusting the Audio
Input Level of the AUDIO IN CH1/CH2
Connectors
Follow the procedure described below to adjust the audio
levels of the audio input from the AUDIO IN CH1/CH2
connectors, which are to be recorded in audio channels
CH-1 and CH-2.
When
1 and 2 are not displayed under the audio channel
level meters, the CH-1/2/ CH-3/4 switch is set to the CH-
3/4 position. Set this switch to CH-1/2.
At the factory setting, the XLR connection automatic
detection mode of the AUDIO IN CH1/CH2 connectors is
set to OFF. If the setting has been changed to ON, start the
operation from step 2.
Start the operation from step 1 with the XLR connection
automatic detection mode set to OFF.
You can set the XLR connection automatic detection mode
on the AUDIO-1 page of the MAINTENANCE menu.
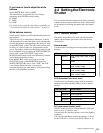
Item Setting
IRIS VAR WIDTH The width of the window
IRIS VAR HEIGHT The height of the window
IRIS VAR H POS. The position of the window in the
horizontal direction
IRIS VAR V POS. The position of the window in the
vertical direction.
The shaded parts indicate the area
where light detection occurs.
Note