


86
Status Display on the Viewfinder Screen
Chapter 5 Menu Displays and Detailed Settings
3
Turn the MENU knob to move the b mark to the item
you want to set, and press MENU knob.
The
b mark on the left of the selected item changes to
a z mark, and the z mark on the left of the setting
changes to a ? mark.
4
Turn the MENU knob to select whether or not to
display the selected window, then press the MENU
knob.
The z mark returns to a
b mark, and the ? mark
returns to a z mark.
5
To continue setting other windows, repeat steps 3 and
4.
6
To end the menu operation, set the MENU ON/OFF
switch to OFF or close the cover of the menu operating
section.
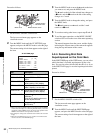
5-2-9 Confirming the Image of the
Return Video Signal in the
Viewfinder
You can set whether or not to see the image of the return
video signal in the viewfinder, using the GENLOCK page
of the MAINTENANCE menu.
Proceed as follows:
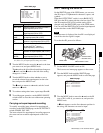
1
Set the MENU ON/OFF switch to ON while holding
down the MENU knob.
The TOP menu appears.
2
Turn the MENU knob to move the b mark to
“MAINTENANCE,” then press the MENU knob.
If this is the first time the MAINTENANCE menu has
been displayed, the CONTENTS page of the
MAINTENANCE menu appears.
If the menu has been used before, the last accessed
page appears.
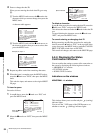
3
If the CONTENTS page is displayed, turn the MENU
knob to move the
b mark to “GENLOCK,” then press
the MENU knob to display the GENLOCK page.
If a different page is displayed, turn the MENU knob
until the GENLOCK page appears, then press the
MENU knob to select the page.
The current setting of each item appears on the right of
the item.
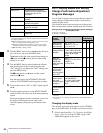
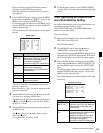
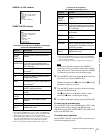
GENLOCK page
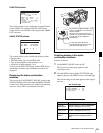
4
Carry out setting operations as follows:
1 Turn the MENU knob to move the
b mark to
“GENLOCK,” and press the MENU knob.
The
b mark on the left of “GENLOCK” changes to
a z mark, and the z mark on the left of the
GENLOCK setting changes to a ? mark.
2 Turn the MENU knob until “OFF” appears, then
press the MENU knob.
The z mark returns to a
b mark, and the ? mark
returns to a z mark, and the setting is executed.
3 Turn the MENU knob to move the
b mark to
“RETURN VIDEO,” and press the MENU knob.
The
b mark changes to a z mark, and the z mark
changes to a ? mark.
4 Turn the MENU knob until “ON” appears, then
press the MENU knob.
The z mark returns to a
b mark, and the ? mark
returns to a z mark, and the setting is executed.
5
To end the menu operation, set the MENU ON/OFF
switch to OFF or close the cover of the menu operating
section.
To see the image of the return video signal on the
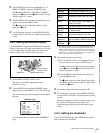
viewfinder screen
Hold down the RET switch on the lens. The image of the
return video signal input to the GENLOCK IN connector
is displayed on the viewfinder screen while you are
holding down the RET switch.
When the return video function is assigned to the ASSIGN
1 switch, you can see the image of the return video signal
on the viewfinder screen while you are holding down the
ASSIGN 1 switch even if the RETURN VIDEO item is set
to “OFF” on the GENLOCK page of the
MAINTENANCE menu.
When no signal is input to the GENLOCK IN connector,
the image is not changed even if you hold down the RET
switch on the lens.
Note
M16 GENLOCK
GENLOCK : ON
RETURN VIDEO : OFF
GL H PHASE : 0
GL SC PHASE : 0
GL SC 0/180 SEL : 180