


D:\Nouhin\DXC990UC\320554311DXC990UC\02GB-
DXC990UC\05OPE.fm
masterpage:Left
GB
24
Shooting
DXC-990/990P
3-205-543-11 (1)
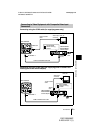
Each time the lighting condition changes, be
sure to adjust the white balance so that
optimum color reproduction is obtained.
1
Press the MENU button to display the
MAIN menu.
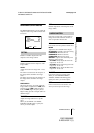
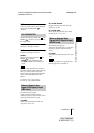
2
Select the WHITE BALANCE menu,
and set MODE to AWB.
For menu operation, see “Operation
through Menus” on page 10.
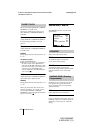
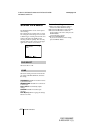
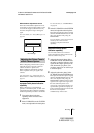
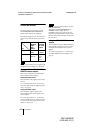
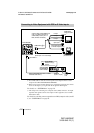
3
Select AREA with the V or v button
and then set it to NORMAL with the B
or b button.
A detecting window appears.
For more details, refer to “WHITE
BALANCE Menu” on page 16.
4
Display the camera image on the
monitor screen.
If a color bar signal is displayed on the
screen, press the BARS button to turn it off.
5
Set the lens iris control as follows:
When using an auto-iris lens: Set to
auto-iris control.
When using a manual-iris lens: Set to
an appropriate iris opening value.
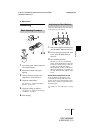
6
Place a white object (white pattern,
white cloth, etc.) under the same light
condition as that falling on the object
to be shot, then zoom in on the white
object to fill the detecting window on
the screen.
• Do not include highly reflective objects in
the picture.
• Always shoot the image under suitable
lighting conditions.
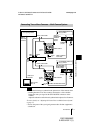
7
Press the MENU button twice to
remove the menu.
8
Press the WHITE button.
During adjustment the bars appear. The
message “WHITE: OK” appears on the
screen when the adjustment is done.
The adjusted white level is
automatically stored in memory and
remains even if the power of the camera
is turned off.
To shoot under the same conditions, the
stored white balance is recalled by
setting MODE to AWB in the WHITE
BALANCE menu.
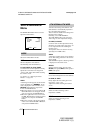
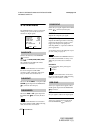
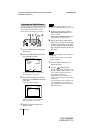
Adjusting the White Balance
TRIG IN
MENU
BLACK
FILE
SELECT WHITE
BARS
ENTER
RGB/SYNC
1,3 2 7 2
BARS
button
<WHITE BALANCE>
>MODE
R. PAINT
B. PAINT
AREA
[A]
AWB
0
0
NORMAL
+_
+_
Select Back
MENU
<WHITE BALANCE>
MODE
R. PAINT
B. PAINT
>AREA
[A]
AWB
0
0
NORMAL
+_
+_
Select Back
MENU
Note
Notes